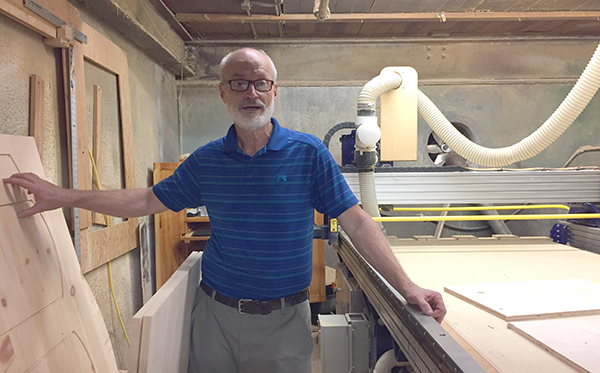
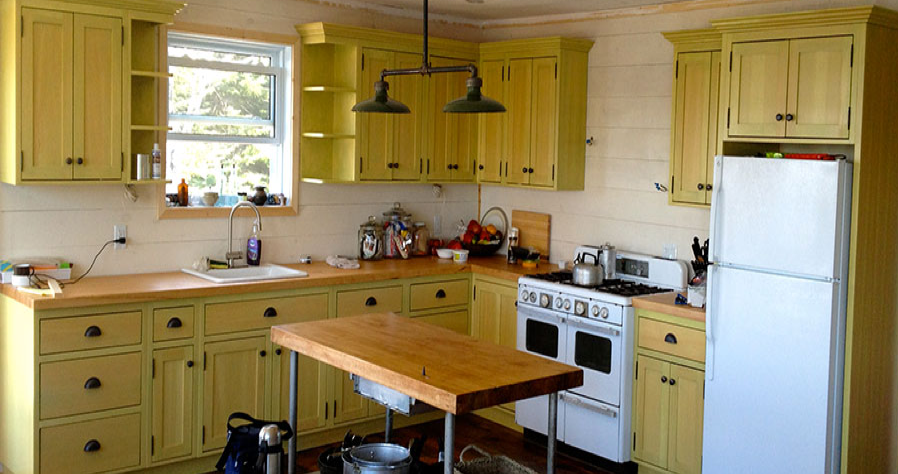
We recently popped in for a quick visit with Phillip Fletcher to see how his business, Durham Bookcases & More, is doing and to take a peek at his 17-year-old ShopBot. Rest assured, his business and his ShopBot are looking good and continue to be ready to take on customer needs today and into tomorrow.
Fletcher’s shop sits just beside the railroad tracks in Downtown Durham. He’s been working in this space since the early 70’s when Durham was a tobacco town and Main Street was still a gravel road. The area has changed a lot since then. He now finds himself surrounded by pricey new condos and busy boutique restaurants – brimming with college students and professionals alike.
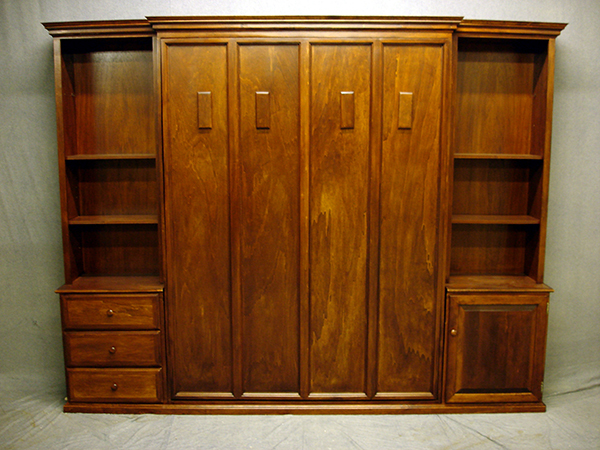
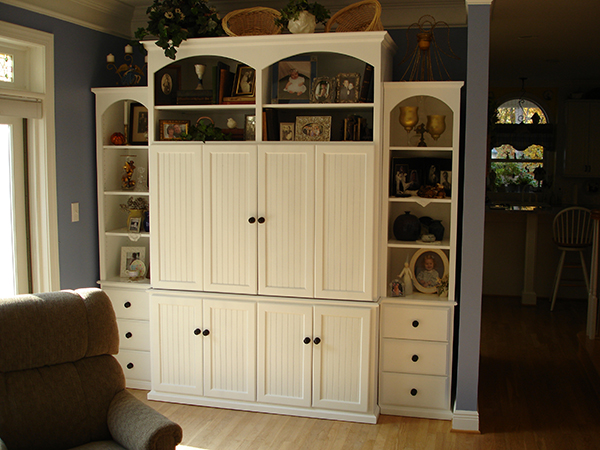
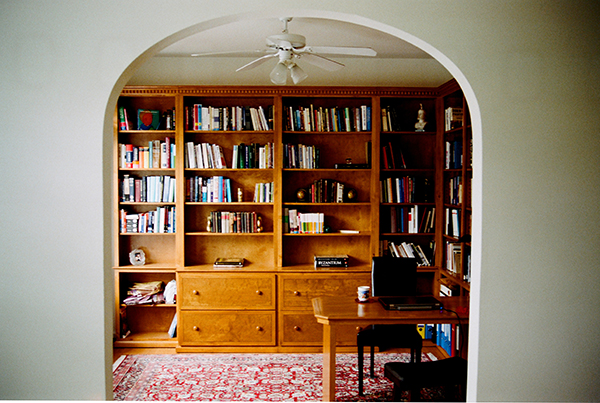
For more than 30 years, Phillip and the crew at Durham Bookcases & More have continued to produce and sell quality bookcases, as well as other real wood furniture items, that fit in both contemporary and traditional homes. Foot traffic is still an important part of the business and allows the Durham Bookcases staff to really connect with customers. However, internet presence via their website and through online retailer, Etsy, have enabled them to expand their sales footprint – selling all over the world. As many businesses and manufacturers have similarly been affected – especially since 2008 – Durham Bookcases has navigated shifts in material pricing and availability due to economic conditions that are still present today. However, they remain committed to reasonably priced furniture that customers can feel good about investing in, furniture that stands the test of time.
The ShopBot that Phillip purchased in 2001 continues to be an integral part of his manufacturing process. Over the years, he has amassed thousands of files – standard and custom jobs – that he runs on a ticketing system. Staff are able to systematically move projects through the shop using a combination of traditional shop tools and the ShopBot; and are able to scale up to accommodate demand.
Durham Bookcases believes in making quality products that last, just like ShopBot does.
Take a look back at the original story we ran on Phillip in 2011 below.
Written & Published by: Michael Berliner
Furniture maker Philip Fletcher founded Durham Bookcases back in 1995. “Our goal from the beginning was to build bookcases at competitive prices with high quality workmanship.” As time has passed, Durham Bookcases has grown their offerings to include custom-built entertainment centers, wall units, office furniture and bedroom furniture, and increased the variety of woods, sizes, & options to continue to please their customers.
Fletcher says his guiding philosophy has always remained the same. “I’m a custom maker. It always works best if my customers meet with me one on one, to discuss their needs fully. That way, the customer is pleased with the outcome. I know my furniture is going to last — so I want the customer to be happy with their purchase for a long, long time!”
It was about 10 years ago that Fletcher added digital fabrication technology to the core of his manufacturing process. He contacted Durham neighbor ShopBot Tools and has been pleased with the tool, and his relationship with ShopBot, ever since.
“My ShopBot is a workhorse,” says Fletcher. “Quite simply, it’s reliable.” Over the years Fletcher has found that the ShopBot’s easy interface is a boon because it’s easy to train employees how to use the software. Asked how long it takes to bring a new employee up to speed, Fletcher didn’t hesitate to answer: “Twenty-four hours.”
When it comes to technical problems, Fletcher smiles and says, “It usually turns out to be a user issue, not a problem with the tool. Customer service has always been friendly and available when we need it.”
Durham Bookcases has been in business long enough to have experienced busy times and quieter times, and has witnessed shifts in customer attitudes and interests. “There was a trend in recent years for customers to want only ‘green’ materials,” notes Fletcher. “I like to point out that by using quality woods is the best way to be green — because furniture that lasts for 25 years and more doesn’t ever need to be recycled!”
______
From the Archive…
See Phillip Fletcher’s posts on the ShopBot Blog (2010) about making raised panel doors with the ShopBot:
You may also be interested in…
Durham Bookcases and More and ShopBot Tools, Inc. are both headquartered in Durham, NC. Here’s a post about projects around town that have been “touched by a ShopBot”. Signs of ShopBot Around Our Hometown – Durham, North Carolina
You may know that ShopBot Tools sells CNC tools, serving small-to-medium sized manufacturing companies. What you may not know is that we build our digital fabrication tools ourselves – using digital fabrication. We design and build our own tools, the electronic controls for the tools, as well as the software that runs the tools, which differentiates ShopBot from most other companies selling affordable CNC equipment.
As a potential CNC owner, the fact that we design and build our own tools makes a meaningful difference to you. With a ShopBot, you get a tool from the people who designed and manufactured the tools and the software that runs it. You get your help and support from the people who know and understand the equipment and its control. The equipment, the design, the wide range of training and support resources that we make available to you – all are based on our own continual involvement in small manufacturing using the digital technologies of the equipment itself.
We use the tools ourselves all day, every day. That’s why we understand how CNC, digital fabrication, and robotics are used in production. We make use of that knowledge in the development of our products and in the technical support we provide to you for your production success.
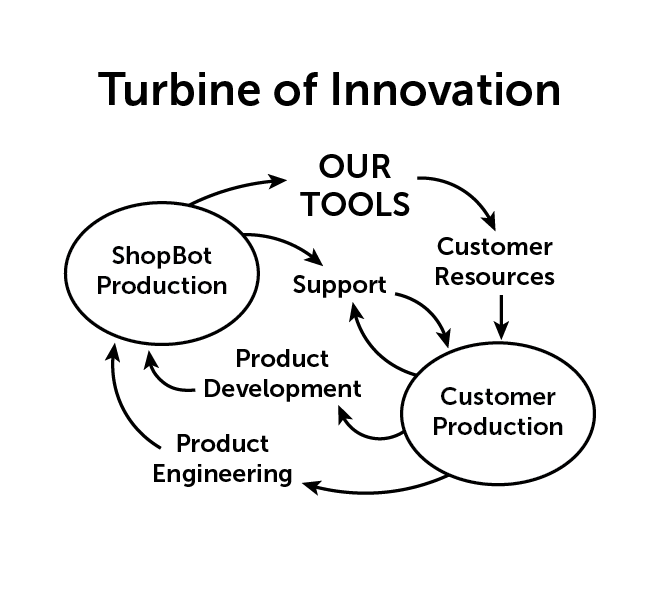
Our involvement in design and manufacture, combined with our full engagement in customer support, creates a cycle of product enhancement that we think of as our “Turbine of Innovation.” Here’s how it works:
There is a continuous loop of integrated feedback between our manufacturing and our customers’ manufacturing. We learn from our production. We learn from your production, and we learn from you. We integrate this learning and discovery into our design, development, and improvement process. This process efficiently drives the innovation that provides you with greater productivity, product reliability, and ease of use.
An advantage of building our own tools rather than importing and reselling others’ equipment is that we’re able to rapidly make iterative improvements and enhancements to tools and software. We continuously integrate these improvements into our products and keep ShopBot owners in an upgrade loop. When we develop something new, it does not obsolete your previous investment; instead we focus on upgrade paths to keep your tool in that Turbine of Innovation loop. Even 18-year-old ShopBots have been updated to have many of the capabilities of new tools – they keep working year-after-year. Because of this longevity, ShopBots keep their value and usefulness rather than becoming a financial and logistical burden to your shop.
We are currently in the process of rolling out our next generation controller for digital tools and equipment. Representing several years work, it’s both hardware and software that improves motion, making fabrication faster, smoother, and easier. It allows monitoring and tuning of tool performance and tracking usage and job flow. We call it FabMo (digital Fabrication and Motion platform). FabMo will first be available on our small tools this summer, then we will begin shipping on full size tools, and, shortly after, will be available as an enhanced, drop-in-controller for older ShopBots – giving them new features and capabilities.
And yes, we get a kick out of developing and building the tools ourselves. We like hands-on. We like production. We enjoy using technology to stay competitive – and we enjoy producing the kind of product that will empower your competitiveness and appreciate the opportunity to help you succeed.
Digital fabrication technology is the key to making small manufacturing competitive again
Over 20 years ago, we had an idea to bring digital control to production tools, but at a human scale —digital fab technology at the time was only available for large industrial applications. We wanted to make the technology accessible to entrepreneurial individuals, small shops, and small-run manufacturing.
History shows that our idea caught on. The press now calls this concept of digital technology being used competitively by small manufacturing: “The next industrial revolution.” Checkout how digital fab works for our own manufacturing: “Eating Our Own Dogfood … ”.
Returning small manufacturing to our communities can restore their vitality. Manufacturing is the single most effective economic activity for producing value. It preserves our quality of life; it keeps us creative; and it keeps us competitive. Small manufacturing is especially effective because of its close relationship to the local economy, its proven role in education and workforce training, and its integration within a community.
We believe in small manufacturing and we practice it.
We use digitally controlled equipment (often our own ShopBots) to produce ShopBot tools. We utilize the continuum of digital fabrication technologies – from the digital model of our tools, to digital prototyping, to full CNC production of almost everything we make. As well, we use digital technologies in our marketing, logistics, and other business activities. We believe that it is these technologies that will make small manufacturing realistically competitive again, right here in the US.
In short, we are small manufacturers of digital fabrication equipment and we use digital fabrication to produce that equipment. We live the idea. We help it work for you!
See Ted Hall’s full series of essays on using Digital Fabrication in Small Manufacturing: https://medium.com/@tedhall.shopbot
The 13th Annual Maker Faire Bay Area, which took place May 18th-20th, once again did not disappoint. The weather was beautiful and there was an estimated attendance of 90,000! Packed with hands-on and how-to sessions, makers young and old were inspired and excited. New programming was added this year: Thursday After Dark at the Exploratorium; Industry, Career, & College Day on Friday (See: The World Needs more Makers article on PCMag.com); and there was the addition of the Learning Lab in Fiesta Hall.
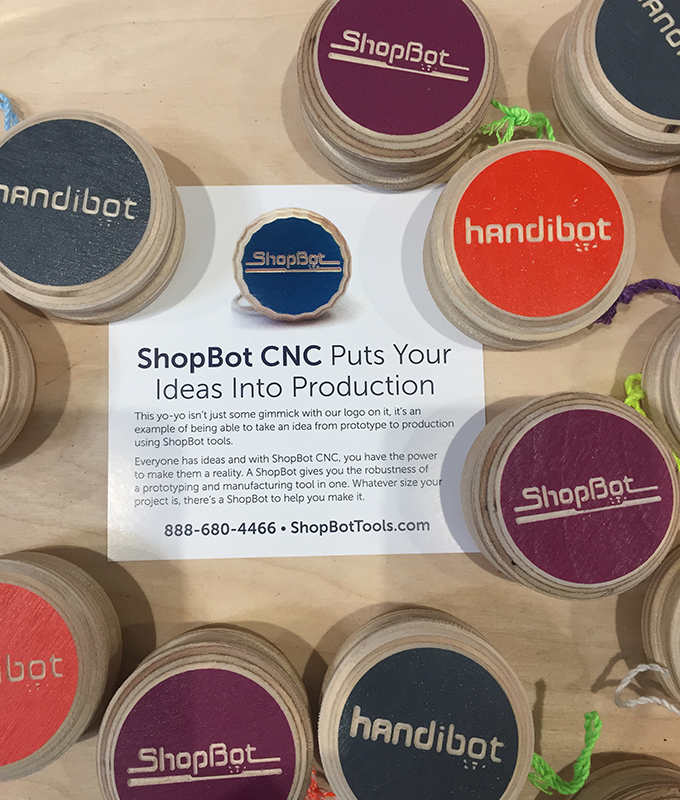
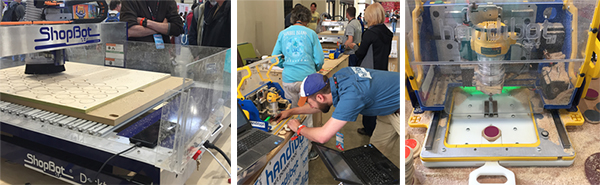
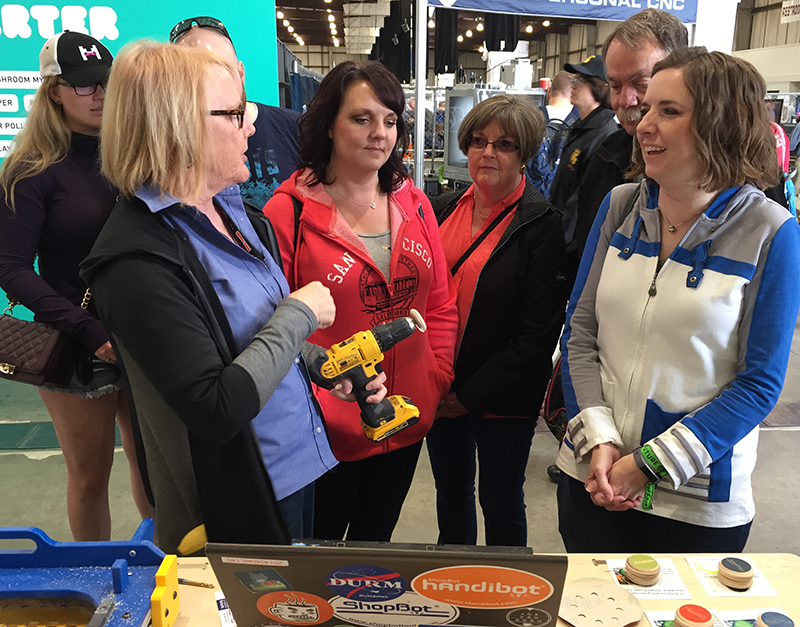
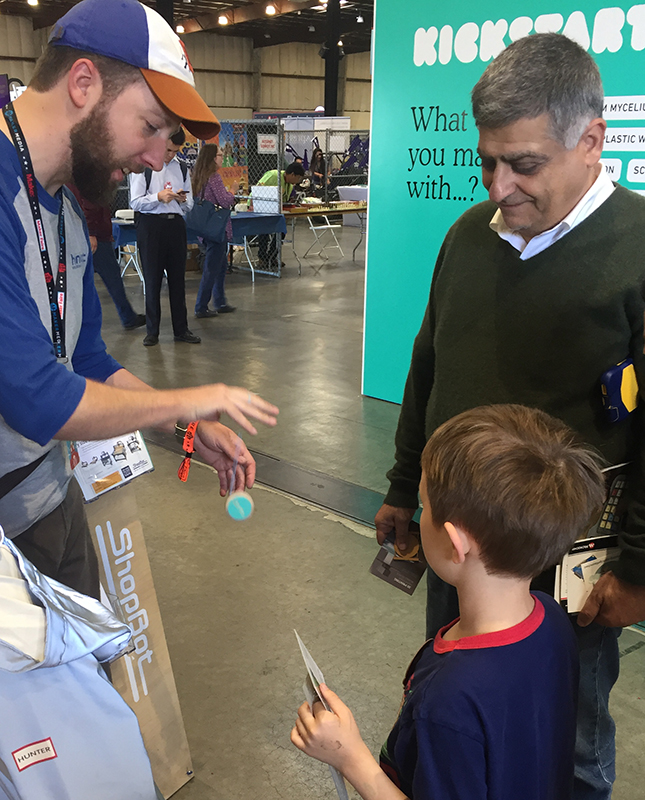
The ShopBot booth was converted into a pop-up factory; creating a start-to-finish production line using the ShopBot Desktop MAX, Handibot® Large Sheet Tool and Handibot Smart Power Tool – Adventure Edition tools to make yo-yos. Yes, yo-yos!! We painted and pre-cut baltic birch 1/2” plywood into sheets to fit on the Desktop MAX. Then, we handled the cutting, drilling, and carving as a batch process for the insides of the yo-yo pieces. Engraving and edge round overs on the painted side of the yo-yo pieces (the fronts) were then processed on one of the two Handibots. After the machining operations were complete, we lightly sanded the pieces, then completed assembly using a dowel pin and string to then pop the sides together and…voila! Using our booth as a live production and assembly shop was a demonstration of how many products can be designed, then manufactured, using CNC (digital fabrication) in a systematic, consistent, and highly efficient manner.
Close to 1,000 yo-yo’s were distributed to attendees at Maker Faire over the 3 day event!
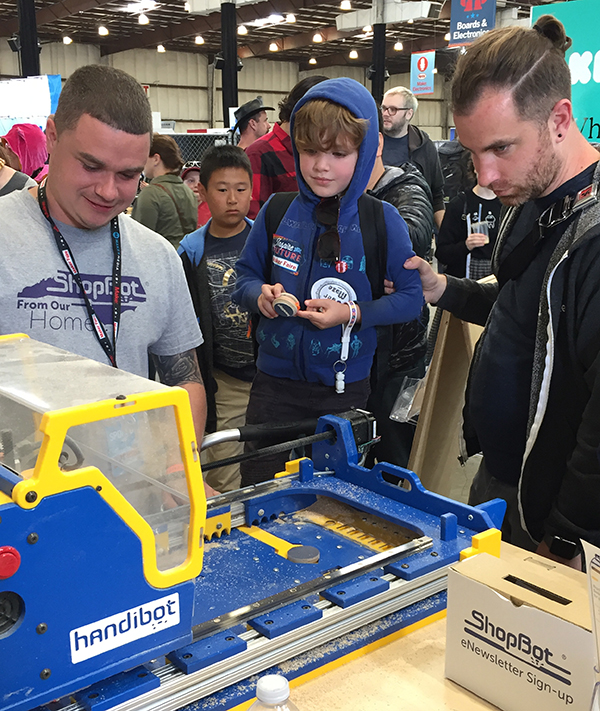
We were thrilled with the abundance of social media posts generated at Maker Faire. Posts were shared by makers with the yo-yos created at the show and pics of themselves with our giant 44” foam yo-yo (cut on a 4×8 PRSalpha tool and assembled pre-show) with the hopes of being selected as the drawing winner for the Handibot Smart Power Tool giveaway. We selected at random from all the social media posts shared publicly and tagged with #goShopBot, #goHandibot, @ShopBotTools, and @HandibotTool. And the winner is… Heather Taylor Price! Heather is a maker and works at a library makerspace at a high school in Utah – she has been considering adding CNC to the makerspace for quite some time and now has the opportunity to do so. We can’t wait to see what she comes up with for the students to tackle! You can follow Heather on Twitter: @skyridgelibrary and @heathertaylorprice.
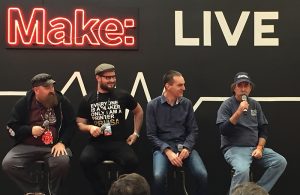
Midday Saturday, our very own Bill Young participated in a panel discussion at the MAKE: LIVE stage. Experts in digital fabrication including Josef Prusa (Prusa Research s.r.o.), Dan Shapiro (Glowforge), and Bill Young (ShopBot), moderated by Matt Stultz, discussed the current state of digital fabrication and where they see it moving forward.
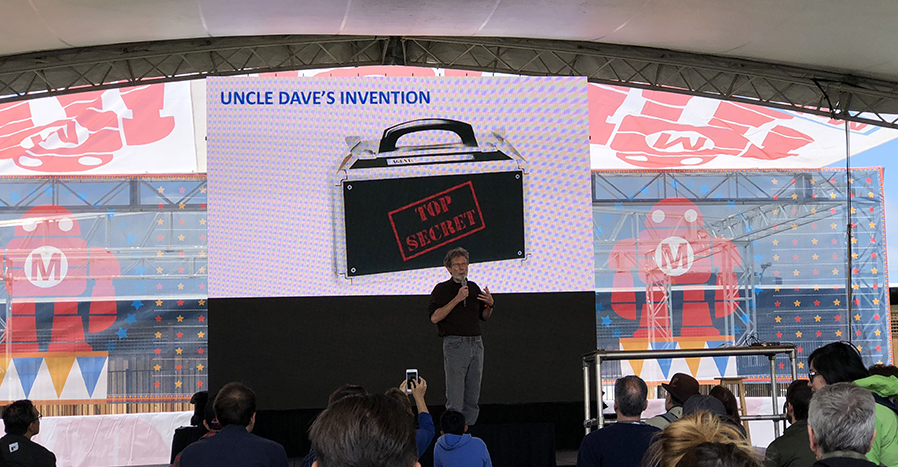
One of our big highlights was Saturday afternoon, at the MAKE Center Stage. Ted Hall presented: “How Digital Fabrication Promises to Make Small, Fulfilling, Local Manufacturing Competitive Again.” Ted talked about an invention his uncle had designed 30+ years ago and how, until very recently, there wasn’t an affordable way to produce this or many other inventions without excessive upfront costs and huge production numbers. Today, however, with the availability of enabling tools in the digital fabrication realm (CNC, 3D printers, laser cutters, etc.), Ted’s uncle and makers all over the world can be competitive.
Ted’s presentation was based on a series of Medium articles that he’s been writing. Learn more about these themes:leapfroging current mass-production and replacing it with methods that can make the small producer competitive again, Digital Fab Renews Small Mfg, Complexity Comes Free, Leveraging Agility & Entrepreneurial Energy.
The next opportunity to hear Ted Hall, ShopBot’s Founder & CEO, speak will be at the CNC Symposium at IWF, August 21st.
Maker Faires are popping up all over the world. While we can’t be at all of them, we encourage ShopBotters to take their Handibot, Desktop, or Desktop MAX to a Maker Faire nearby so you can show off what you design and make. You get to watch kids of all ages light up, they learn about how to make a classic toy (like what we did) or another object, and it provides an opportunity to get to know other makers in your area. Find a Maker Faire near you.
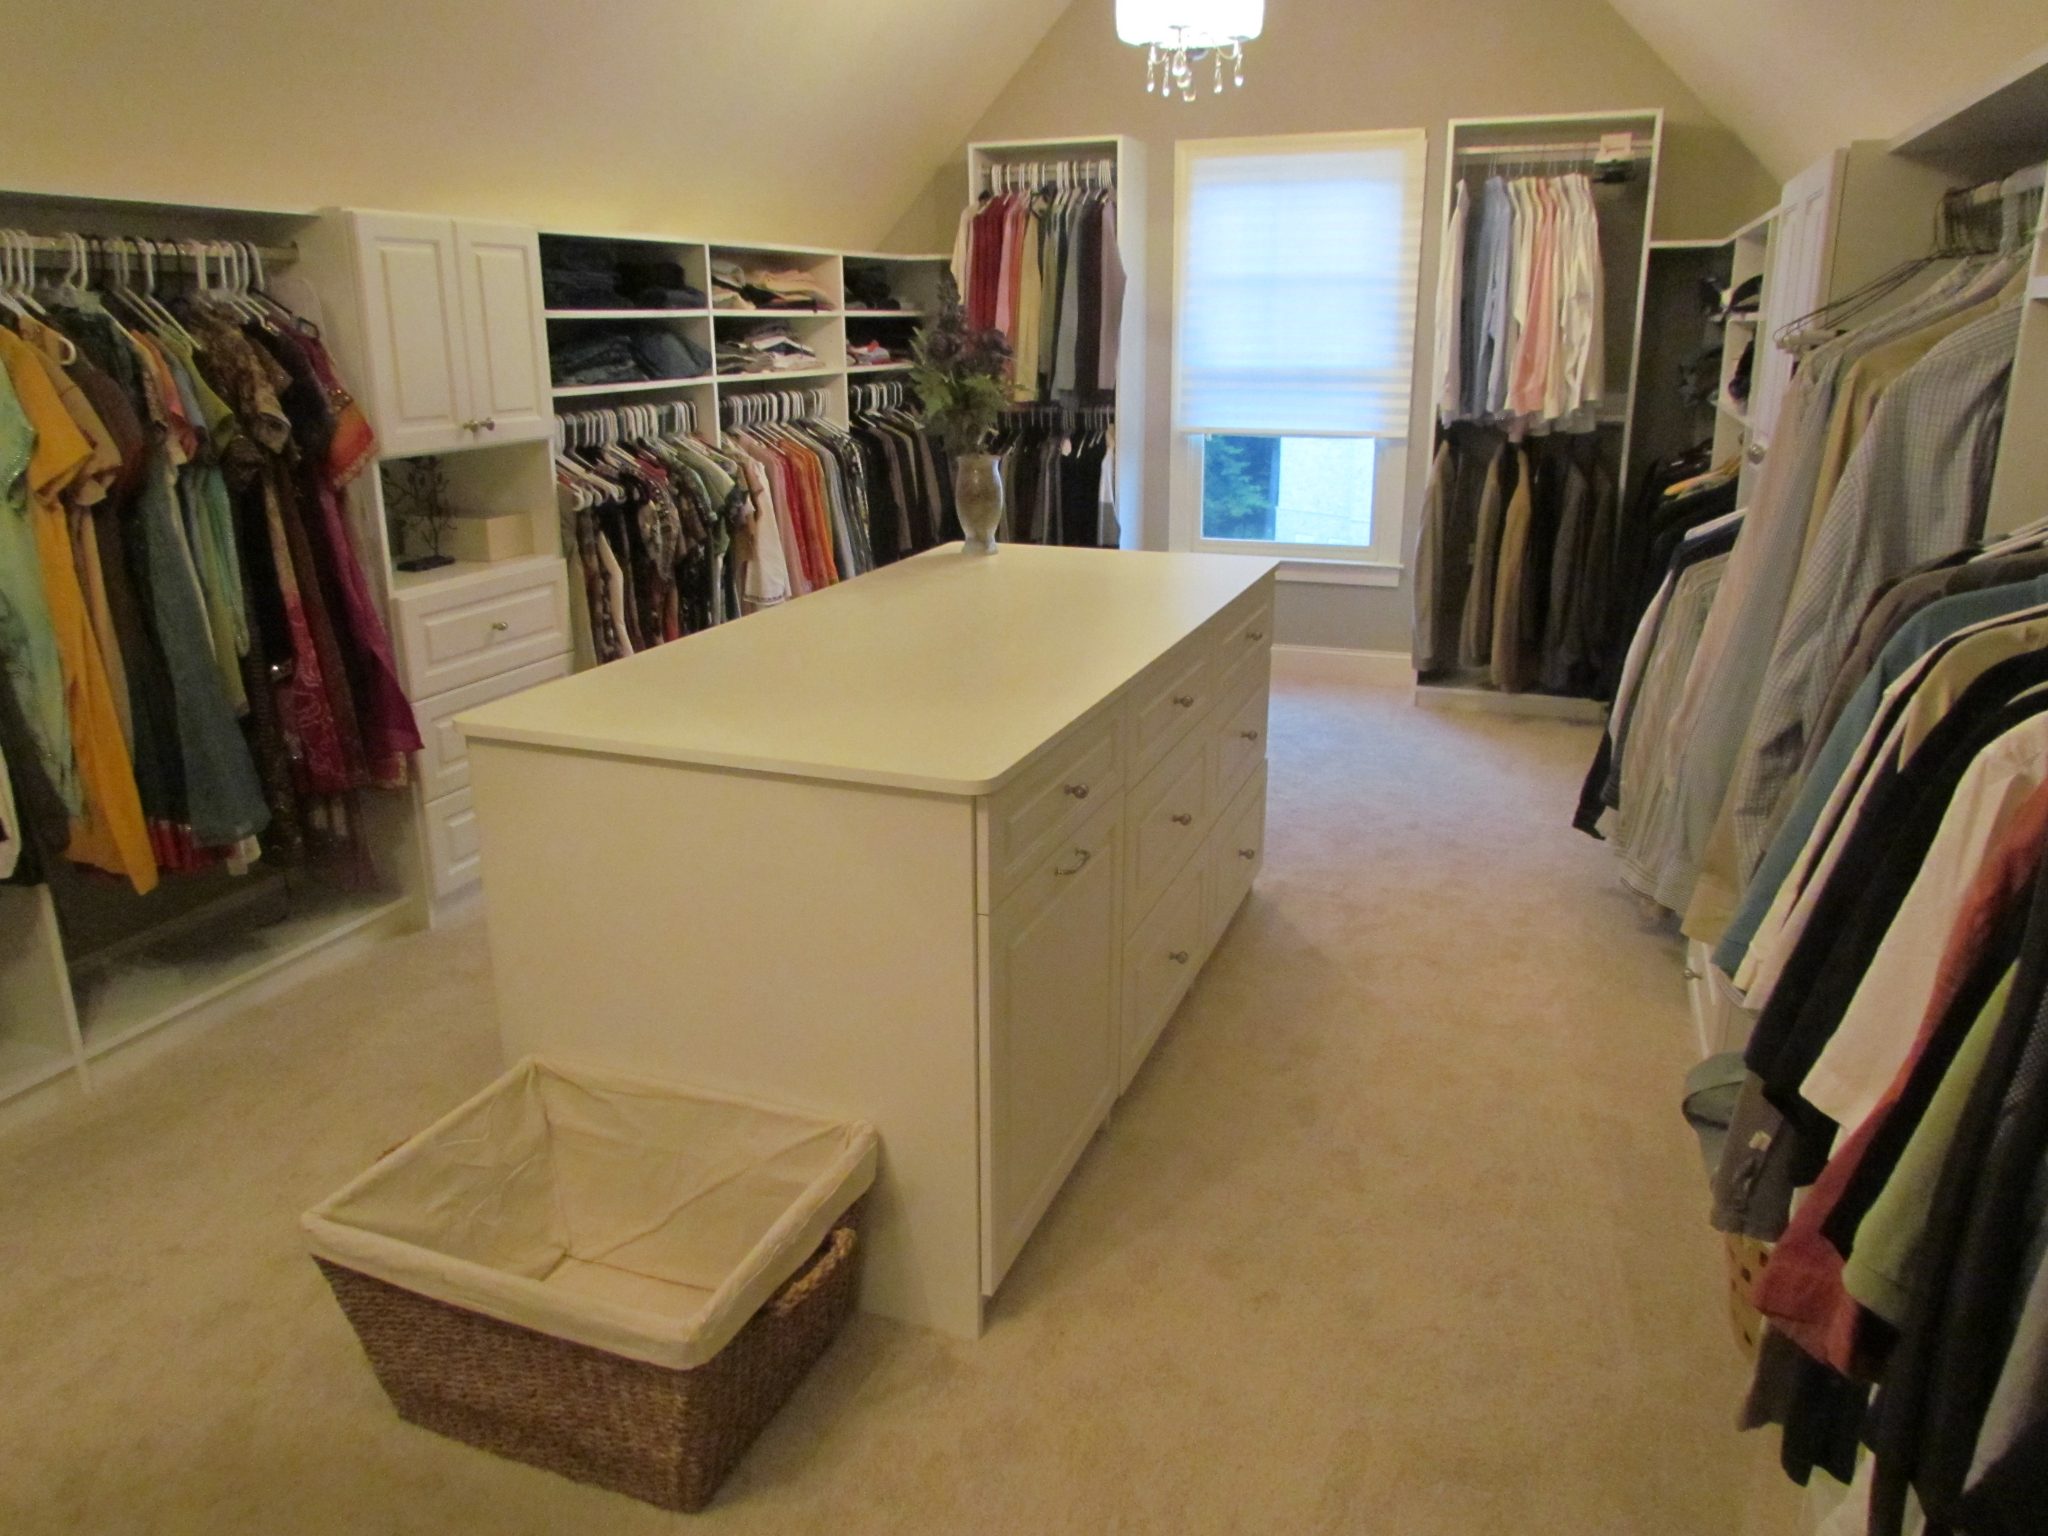
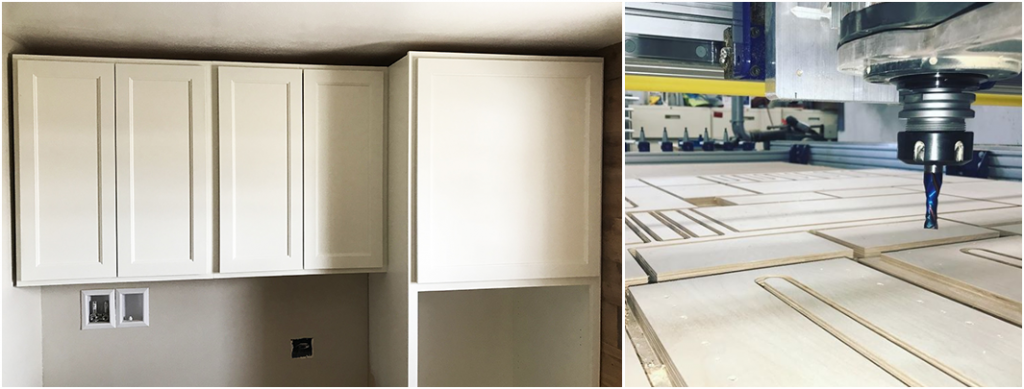
Well the last four years have been challenging to say the least. To get caught up as quickly as possible, in early 2014 we moved into a 6,000 sq ft space and purchased a large CNC machine to grow our custom closet business. In short, business has continued to increase and we have a growing base of happy customers for both our retail closet installations and our wholesale closet parts.
Designing, manufacturing and installing custom closet systems like this one has been the main focus of our business for the past several years
However I have not found it easy to keep up. We immediately ran into problems with the fancy new CNC machine, along with almost everything else that I purchased. And unfortunately while I have been lucky enough to have a couple of good long-term employees, I have not been able to build a capable team to help us scale or even to keep up with the daily workload effectively. Along the way I’ve learned a lot about working with people and running a business that I wish I had known 30 years ago when I was just getting started. I’ve also learned a lot about myself, what I’m good at and not so good at, and what I like to do and don’t like to do.
Wholesale customers, including contractors and other closet companies, have become a sizable part of our revenue
And so I’ve come up with a plan. I’ve decided to close my shop and team up with two other local businesses to serve both our residential and wholesale customers. One is a former competitor who is handling all our retail leads (in exchange for a small percentage of whatever they sell). The other local company, with whom we will be partnering on the wholesale closet business, is another manufacturer who has a very substantial production facility but has been lacking a coherent order entry system or any way to price out a lot of small jobs efficiently. The online catalog/order entry/customer management system that I’ve been building fits the bill perfectly. Combining our customer base and ordering system with their production capacity will enable us to grow together – and the best part is that I can work from home, without the headaches or overhead of maintaining my own production facility.
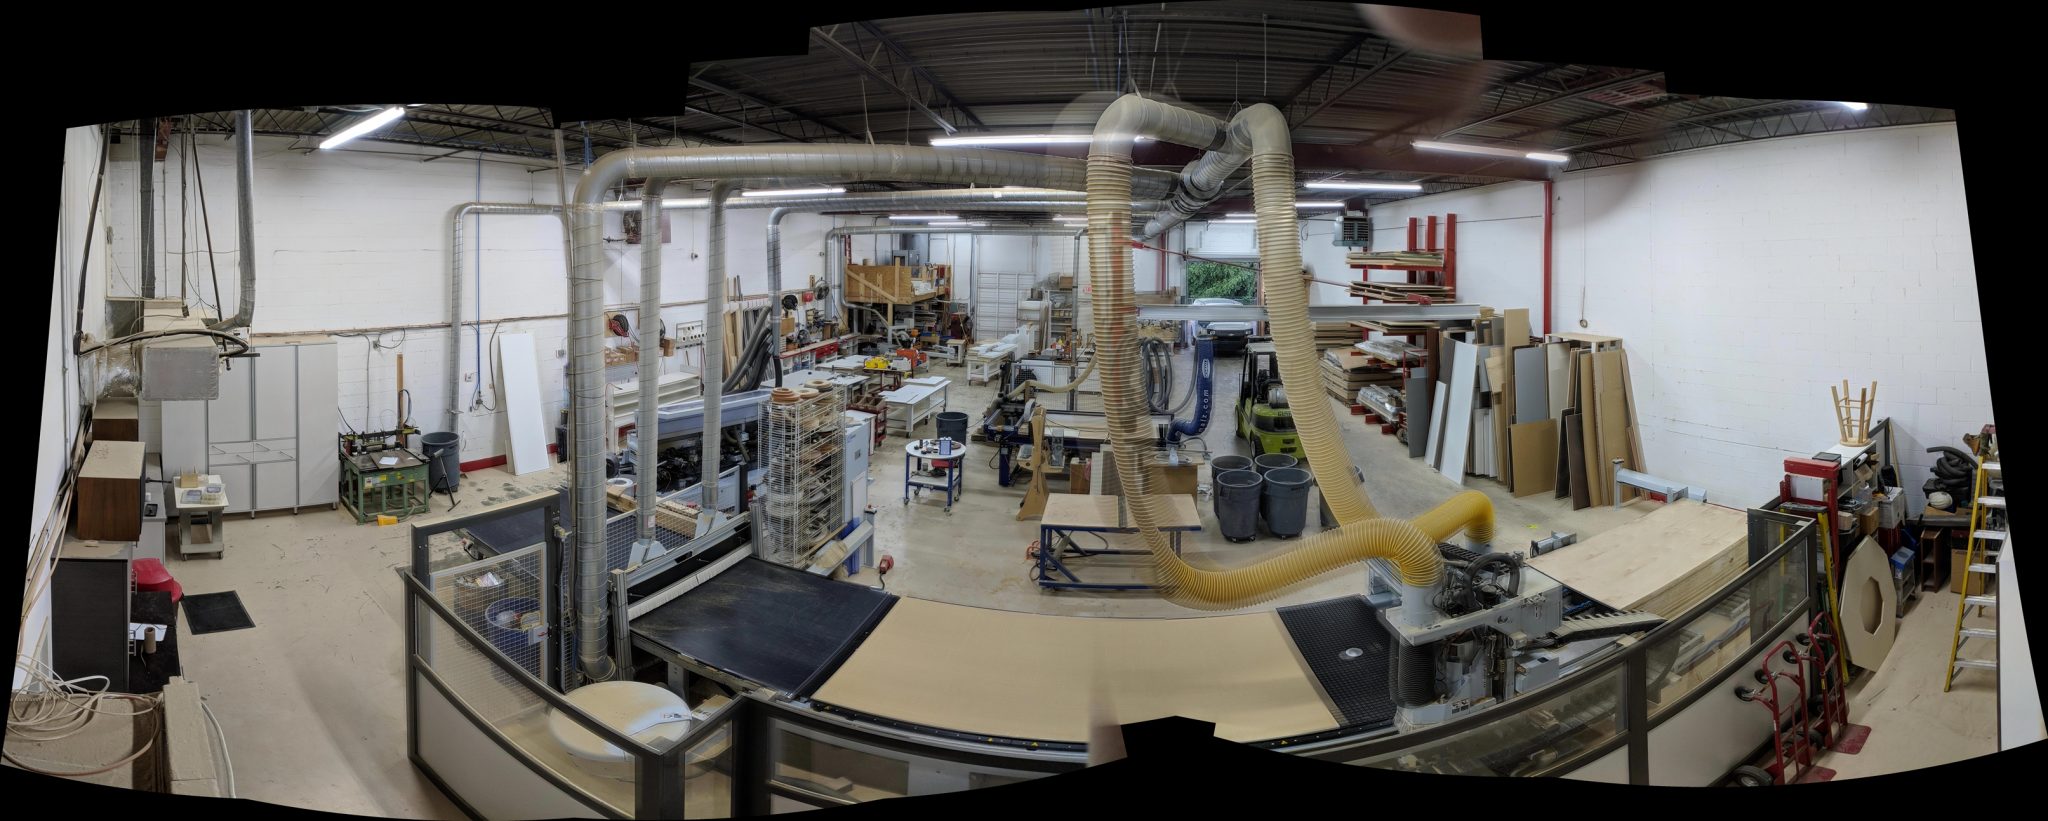
Overall view of our production facility with the large CNC in the foreground and the ShopBot in the center
I’m excited to be making this huge transition, but a little nervous about the next step, which is to sell all our equipment and get the space cleared out. After some consideration I’ve decided to use an online auction service to liquidate everything at once. Here is the sale info (bidding ends July 20 2018). Highlights include our big throughfeed router, two edgebanders (one for curves!), forklift, scissor lift, and plenty of router bits, hand power tools, storage cabinets and displays, office furniture and cabinetry, and much more! And yes, I am selling my ShopBot. It’s a pretty big deal after owning a CNC machine (or two) for almost 19 years.
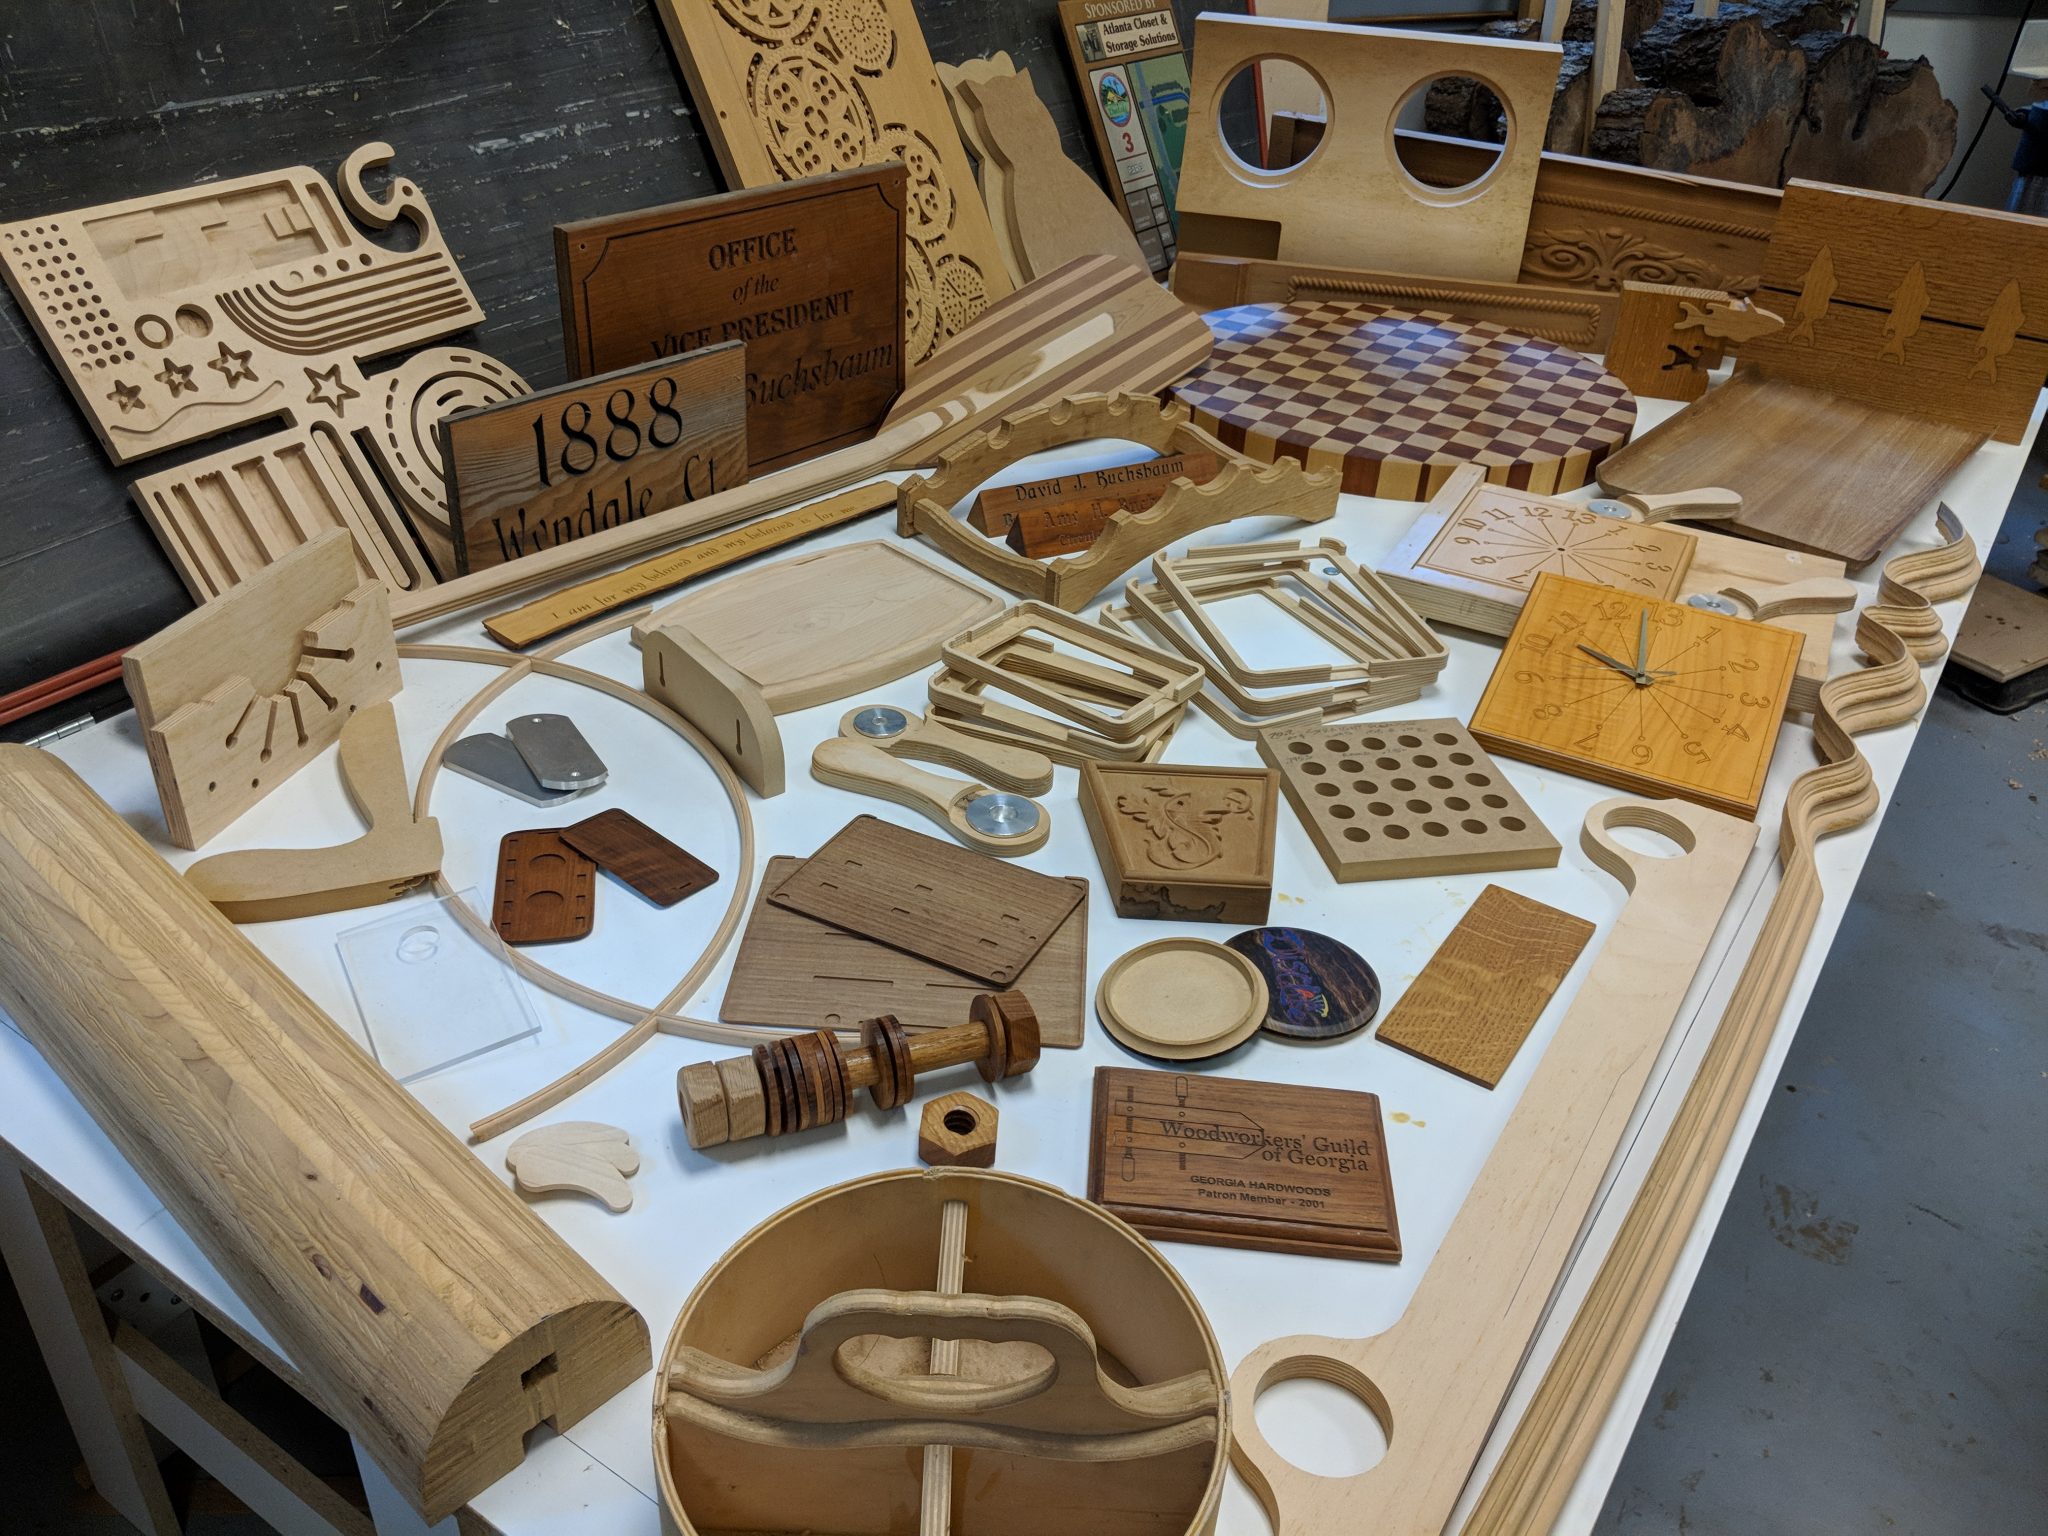
Family reunion: a few examples of the hundreds of projects completed on my ShopBot over the last two decades
I know I’m going to get asked 1,000 times why would I ever want to sell the ShopBot? It’s been a huge part of what I am and what I’ve been capable of, not to mention one of the primary tools I’ve been using to earn a living, for almost 20 years. Well, it’s complicated, but essentially, I’m ready to no longer be the person that runs the machine. Or that even employs the person who runs the machine. I’m ready for a simpler, less stressful stage of my life where my income is not tied to how many hours I have available to work in the shop, or to being able to keep a bunch of other people productive and out of trouble.
In a nutshell, here are the Top 10 reasons to sell the ShopBot too
10. It’s a good time to be selling good used equipment. Adding the ShopBot to the auction increases the overall interest in the auction and may lead to increased activity on the other items.
9. Combining the additional auction income with saving the time and cost of moving the ShopBot to the house and setting it back up, I would have to bid and execute a lot of work just to repay the initial cost of keeping the machine
8. We may be selling the house in the next year or two and the machine would have to be sold or moved again
7. I can still sell profitable work and have other shops cut it
6. I know at least 6 other businesses that own CNC machines that I can call on to cut whatever I might need
5. Selling the machine will force me to be serious about moving on to the next phase of my life
4. I need to concentrate on less physical ways to earn money, preferably some that earn residuals
3. I want to spend more hobby time with my wife and less time in the shop
2. I won’t miss the noise or the dust
1. It’s only a 4×8
Memories of my ShopBot will always bring a smile to my face. It’s been about the most reliable piece of machinery in the shop.
You might notice there are no traditional woodworking power tools in the auction. I still have all of my personal tools and basic woodworking equipment at the home shop, so other than not having my own CNC (at least for a while) my capabilities have not diminished, but my motivations and desires have changed.
So will this be my last column? Maybe and maybe not. I still have plenty of photos of projects I’ve cut that I haven’t written about yet, and just because I have a plan doesn’t mean it will work out exactly as expected. It rarely does.
ShopBot’s former operations manager, ‘head camp counselor,’ and the penultimate editor of American Woodworker, Randy Johnson, is out championing CNC to woodworkers across the country. As an enthusiast of traditional woodworking, Johnson caught the CNC bug and has become an inspiring proponent of digital fabrication, CNC, and how to bring it all into the woodshop. His new book with George Vondriska, CNC Router Essentials, introduces readers to the technology and craft of CNC with presentations focusing on Vectric software and highlighting ShopBot projects.
The book is organized to get new CNC users going quickly, leveraging the ease of use of VCarve Pro from Vectric, Ltd. and the best practices for introducing CNC, as developed by the ShopBot training team working with new CNC users over the last 20 years. There is a lot of good detail in the book with illustrations of dozens of projects from our shelves right here at ShopBot World Headquarters.
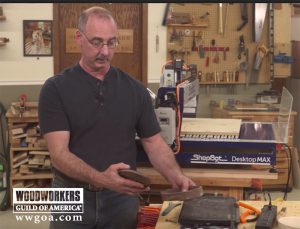
One of the last chapters in the book features a wooden box with a beautiful 3-D, domed lid that George, along with the WWGOA (Woodworkers Guild of America), developed as a ShopBot project. George produced a fascinating videothat will step you through how the work was done and impress you with the CNC skills and strategies he has developed.
SPECIAL OFFERS Celebrating Randy & George’s Book Release
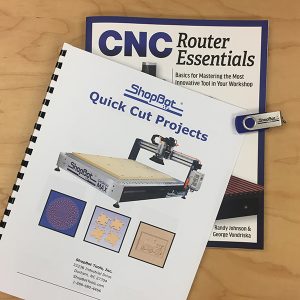
(1) For a limited promotional period, you can purchase CNC Router Essentials book from the ShopBot web store, bundled with printed instructional PDFs of the ShopBot projects from the book’s gallery, and including a jump drive with all the files you need to produce these projects. The jump drive includes four other quick start projects from Randy.
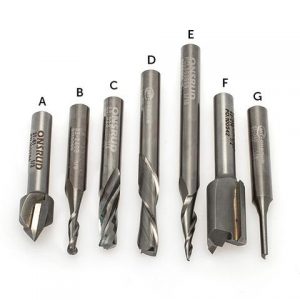
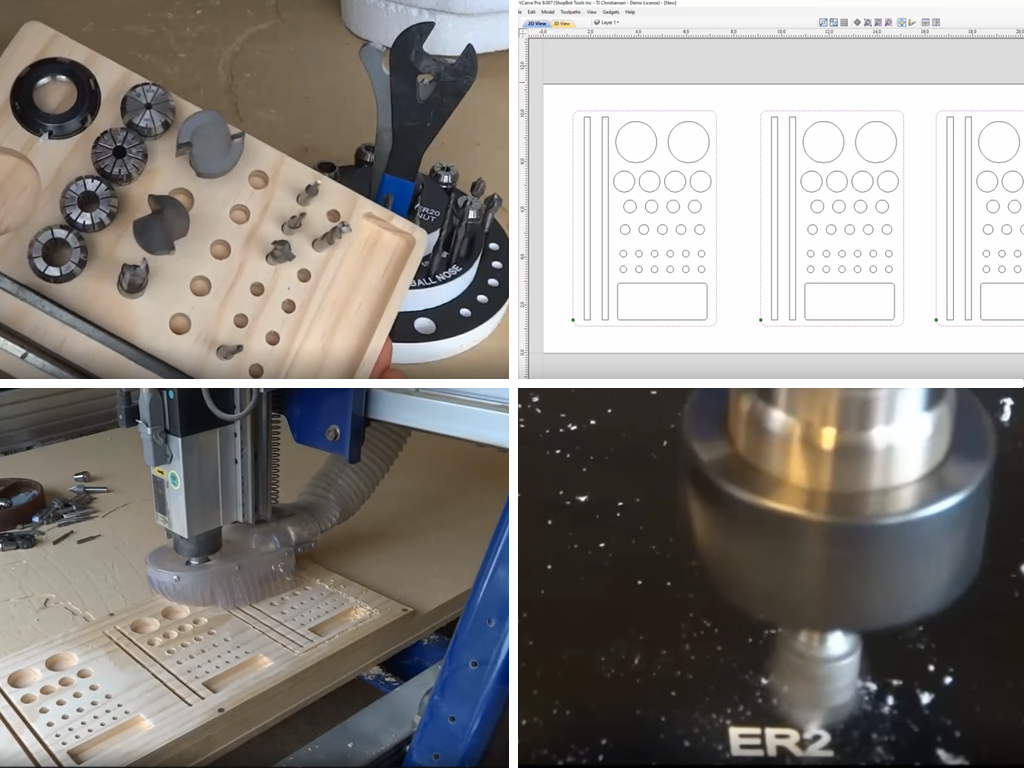
ShopBot Bit Kit (All 1/4″ Shank), 7 Onsrud Cutters: 1/2″ 90° V Bit (13732) 1/8″ Upcut Ball Nose (13727) 1/4″ Upcut Super “O” (13729) 1/4″ Downcut (13507) 1/16″ Tapered Ball Nose (13731) 1/2″ Two Flute Straight V Flute (13733) 1/8″ Straight “O” Flute (13728)
(2) For a limited promotional period, we will offer a 10% discount on our 7-Piece Bit Kit when purchased in the online store, noted in the book as an excellent way to make sure you have appropriate CNC cutters for your first woodworking work with CNC. (USE Discount Offer #CNCESSEN on our web store at checkout. You don’t need to be a ShopBotter to benefit from this one. Valid through 9.11.2018)
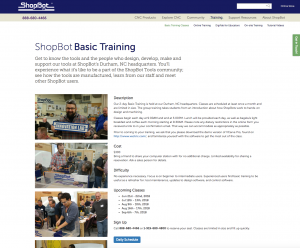
ShopBot’s Basic Training classes cover CNC basics with hands-on learning in a fun interactive environment.
(3) And, while reading about it is great, it’s hard to beat a hands-on, work-with-the-tool approach to getting started in CNC. For a limited period, we’ll be providing Randy and George’s book to participants in our highly-regarded Basic CNC Training course (two days at ShopBot here in Durham). You’ll actually do real projects – just like those in the book – with plenty of help at hand to make it easy to work through any questions you may have.
ADDITIONAL LINKS:
Here are some projects you can download from our website that are featured in the CNC Router Essentials book along with other fun CNC projects.
ShopBot Tools is opening its highly-regarded webinar training to owners and operators of imported CNC routers. Whether you bought an imported tool on eBay, or purchased from a US importer of Chinese tools such as Laguna, ShopBot invites you to join us for our online webinar trainings.
We’ve come to recognize that some importers (and even some US manufacturers) feel that once they’ve shown you how to start and run your CNC tool, their responsibility ends. We know that several dealers even boast of a short, “free” training session for their tools.
But as anyone familiar with CNC tools and digital production will tell you, taking a file to a CNC and starting it up is not the toughest part of CNC. Rather, it’s the conceptualizing and executing efficient CAD/CAM projects, and integrating digital fabrication into the production process, that can be a challenge to any shop. There are just a lot of interesting components of CNC to learn about – from design concepts to machining issues to material-holding. You’ll want to be able to develop an efficient workflow that fits your style. Everyone can benefit from access to key production information and resources. ShopBot would like to help … particularly shops that are just getting started with CNC. We can help new users avoid a lot of frustration. We recognize that the value of CNC is often less related to how much it weighs or what you paid for it, than whether you can put it efficiently to work in your facility. We’ve trained a lot of people to operate CNC routers over the last 20 years – we have a pretty good idea how to do it.
ShopBot is positioned to help because we design, develop, and manufacture CNC routers ourselves, right here in North Carolina, and not just the machines. We make the software, the electronic controls, and the tools themselves. So we know CNC from a lot of different angles. Maybe even more important, in our own shop we use CNC and digital fabrication across the entire manufacturing process. Our tools are digitally modeled, digitally prototyped, and digitally manufactured using CNC. We have a strong commitment to digital fabrication and robotic production assistance and believe it can be the key enabler for realistically competitive small manufacturing.
ShopBot’s CEO, Ted Hall, has stated: “… If we can provide the training and resources that others are not offering, we feel like we are helping everyone in CNC, including ourselves. It’s that old ‘raising the water level’ thing.”
Non-ShopBot owners are also welcome to sign up for our in-house and regional trainings. In attending one of our trainings, whether online or in-person, you will also learn about items available in our web store—bits, accessories, and other supplies—most of which are appropriate for all CNC tools. And, ShopBot also offers CNC production services and consulting that can be helpful in setting up production with any CNC equipment.
Reports suggest that only 20-30% of production shops that could really benefit from CNC or production robotics are putting these to use. We have been making the case for years that it is robotics that will give the small shop and small manufacturing the chance to be competitive again. ShopBot is happy to lend a hand to all new CNC tool owners.
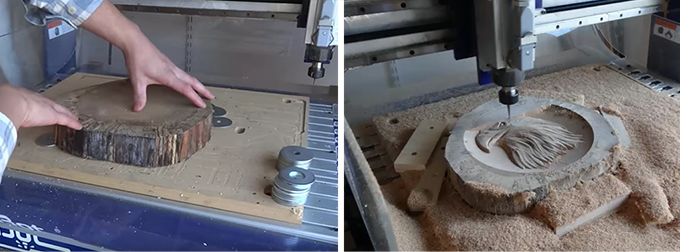
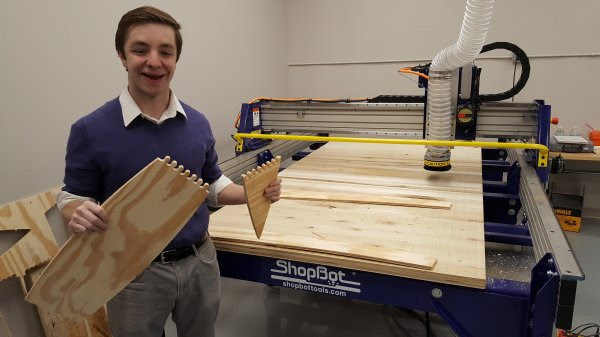
Imagine being a high school student and having the opportunity to pilot a plane or a boat, learn how to design and model planes and boats, and understand the businesses behind the aviation and marine industries—all while taking core high school courses. Davis Aerospace and Maritime® High School, a unique partnership between Cleveland Metropolitan School District and PHASTAR Corp. presents that opportunity for students in Cleveland, Ohio.
In April, under a contract with TIES, I was able to spend two days at Davis to work with the teachers and digital fabrication lab managers. Our goal: to use the ShopBot CNC router (a PRSalpha) to build boats and create a model of the Cuyahoga River to float them on. Doing the research for how to make that happen was part of the fun.
PROJECT 1: Building Models of Boats
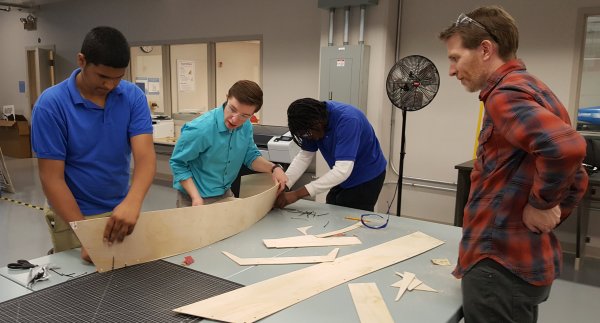
Danny and Nick, digital fabrication lab managers, showed me the progress that they had made translating designs on paper into models of boats. As shown in the photo, cutting out the models by hand, then taping the models together, regardless of how the plans were generated (photocopies or CAD drawings generated from paper copies), had its drawbacks.
First attempts at creating models from paper plans.
Joining Long Pieces Together
Once a CAD file of the designs had been generated in Fusion 360, Danny and Nick (with Scott acting as cheerleader) had used the ShopBot to cut out a sample in plywood. With the intention of eventually making boats bigger than either the bed of the 4’ x 8’ ShopBot or a standard sheet of material, they had created their own version of a scarf joint. It was a great idea to use the precision of the CNC to create curves to interlock and join shorter pieces into longer panels. But there’s more!
Scarf joint using the precision of a CNC tool.
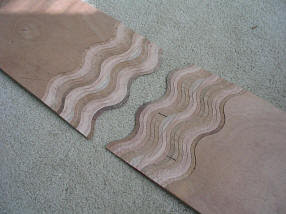
Bill Young, a boat builder from Virginia who early on realized the potential of CNC woodworking, would add another dimension to the scarf joint. For his boat kits, he created scarf joints that beveled the edges of the material where two shorter pieces joined together to make a long panel.
Scarf joint options. Straight butt joints, or beveled edges.
Then, Bill realized that he had the option of 3D carving (though he didn’t call it that) the scarf joints to increase the precision of the fit, reduce the chance of breaking off the tips during shipping, and disguise the joint in the finished product. Here is a link to Bill’s blog about his creative technique for creating “wavy” stepped scarf joints.
Bill Young’s wavy stepped scarf joints. Joints are machined from the top down, then flipped for assembly.
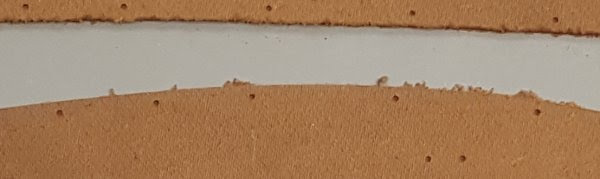
Holding the Parts Together During Assembly Stitch-&-glue is a technique used by many boat builders who are creating “hard chine” boats: Panels cut out of flat material are designed or lofted with “developable surfaces” so that the curves of the panels will fit together when “folded” into 3D boats.
With a CNC machine, the panels can be cut very precisely so that there are no gaps or overlaps between the edges of the panels. As the panels are being cut, a series of holes can be added so the panels can be “stitched” together with cable ties until they have been glued in place.
Once again, I looked to Bill Young for inspiration. A number of years ago, Bill had created a file to cut a 1/4 scale model of the “Weekend Dingy,” a 9’ skiff designed by Karl Stambaugh of Chesapeake Marine Design. The original skiff was built during several of the Woodenboat magazine community boatbuilding events, and Bill’s model kits and instructions were given away during the early Maker Faires. For this trip to Cleveland, Bill was able to find the original .sbp files, convert them to a .dxf, then import them into a Vectric file for us to try out at Davis.
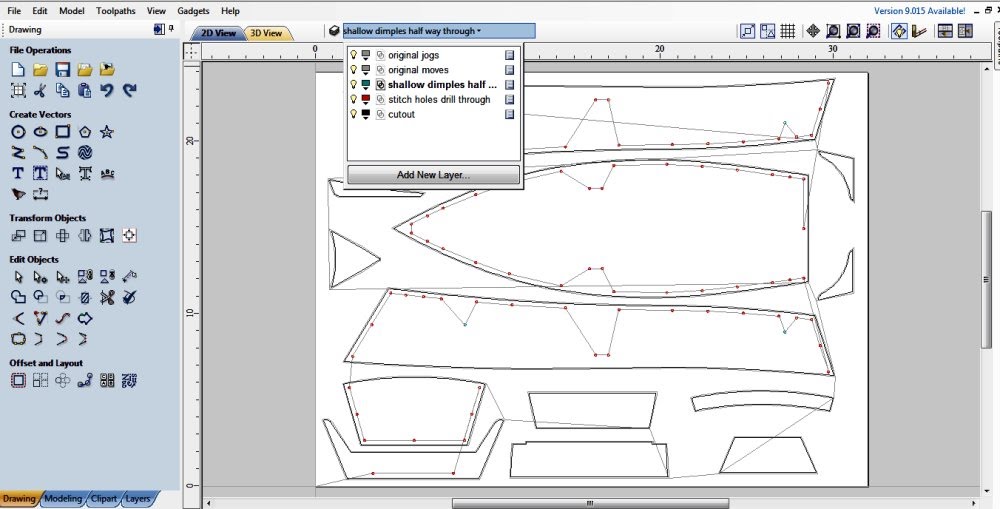
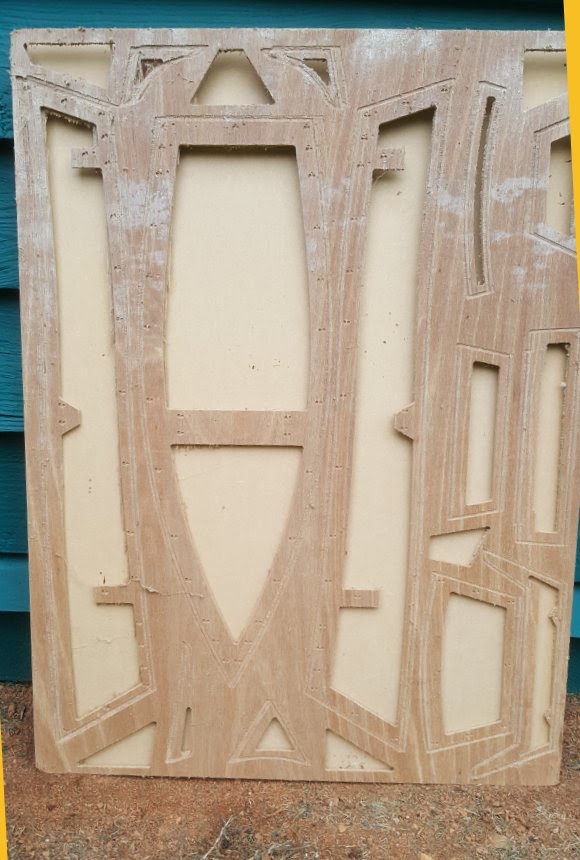
VCarve Pro or Aspire CAD file generated from original .sbp code.
In the ShopBot Control Software, the FC command will convert a .sbp file to a .dxf file. That .dxf can then be imported into the Vectric software.
The .sbp file includes the compensation for the waste from the bit. To get the true size of the design, the vectors that mark where to cut out the parts have to be offset to the inside the radius of the bit used in the original .sbp file.
Anything that is just a plunge into the material, like a hole for the stitches, would not have to be offset.
Once the true size of the design is determined, the model can be scaled up or down and re-toolpathed to take into account material and bit size as needed.
Note the layers in the design file. Many of the layers were created from the .sbp to .dxf conversion. Some, Bill created to keep track of his work
At Davis, we first scaled the model even further and tested the concept with tempered hardboard, easily available from the big box stores. Using a 1/8” bit, we used the drill toolpath to create the marker and through holes for the stitching (the size of the bit determines the size of the hole), and the profile-to-the-outside toolpath for cutting out the pieces. Didn’t quite get the cut depth correct, but not bad for re-engineering a 10-year-old file.
First test and detail of smaller model cut out of 1/8” tempered hardboard.
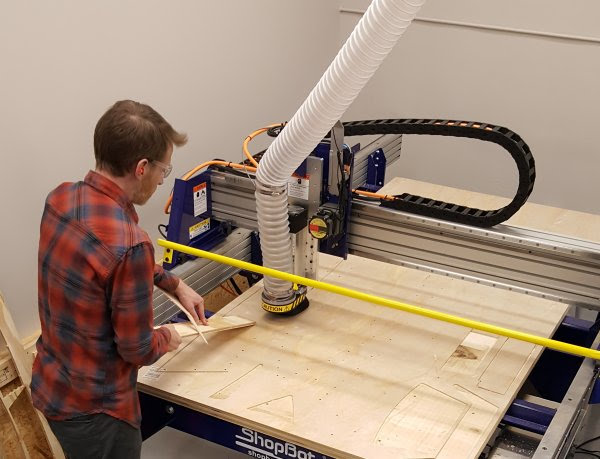
For the ¼ scale model, we used .25” inch Luan, again from the big box store. Without the vacuum hold down table and template that Bill had used for his Maker Faire kits, we marked where it was safe to put a hold down screw in the CAD file, had the ShopBot run a file to mark those locations on the board, and screwed the board to the sacrificial table. Since adding tabs to hold the parts in place while they were being cut out might mar the clean edge of the cut, we instead added a ramp to the profile toolpath to create a temporary functional tab at the start point of the cut. Nick also provided a physical assist to keep each piece in place while the cuts completed.
Vacuum template used by Bill Young for original Weekend Dinghy kits given out at Maker Faire. One could create a mini vacuum table much like the one described here, lay a template like this on top, then the material. When the parts are being cut out, the toolpath cuts into the template, and the parts are held in place by the vacuum.
Nick is using a board as an assist to hold the parts in place as they finish cutting.
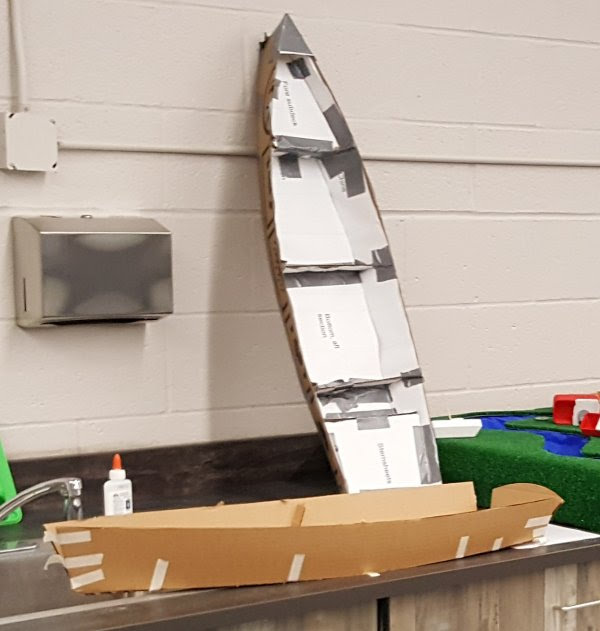
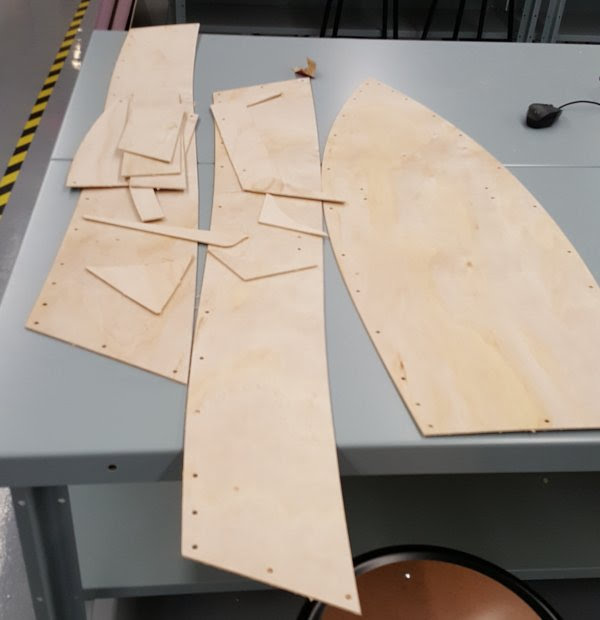
Parts ready for assembly.
Members of the after school club assembled the boat using cable ties and intuition. (So why did Bill provide instructions?)
The school now has a project that they can share with their students, and with the community at large. It was also a terrific opportunity to revisit the ShopBot website for ideas and information about boatbuilding, including the original inspiration for why Ted Hall created ShopBot Tools.
PROJECT 2: A River to Float Them On
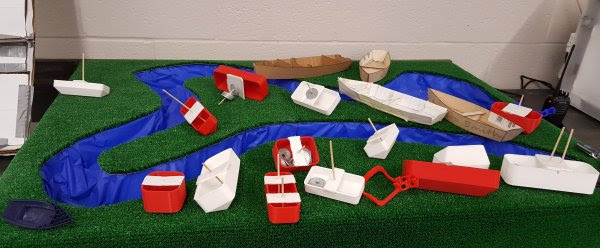
Danny and Nick showed me the 3D printed and laser cut boats the kids had designed, and a hand-carved model of a big bend in the Cuyahoga River lined with a plastic table cloth and fake turf. Danny reported that it was successful at first, but the plastic table cloth was water resistant, not water proof. All too soon, the water leaked out of the model. Still, the students were able to test concepts about size of craft, displacement and maneuverability around the objects, and geography of the river.
First attempt of creating a model of the Cuyahoga River in downtown Cleveland.
With the ShopBot, Davis wanted to create a bigger version of the Cuyahoga River to test larger models. Adding semi-realistic information on the depth available to float a water craft, and the height of the bridges they have to get under, would make the model more meaningful.
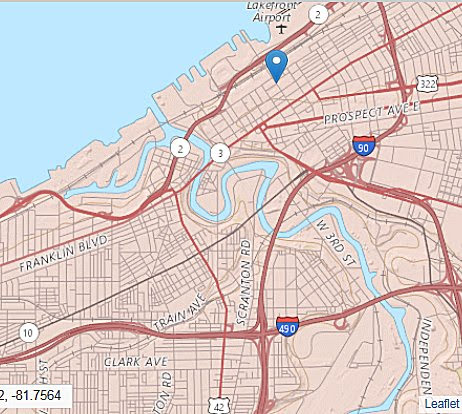
The first step was to locate a digital model of the river that flows through Cleveland and into Lake Erie. I tried Terrain2STL, a website that takes information from Google Maps and turns it into 3D files that can be printed with a 3D printer or 3D carved on a CNC. Cleveland is too flat for much detail, and the site wouldn’t give underwater data either. I also looked at Google Maps, USGS (US Geological Services) for topographic information, and NOAA (National Oceanic and Atmospheric Administration) for a chart of the Cleveland area that would be useful for mariners piloting Lake Erie and the Cuyahoga River. No one source was sufficient, but combined, they gave us a lot to work with.
USGS map of Cleveland waterfront. Location of Davis Aerospace and Maritime High School is marked.
Google Maps version of Cleveland.
Chart of the lower Cuyahoga River and Lake Erie water front with water depths, bridge heights, and landmarks as seen from the water. Pronounce NOAA as a man’s name. Who says the government doesn’t have a sense of humor?
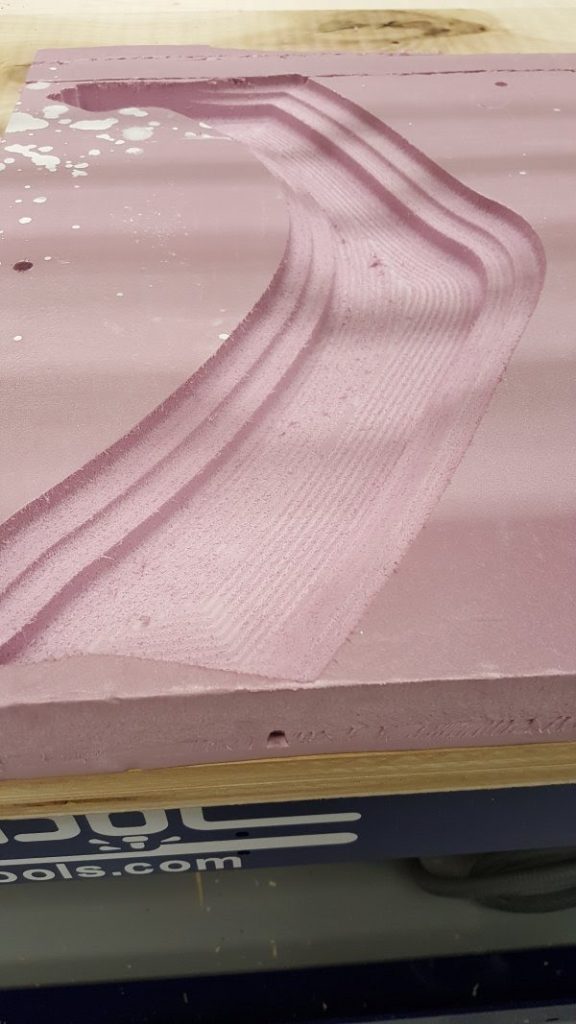
Once we got a semi-clear image of the banks of the river, we brought it into VCarvePro for tracing. With the vectors, we could select the portion of the river we were interested in, and scale it for the size of material we have available. For our first attempt with a small piece of pink insulation foam, we were ready to use a pocketing routine and a ball nose bit to scoop out a model of the river.
Outline of the Cuyahoga River traced in VCarve Pro. Next step is to select the area of interest, and set up for pocketing in foam.
Pocketing the selected area at three different depths with a ball nose bit and a large stepover using a contour path (hence the visible lines).
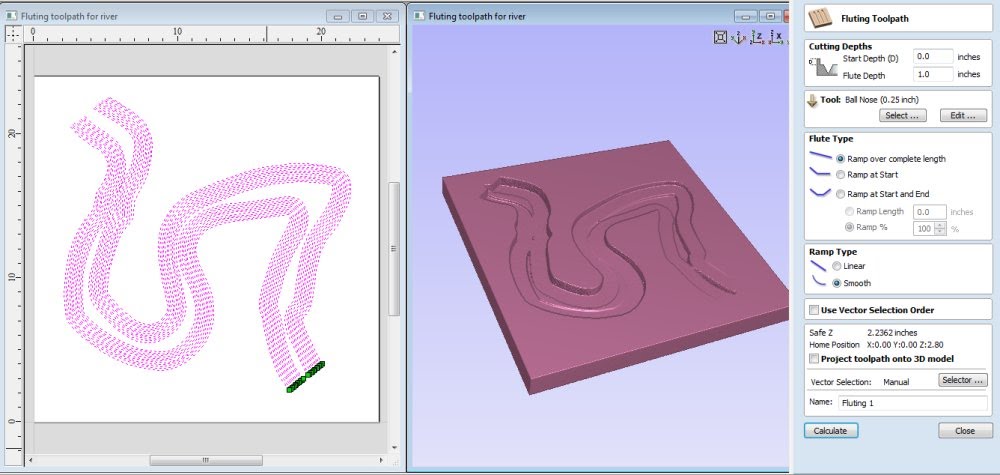
Since the model was a 2D vector and not a 3D rendering such as an .stl, with VCarve Pro, in this first attempt, we could only use 2D toolpaths that machine to one depth. However, the Vectric softwares have a toolpathing option called Fluting that will vary the depth of a single open vector from one end to another. Simulations indicated that, with a little manipulation, it would work to give us a river that was shallower upstream, and deepened as it neared the mouth.
Using the Fluting toolpath to vary the depth of the River
We created a series of open vectors inside the boundary of the river, and made sure the start point of each vector was on the upstream side (green point)
Choosing all of the vectors, we set the start point at 0 (top of the material) and the flute depth to 1 inch
Fill in the blanks, toolpath and simulate to check the results.
Adjust as the simulation reveals more about the results
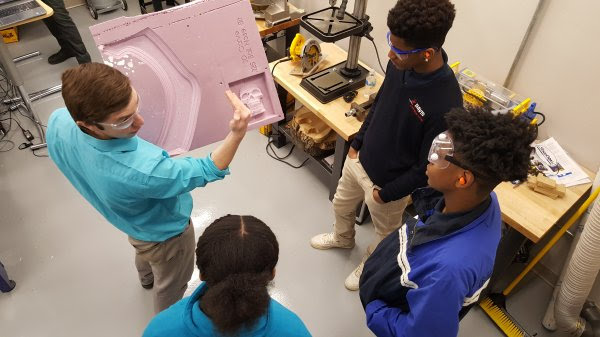
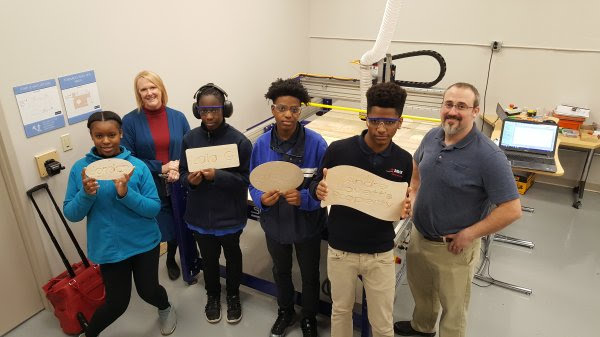
The Professional Development was directed towards the faculty of the school. It was fun time when, each day, students visited the Fabrication Lab while we were working. Some even got involved in doing a quick project.
Danny showing the students examples of the ShopBot carving in foam.
Students design and machine their individual signs. It was terrific to see how well Scott knows his students, and what motivates the reluctant ones.
This year was the inaugural year for Davis Aerospace and Marine® High School, starting with approximately 60 students in the 9th grade class. Each year will add another class until there are 4 classes/years. Applications for next year’s class are now open. I’m sure Bill Young (and I) would be glad to visit again and keep up with the progress.
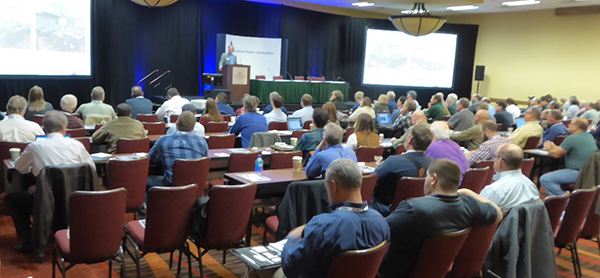
CMA 20th Anniversary Conference March 1-2, 2018 Denver, CO
ShopBot recently attended the CMA’s 20th Anniversary Conference in Denver, CO. We participated by sponsoring a lunch highlighting our 20+ years supporting small and medium sized cabinet operations with affordable and innovative CNC tools. Many of ShopBot’s first customers were cabinet makers and it was fun to touch base with some of the friends we made in our early years.
While a few of those customers have moved on to big-iron CNC’s, many others still depend on their ShopBot tools for day-in, day-out production; and many have added a second tool to increase throughput while creating agility in how they put their CNC equipment to use. Sometimes two tools are better than one, especially if they are affordable.
We also got to chat with newer customers at the event. More than ever, we find that ShopBot has the products and services relevant to the dynamic needs of today’s cabinet makers—who must be responsive to the changing needs of their markets. They appreciate tools that can adapt with them to accommodate what the new work demands. The ease of use of ShopBot tools, as well as their adaptability, configurability, and programmability, make them well–suited for the production methods of creative cabinet making.
Because we not only design and build our tools, but also develop our own highly usable software, we are well–qualified to help with a broad range of needs for those using CNCs in production. Our staff of experienced CNC users, developers, and engineers can work directly with customers on what options are best for their needs because we are the developers of the products we sell. And we use them in our own manufacturing, every day.
ShopBot’s CEO and Founder, Ted Hall, says “… being competitive today is about cabinet makers making effective use of smart technology. Just because a tool is controlled by a computer, or has a decal that says “smart,” does not mean that it will make you smart. You need a tool that is intuitive and interactive … a tool that puts you in control of your work and production. We’ve put a lot of years into making equipment that works with people.”
“When I first bought my PRSalpha ShopBot, I thought it would do everything for me,” says cabinet makerKeith Larrett. “But what I’ve learned since is that it’s even more important than that: it doesn’t do the work for me, it allows me to do work that wasn’t possible before, and do it with more speed and precision.”
“I needed to find a CNC that could be assembled in my workspace and one that didn’t break the bank. I was a bit surprised with sticker shock for the caliber machine I wanted to get into – and even then, these machines couldn’t be disassembled. That’s when I stumbled across ShopBot Tools. Their machines had an excellent reputation and their customer service was out of this world great,” says custom closet and cabinet maker Andy Glass. “I was a bit nervous on what add-ons might bring the cost up to and I was extremely relieved to see the final price. It was so much lower than the competition that I decided to add-on a service tech to come help me set it up, tune the machine, and train me on the software and ATC capabilities. It was an extra cost, but even with that addition it was well below the competition; and bringing the field tech to the shop was the best decision ever.“
“The ShopBot has met and exceeded expectations. We’re able to perform repetitive tasks such as making the parts of tables, chairs, benches, and cabinetry much faster than before — so of course it saves us money. And there are some areas where CNC has afforded other benefits. For instance, I knew that we could do decorative carvings using the tool, but hadn’t really intended to do much of this work. Well, I’ve found that I’m doing more and more of it, because clients are really liking the work.”
ShopBot has made CNC accessible to small and medium sized shops. We don’t just import and resell something we don’t understand. At ShopBot, we design, develop, build, and support our tools, all from our Durham, NC facility. Our customers know that we know CNC—and that we know cabinet making—inside and out. Give us a call, visit our website www.shopbottools.com, or better yet, join us for one of our interesting, useful (and fun!) trainings at our headquarters in Durham, NC. If you can’t get out to North Carolina, keep your eye on our schedule of events and plan to attend one of our regional events where you can learn more about how we’ve helped cabinet makers compete and thrive.
Here are a couple of other blog posts about our customers using their tools for cabinet making and furniture making:
Ted Hall, ShopBot CEO, recently posted an article on small manufacturing on Medium. He explains why the new robotics is less about replacing people and more about making successful use of production robotics to enable small producers to be more realistically competitive:
Over the last several months, I have spoken to several groups about robotics in small manufacturing. Everyone gets that robots, and specifically the digital-fabricating robots that are particularly interesting to me, are machines that offer useful automation — automation in the sense of helping a producer make a lot of something. But an emphasis on automation can make it easy to miss the more powerful advantages that robotic assistance offers small manufacturing. These are the advantages that will be key to re-establishing the competitiveness of local, low- and medium-volume production.
Showing off projects created on a ShopBot CNC and a laser cutter
Do you own or have access to digital fabrication equipment such as a ShopBot CNC machine, laser cutter, or 3D printer, and an interest in education? Do you want to know more about the software and machines available for digital fabrication in education? Are you a facilitator of a digital fabrication lab or makerspace who would like to join a support network of other educators to discuss project-based learning, lesson plans, and how to address standards? Then this hands-on workshop is for you! ShopBot’s Sallye Coyle will be facilitating a multi-day “Digital Fabrication in Education” workshop at ShopBot headquarters in Durham, NC.
This 2½ day workshop will begin with ShopBot CNC machines. Using VCarve Pro CAD/CAM software, we will design and prepare files for machining on a ShopBot. The sessions will then move to cross-platform training—demonstrating how designs originally intended for one digital fabrication tool can be prepared for use on another platform (example: CNC to laser or vinyl cutter, 3D printing to 3D Carving on a CNC machine). Topics will include design flow, 2D vs. 3D, computer aided design (CAD) and machining (CAM) software, and how to evaluate which digital fabrication process is best for a desired outcome. The final half day will return to ShopBot tools, providing more advanced information for those charged with installing, maintaining, or getting the most out of their CNC machine. If there is sufficient time and interest, we will have a session with an introduction to Fusion 360 CAD/CAM software and/or using a Rotary Indexer on the ShopBot.
While you do not have to have CNC or CAD/CAM experience, familiarity with some aspect of digital fabrication would be helpful. There will be opportunities for show and tell, and at least one round table discussion, so you should come prepared with questions and/or examples of how to use digital fabrication in education. Working in collaboration with your fellow attendees, you should leave the workshop with hands-on projects and ideas to address topics related to STEM, CTE, the Arts, Common Core, and/or Next Generation Science Standards.
Summer Session 2018 • June 14- 16, 2018
On-site at the ShopBot facility in Durham, NC
Thursday: 9am–5pm
Thursday evening open hours to work on your own project (optional)
Friday: 9am–5pm
Saturday: 9am–1pm
2.5 days total (2 CEU credits)
Cost: $400 per computer seat (we can have up to 2 people per computer)
How to Sign Up
If you’re interested in attending the workshop, send us an email at info@shopbottools.com with your name, contact details, and a couple of sentences about your experience level. And of course, questions are welcome!
Sallye Coyle is experiencing how rapid advances in computers, software, and technology have changed the way education is served by digital fabrication spaces. She has traveled extensively in the US and the world, working with schools, Fab Labs, and makerspaces to “train the trainers” in how to use the digital fabrication technology, as well as how to build, maintain, and use ShopBot tools.
Special guests
In addition to ShopBot CNC tools, Handibot® Smart Power Tools populate the ShopBot Training Area. We are working on making a suite of other digital fabrication tools (and their handlers) available on-site for the workshop. These tools include: a vinyl cutter, laser cutter, and an Ultimaker 3D printer.


 Ted Hall, ShopBot CEO, recently posted an article on small manufacturing on Medium. He explains why the new robotics is less about replacing people and more about making successful use of production robotics to enable small producers to be more realistically competitive:
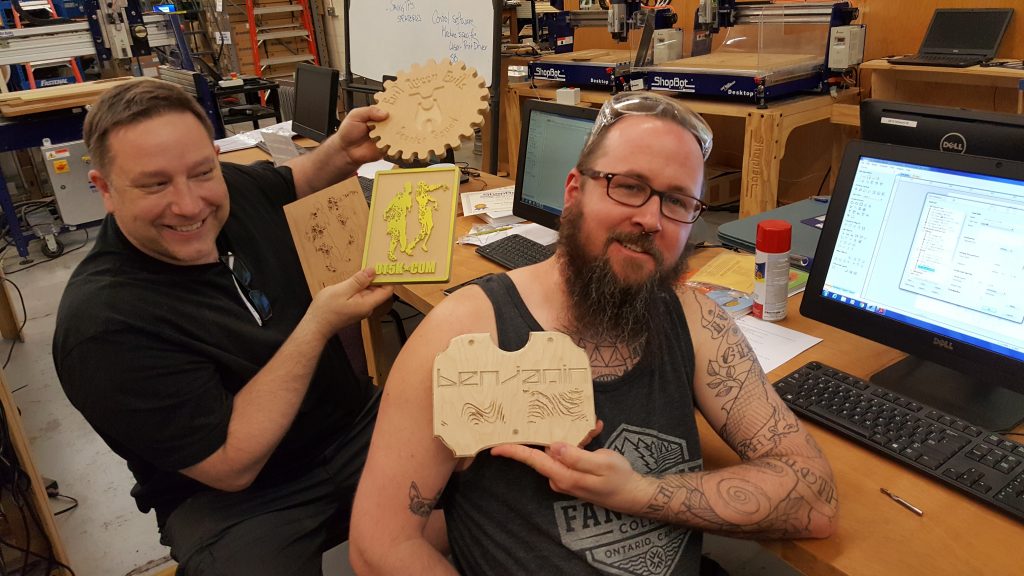


 to take part in this workshop.")