Our quest to create the perfect solid wood raised panel door on a ShopBot raised many questions. We began by measuring the thickness of our current door panels to determine the needed depth of cut and create a plan for two part jig system to hold the door panels in place while they were being shaped. We also decided that user input and a combination of relative and absolute coordinate references would be the best way to write the program so the user could both size and shape the door panels on the CNC router. Now it was time to start building the jigs, fire up the router, and see how things would really work.
Sizing
Our initial assumption that we could size the blanks directly on the table without the need for a jig proved to be correct. A ¼” double fluted bit did the trick nicely. I wrote the program so that the user could input the width and height, then it would punch a hole at each corner and then cut cut out the doors. This ensured sharp corners. We chose to have the ShopBot make three passes so there was not too much pressure on the panel, bit, or the vacuum. Sizing panels this way might take an extra minute or two but it produced a nice square panel.
Frankenstein’s Monster
We designed a two part jig system using Part Wizard 2. The first part was inserts that we screwed the the door panels to. The second part was the base with clamps to hold the inserts in place during shaping. The base was to be held to the router bed with the vacuum pump. We looked into buying low profile hold down clamps and putting 8 to secure each of the three inserts, but buying 24 clamps was more expensive than expected. So we decided to use a wooden peg and block system instead.
After writing part files to cut the blocks, we got our wood together and used the ShopBot to cut the parts for the jig, then glued and nailed it together. This was a two-day affair, once the solid maple pegs were made, that produced with what must have been at least an 85 pound monster of a jig. Then we screwed one of our panels into the insert and realized that the corners of the panel would likely move up and down during shaping and produce an uneven depth. Also, the screw holes in the back of the panels would have to be filled and sanded, which would be another step in a process we were trying to shorten.
Escape from Castle Frankenstein
After looking at our gigantic gadget, we reconsidered its usefulness. We wondered if the panels could simply be vacuumed to the table directly. We cut only the top part of monster jig (see picture), and designed some “L” shaped corner-chocks to hold panel blanks tight into the corner to prevent any movement along the X or Y-axis’s. We put the panels on the table so the natural bow of the panels was in the middle. This was sucked down by the vacuum and helped hold the edges of the panel securely to the table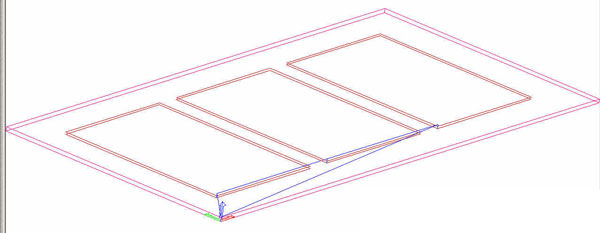
This helped streamline the process considerably by eliminating the need to have two people to get the jig onto the table, to mount the panels on a jig insert, and having to fill screw holes in the back once they were shaped.
From a programming perspective, we chose to have the shaper bit take three passes over the panels. The first and second remove most of the material and the third is a finishing pass to ensure a smooth cove. The ShopBot works from the dead center of the bit, so we needed to know its diameter of the bit to get the cove right. This also meant that a cove needed to be cut into the jig to account for the back half of the bit as it turned, but this was not any real difficulty.
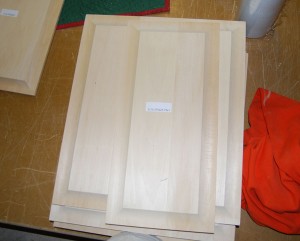
At this point we put the new and much lighter jig on the machine bed, screwed it down, and loaded a panel. We then put the L-chocks as tight against them as we could and started the vacuum pump. After loading the shaper bit, we tried our program. It blew shavings everywhere. There were a few hiccoughs to start with, but they were soon worked out and we produced our first batch of ShopBot-made solid wood raised panels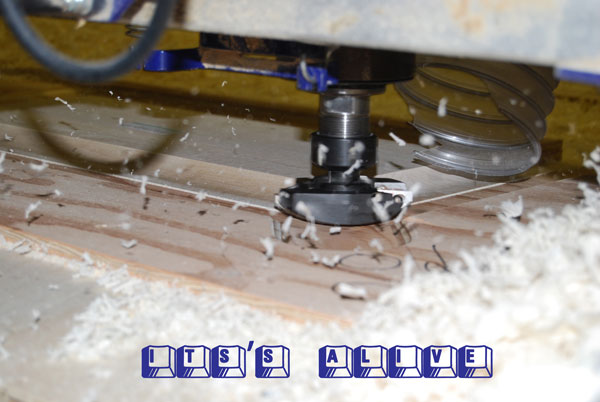
Miscellaneous Matters
When our bit supplier came back and saw some of the panels, he was quite impressed. After talking about the process, he suggested that we offset the bit so it only used part of its radius in cutting as the bit is not really designed to cut material directly underneath it. This seemed like a simple fix. Go back to the programming and add an offset to account for the difference between the radius and the part we wanted to use. In doing this,however, I messed up program and the machine kept getting about an 0.125″ off with every pass. The interaction between the offset, absolute and relative coordinate references, and the need to come onto the panel from the corner, was the cause. I finally figured this out by talking with Phillip Fletcher, who has been ShopBotting for many years. By doubling the offset for the first move onto the corner of the panel and removing it for the second and third passes, we solved the problem.
Due to the large amount of shavings and dust produced by the shaper bit, we decided to get a dust skirt. Our only difficulty was that ShopBot’s current version did not fit our machine. So we built one using the CNC to cut the parts. This helped cut down on airborne dust particles and keeping the table clean. One other thing we realized is that we could size the panels in the same jig that we shape them, by modifying the shaping program to account for a ¼” bit and a .375” offset. This meant that we could put the jig on the router table at the beginning of the process and leave it there until the panels were complete. No need to change jigs, only the bit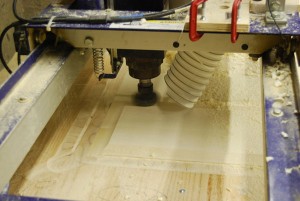
Conclusion
Though the door panels may not but perfect, they are better quality and easier to make than our old panels that were made on the spindle shaper. It was a quite a journey from concept to how the process finally worked and required the input of various different people with a lot of trial and error. In the end we developed a low-cost, but efficient jig system, programming capable of accepting user input both for sizing and shaping our door panels, and stream lined process that produced a clean door panel with smooth, sharp lines.
N.B:
For more information regarding the programming or construction of a ShopBot-based solid wood raised panel door creation system please feel free to contact us at 919.683.6123 or vostro420@frontier.com
Leave a Reply