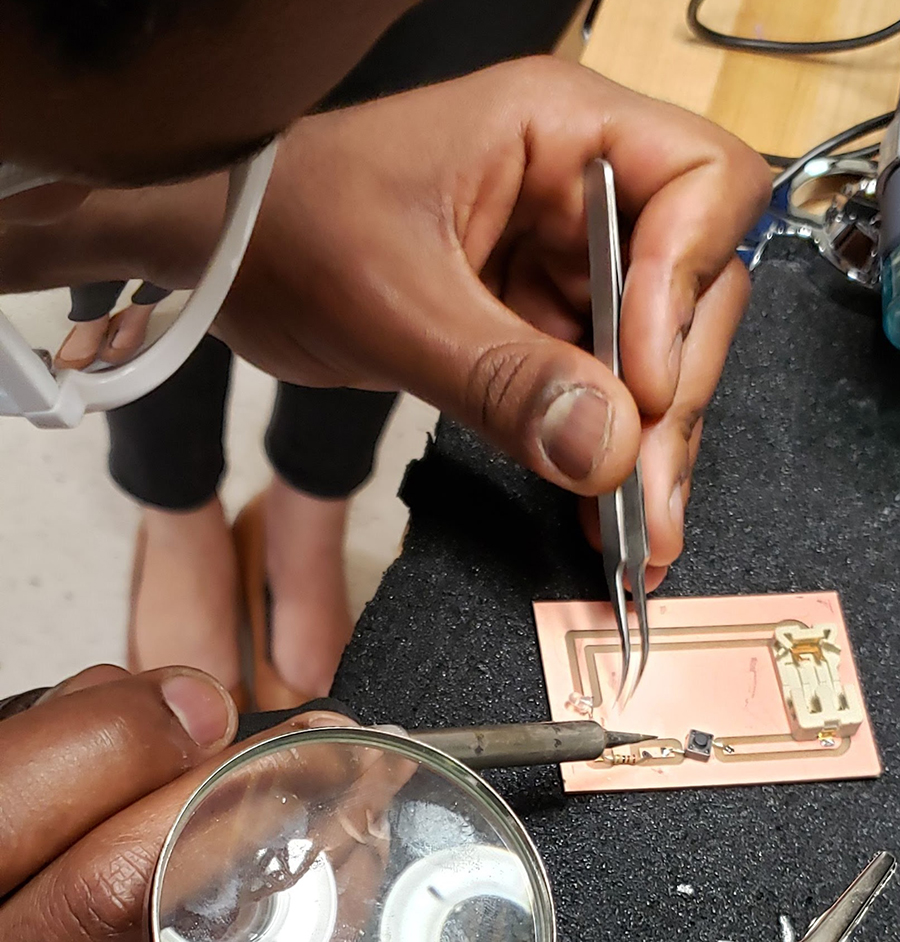
Soldering surface mount components to the PCB board: LED, switch, battery holder.
The first three months of 2019 saw a flurry of Professional Development in Fab Labs from Mississippi/Louisiana to California. Fab Labs have a full quiver of digital fabrication tools and a well-stocked electronics station. The goal for these Professional Development workshops or FFI’s (Fab Faculty Institute) was to do some cross-platform training that would introduce faculty and lab managers to equipment and techniques that are often underutilized. While we go into the Fab Labs with an agenda for each day, the most important aspect is for faculty and managers to have time to “mess about” with some guidance from the FFI leaders.
Simple electronics, sewing and embroidery
In Santa Clara, middle school and high school teachers expressed an interest in learning about Arduinos so that they could help their students in robotics competitions. Arduino is an “open-source electronic prototyping platform enabling users to create interactive electronic objects.” Instead of using actual physical components such as capacitors and resisters to control inputs and outputs, one can write code and load it onto the Arduino. Rather than leap to Arduino without understanding the basics of circuits and electricity, we started with some simple circuits using conductive thread or copper tape, LEDs, batteries and switches.

Basic circuits on the board.


Teachers using popsicle sticks, copper tape, LED’s, batteries and clips to prototype circuits.
With help from FFI leaders, one teacher used VCarve Pro to create a drawing for a circuit, machined a copper blank using a 1/16” bit on the ShopBot CNC, and soldered the surface mount components to the PCB to make a flashlight. One project, several skills.
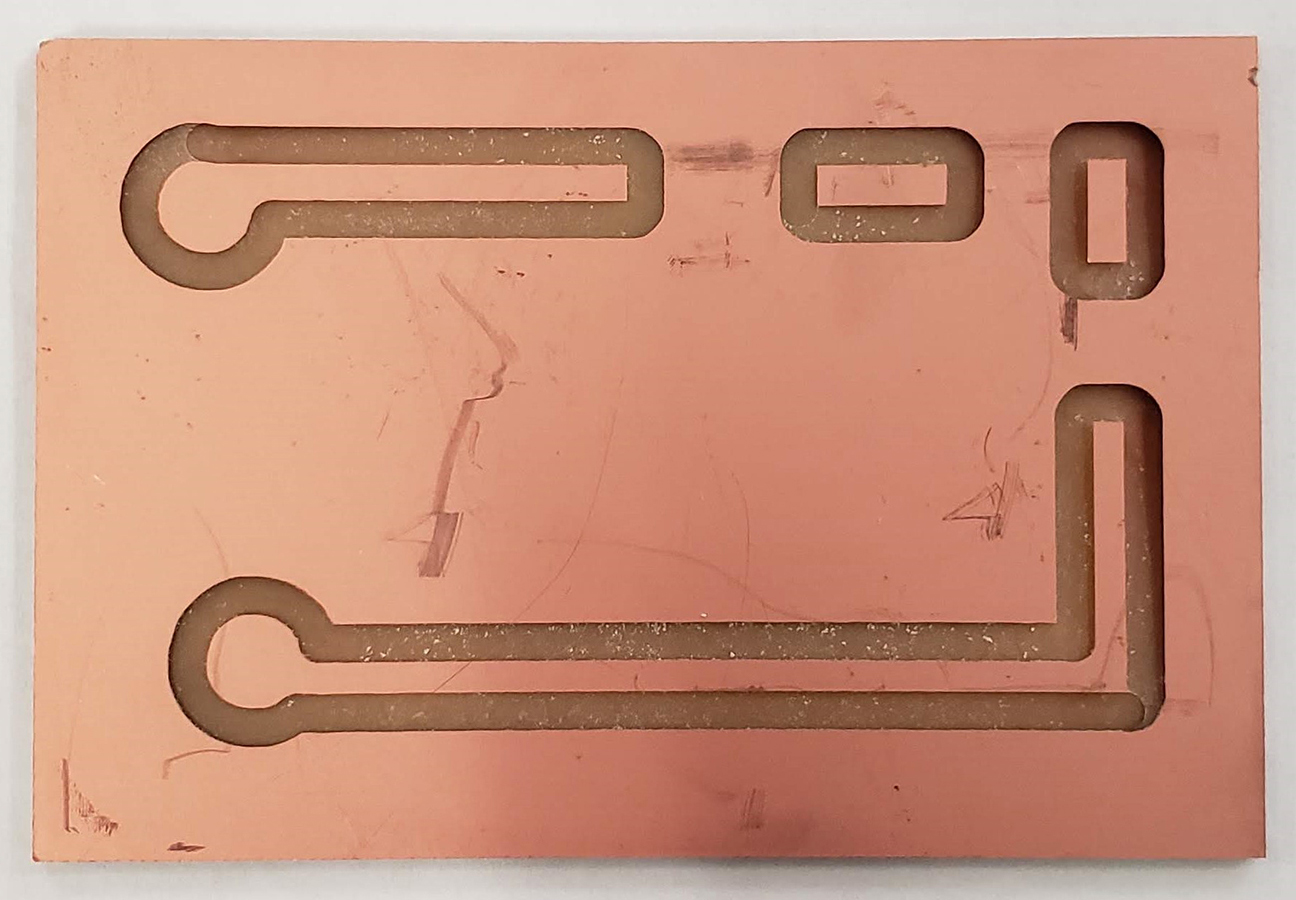
PCB blank with a thin layer of copper on the board, machined on the ShopBot PRTalpha with a 1/16” bit.
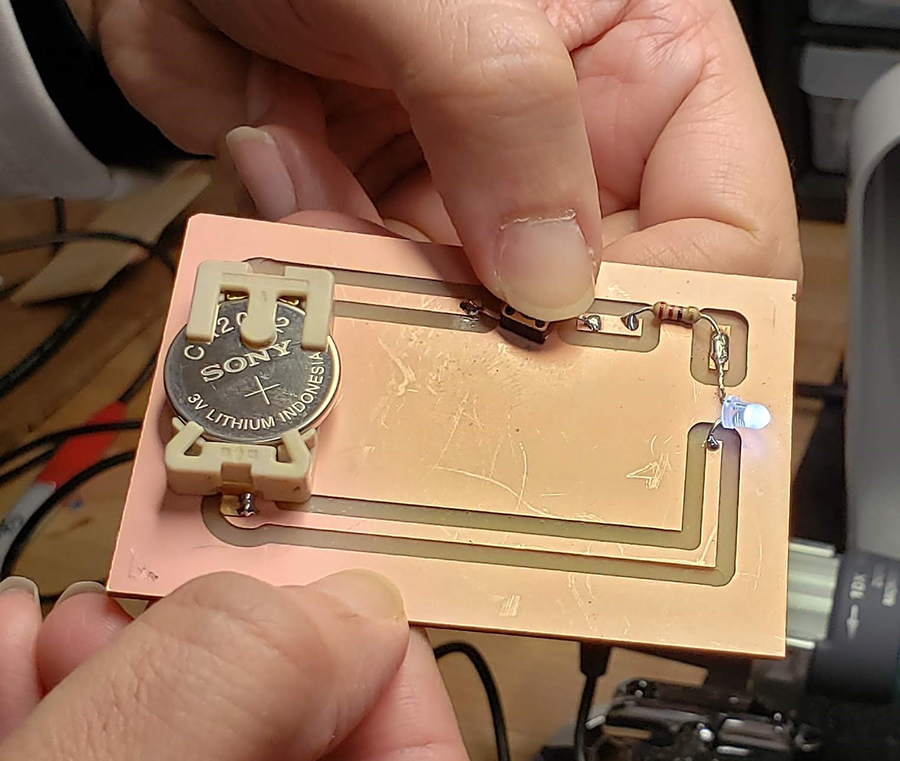
A functioning flashlight.
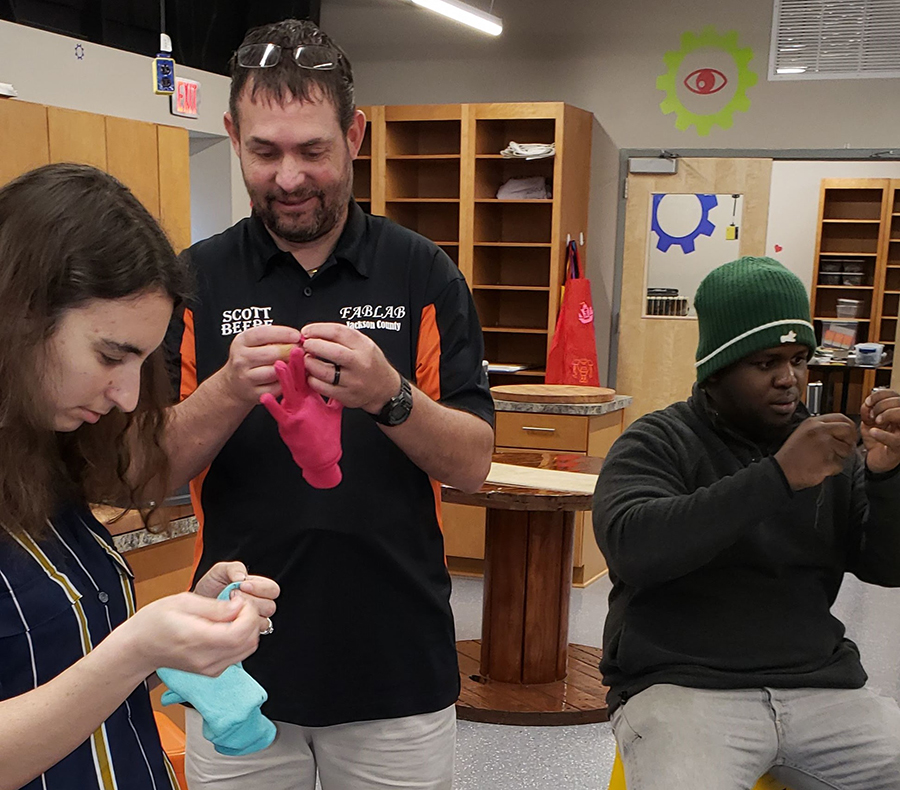
In Jackson County, Mississippi, managers from three Fab Labs joined together: Jackson County (Vancleave, MS), NOLA (New Orleans, LA), and the newest, Jackson (Jackson, MS). They were interested in learning about the sewing/embroidery machines that often sit idle because A) sewing is a skill that is seldom taught in schools or at home B) the digitizing software is unfamiliar to them c) they had never taken the time to actually use the machines.
Again, we started with the basics: hand sewing. In a room of adults, several had never threaded a needle or tied a knot in thread. To make the project a bit more interesting, we used conductive thread to make ordinary gloves into “smart” gloves that could be used with smart phones.
Hand sewing conductive thread onto the fingertips of gloves.
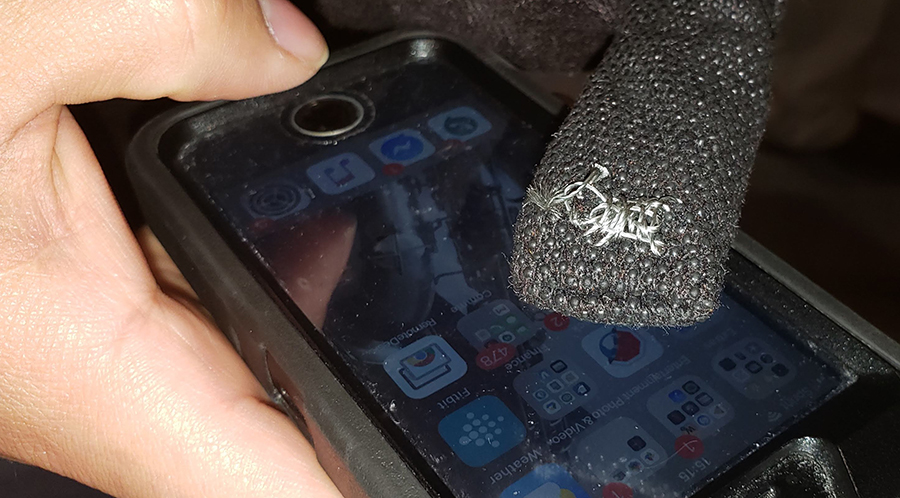
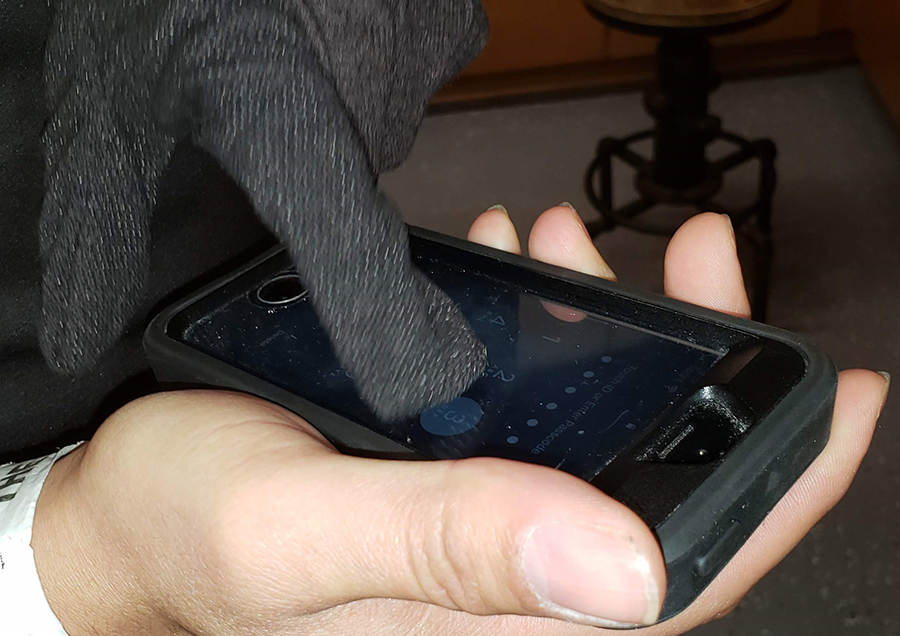
With a simple pad of conductive thread, an ordinary glove now works with a smart phone screen.
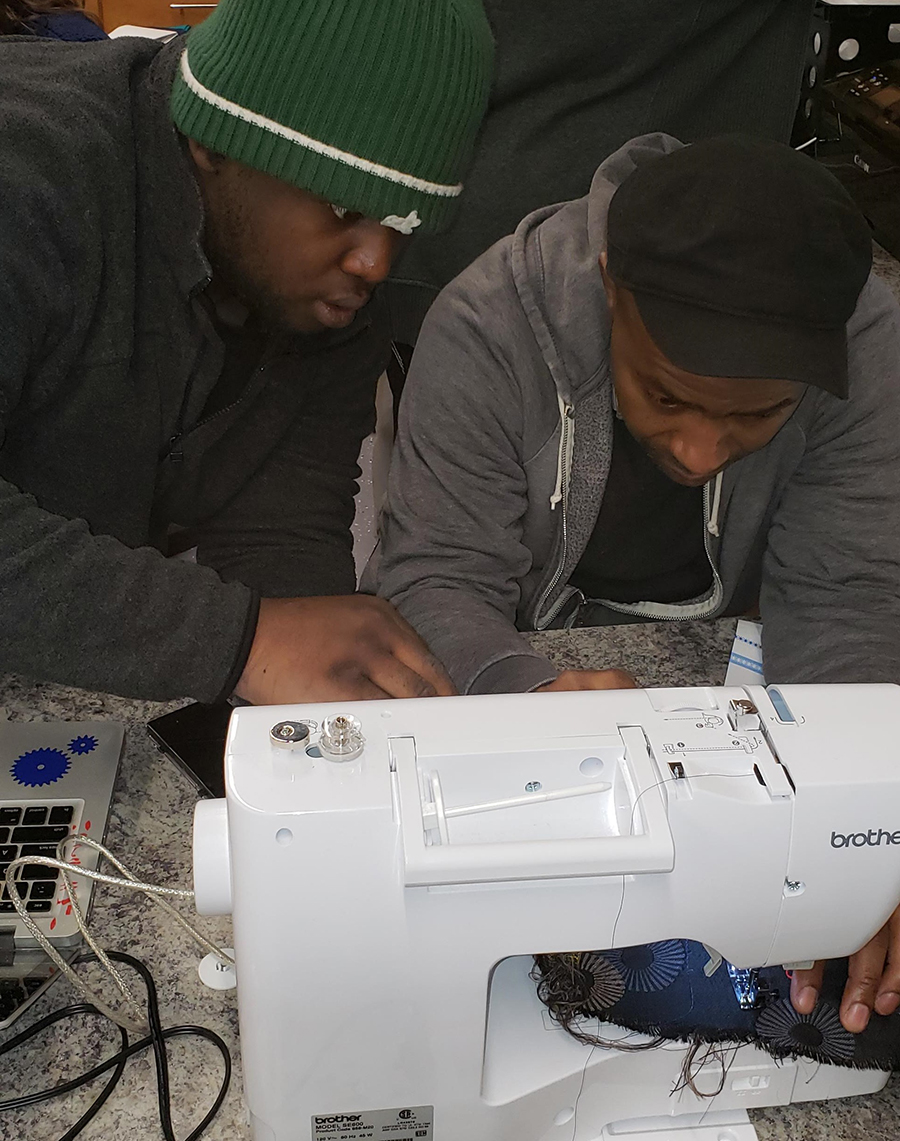
From there, we threaded the sewing machine and used utility stitches to make a little bag, and the embroidery stitches to personalize it. What does this have to do with ShopBot? The digitizing softwares for embroidery machines are CAD programs. Many of the terms and tools used in one software are the same as the CAD software used for the ShopBot CNC or a laser cutter. Who knows which machine will spark enough of an interest in a teacher or a student to get them over their fear of using a computer-controlled or digital fabrication tool? Success on one digital fabrication tool can open up worlds.
Using utility stitches with a sewing machine.
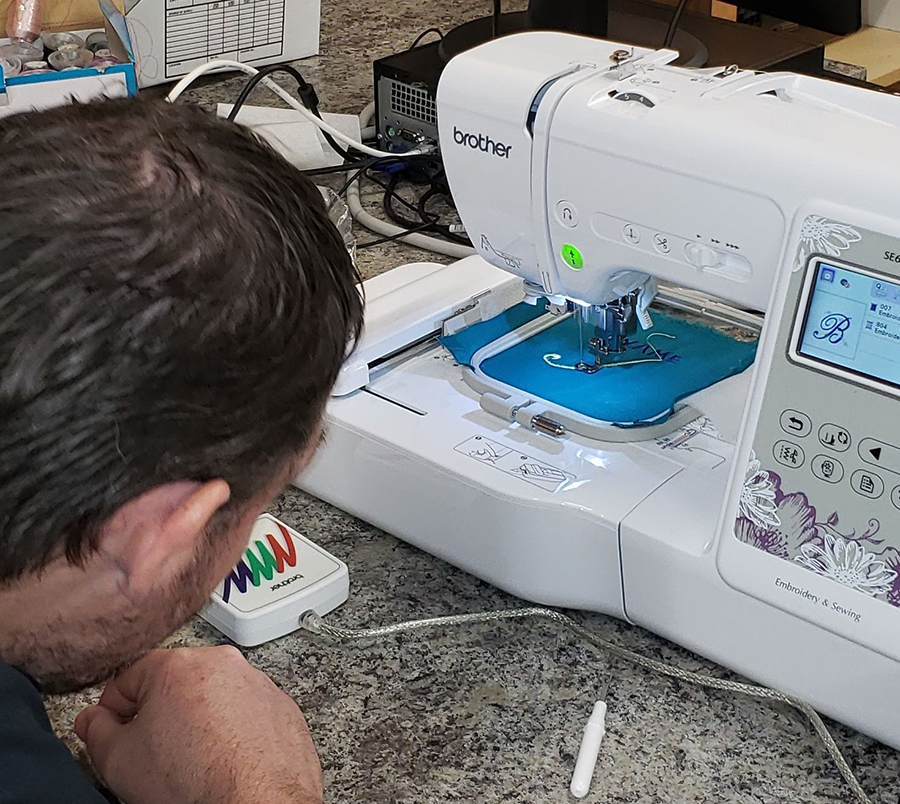
Watching the embroidery machine do its thing.
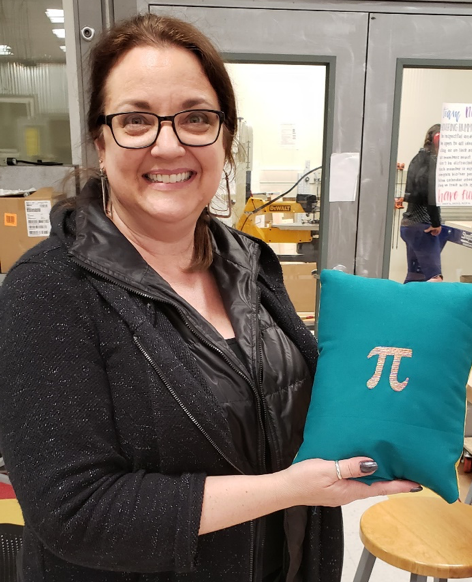
This math teacher from Santa Clara didn’t know she could have an interest in an embroidery machine. Check out that smile after digitizing Pi, embroidering it onto fabric, and sewing up a pillow!
3D Carving, Molding and Casting
3D printing was intended for rapid prototyping of designs, and was not intended for production of multiple copies of the same thing, like rubber duckies or Yoda heads. But its rise in popularity has contributed to the development of many CAD software applications, and even 3D scanners, that can create 3D models on the computer. Many of the same files that can be used with a 3D printer can be 3D carved on a ShopBot, and the resulting model used to create molds to aid in the production of many copies.
At Santa Clara, we imported an .stl file into VCarve Pro for machining on their ShopBot PRTalpha. After sizing onto a 2”x 6” from the local building supply store, we created a roughing pass to clear out the majority of the material. We then used a ¼” ball nose bit to finish the 3D carving. Time from start to finish for the roughing and finish passes: 27 minutes.
Once we had the model, we added a bit of hot glue around the edge to give the mold a little more depth, then filled the model with a two-part flexible mold making material from Smooth-On. After it cured, we pulled the mold from the model. For this experiment, we filled the mold with melted paraffin and crayons. Think soap, plaster, or, with food-grade mold material, chocolate!

Model 3D carved on the ShopBot (27 minutes), and mold made from a two-part material from Smooth-On.
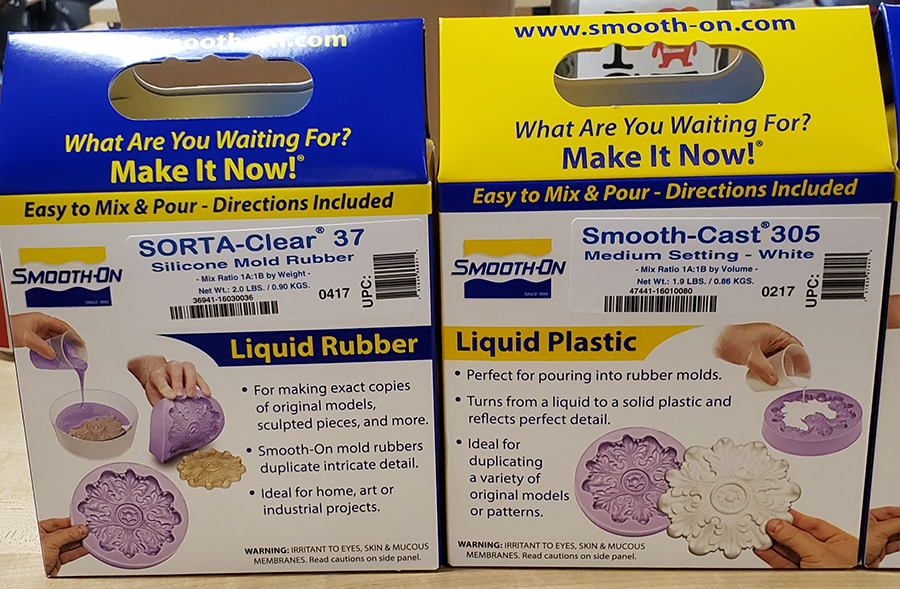
Some of the molding and casting materials available from Smooth-On.
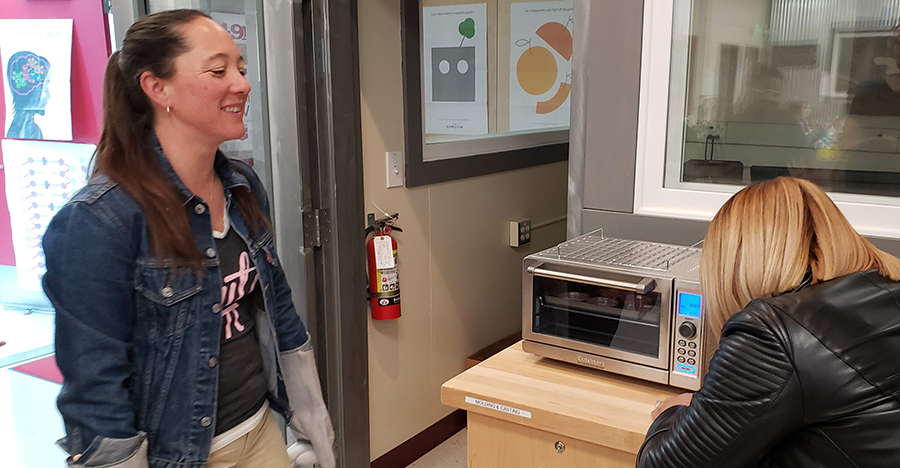
Carefully watching the paraffin and crayons melt in a toaster oven.
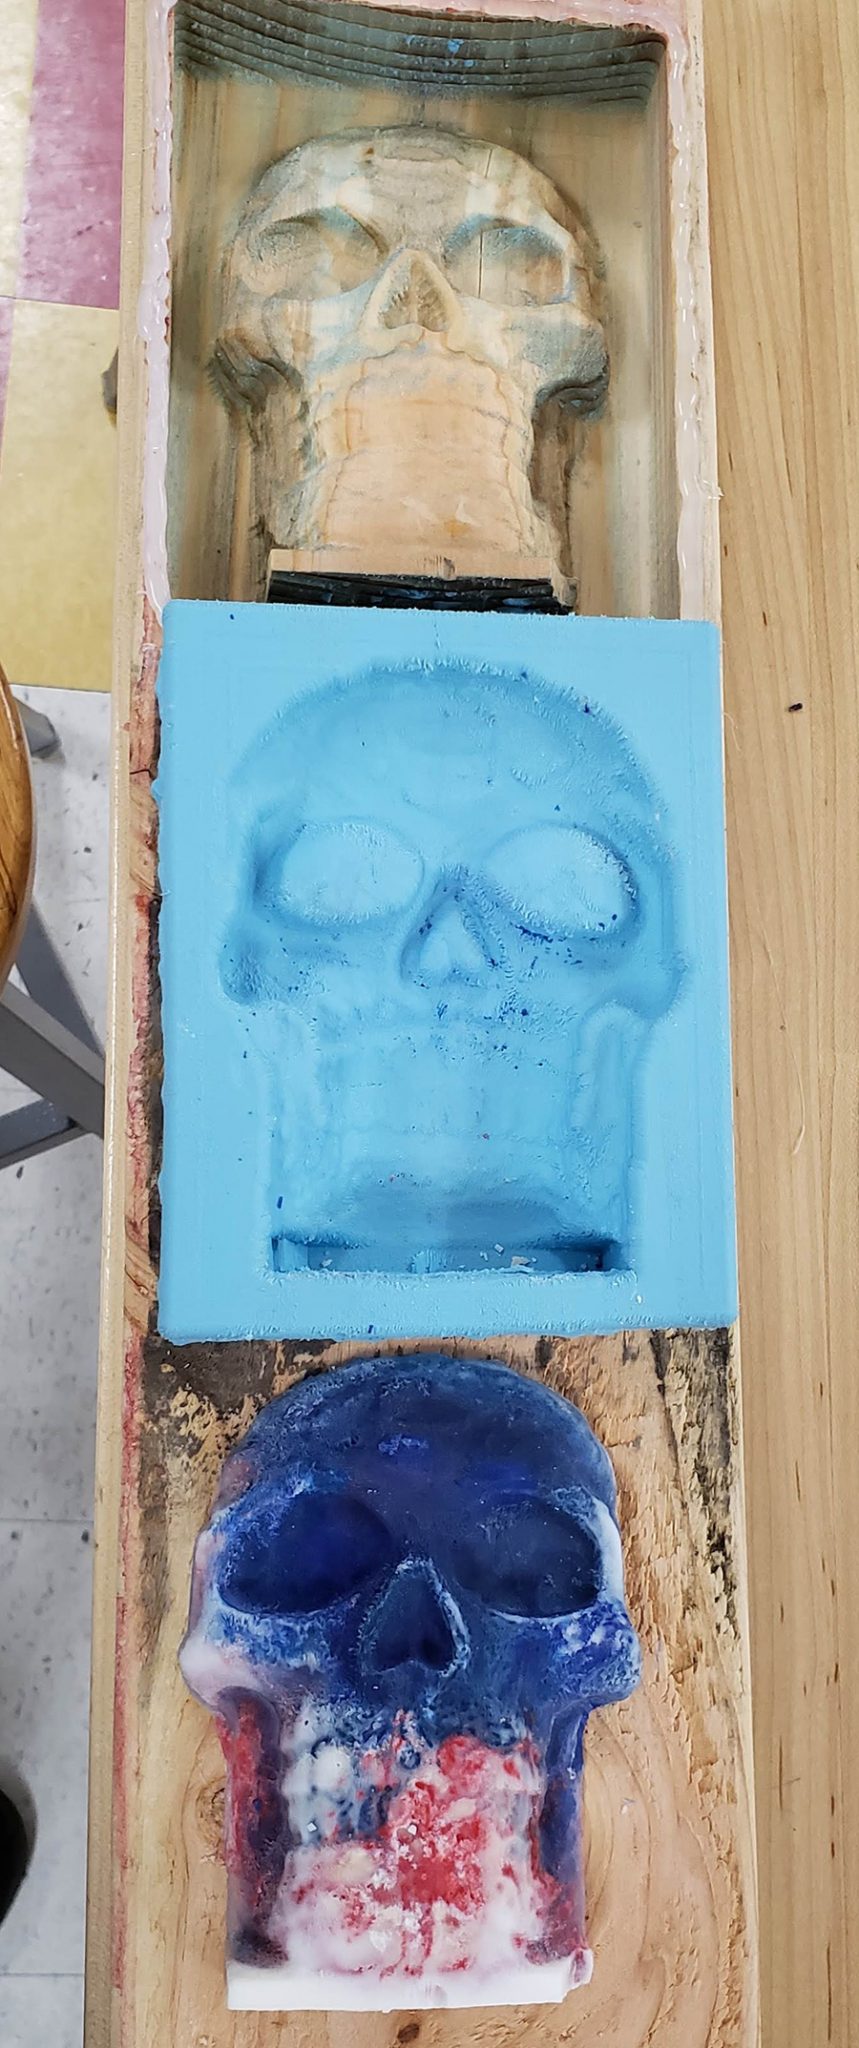
Paraffin and crayons cast in the mold.
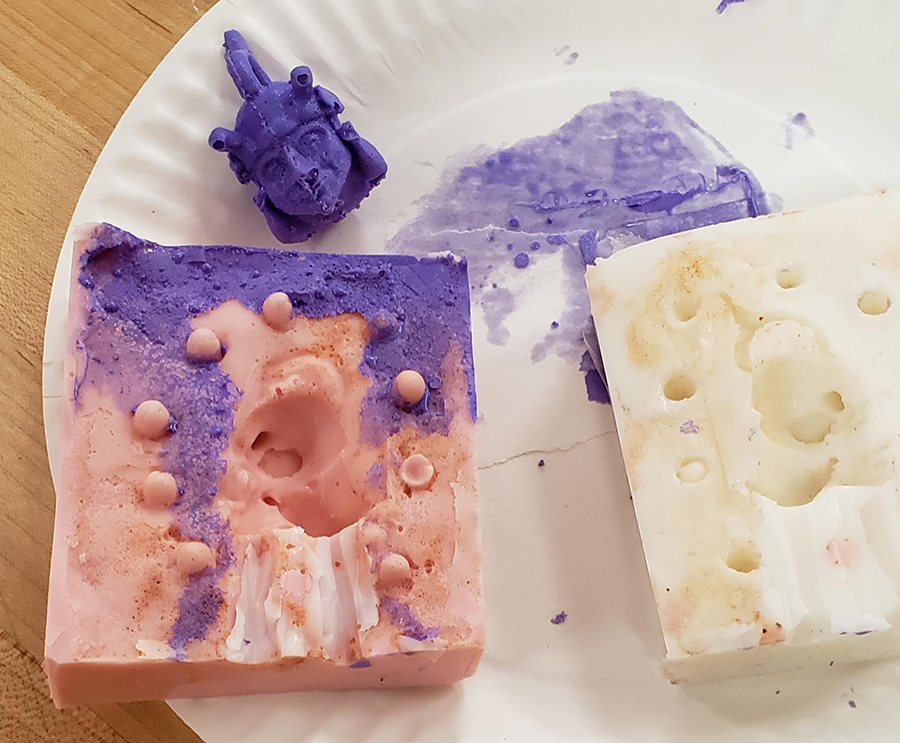
Another object cast in a 2 part mold made from a 3D printed model. Notice the “nobbies” added to align the two sides of the mold, and sprues added to allow the material to be poured into the mold, and air to escape while the material is poured in.
________________________________________________
The leaders of the FFI in Mississippi: Sallye Coyle and Chris Carter
The leaders of the FFI in Santa Clara: Sallye Coyle, Andrea Fields and Chris Carter (www.TIESteach.org)
Leave a Reply