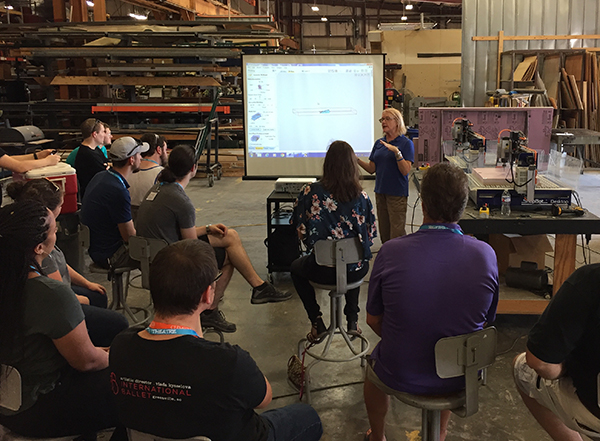
The scene shop at Coastal Carolina University in Conway, South Carolina, has been making good use of their 4’x8’ ShopBot PRSstandard for creating various props for stage productions, including plywood forests of trees. Recently, the theatre department asked ShopBot to conduct a series of Master Classes for the Southeast Section of USITT (United States Institute for Theatre Technology) to learn more about, and share the capabilities of, their CNC machine with other theatre programs throughout the southeast.
One topic that seemed to spark everyone’s interest was 3D carving. With that in mind, the first demonstration was how to import a 3D file, in .stl format, into the VCarve Pro software, which is shipped with each ShopBot tool. Placing the “component” into the software in the correct orientation is a simple process. The model we chose to make was thicker than the 1.5” pink insulation foam that we had available, so we foreshortened the Z-height in the model to create a “bas” or low relief that would not be evident when looked at straight on. Another option to create the effect would be to use the slicing feature available in VCarve to create a series of carvings (slices) that could be stacked up after machining. Since we went for speed rather than detail, we used the same .25” ball nose bit to do a roughing pass over the entire model, and a finishing toolpath over the right side of the model.
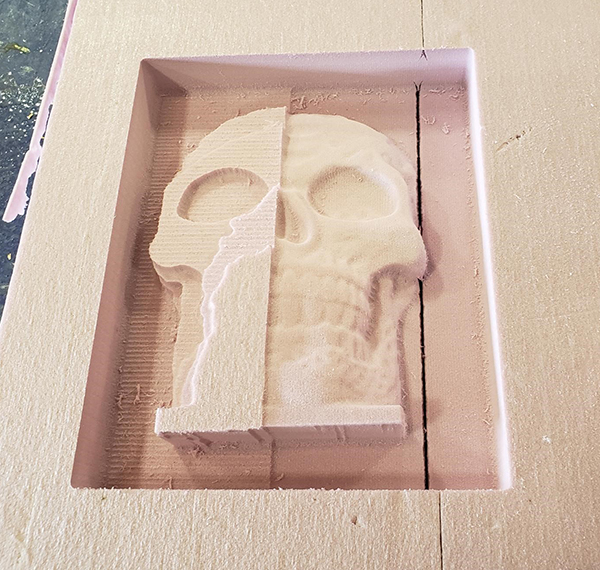
The bas relief of the imported Dia de los Muertos skull was subjected to two different tool paths. The entire model inside the larger rectangle was given a roughing pass to clear away the excess material. For the finishing pass, a smaller rectangle was selected. The stepover and feed/rate were changed to enhance the final result.
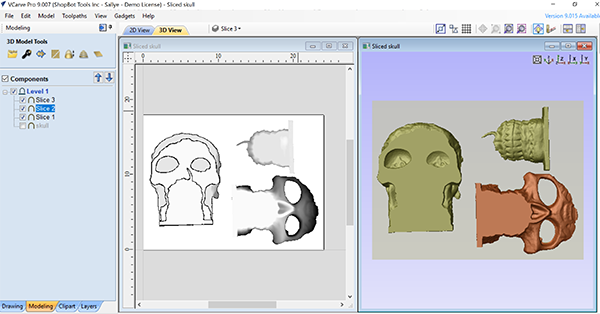
Another option is to use the slicing option available in VCarve Pro/Aspire to slice the model into sections that are the thickness of the available material, and stack them up after 3D carving.
Even experienced ShopBot operators learned something new when going over the basics of ShopBot set-up and the tools within VCarve Pro. Want to join all the open segments in an imported .dxf file or change all the individual segments into a sweeping curve? Want to trace a bitmap? Want to recalculate all the toolpaths in one go? Want to get an estimate of the time to machine a part? There’s a tool for that.
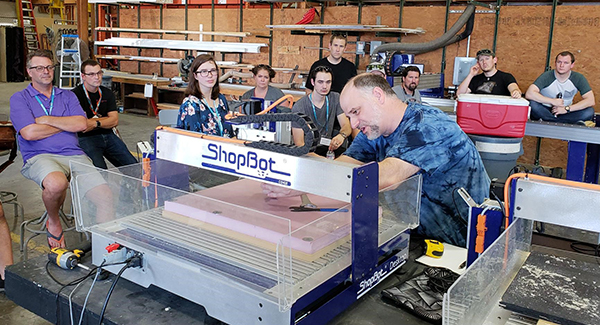
While the skull was being 3D carved, we split up and worked with smaller groups on different projects on different machines. On the big ShopBot gantry tool that belongs to Coastal Carolina University, we worked on a shop stool project that is available on the ShopBot website.
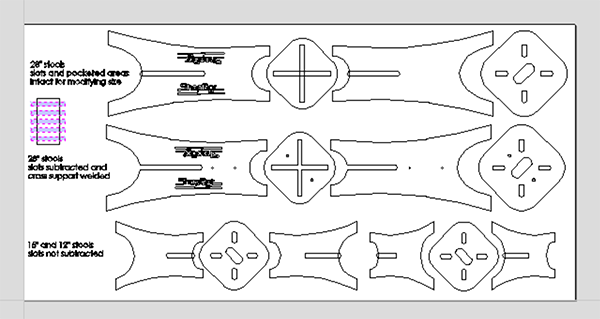
Screen shot of shop stools laid out so that the slot size can be adjusted for the actual thickness of the material.
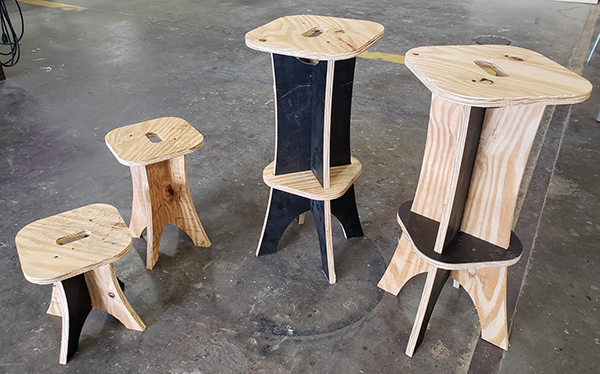
Finished shop stools.
On the other Desktop, we worked with a V-bit. Richard demonstrated how to import a bitmap, trace it, and VCarve the result. The CC was an example of how to use the VCarve toolpath tool to create a raised design by selecting the design, and a border. The CC is reversed so that the carving can be used as a stamp for textile design.
By painting the board first, then carving into it, one can easily create a two-color sign or design. (Or perhaps you have a piece of scrap material, and the board was already painted and placed back in the material pile.)
Session 2 of the Master Class included some additional options. VCarve Pro is 2D CAD and 2D/3D CAM software, so you can import 3D files and toolpath them, but you cannot design them or manipulate one that you have imported. Aspire is the big sister of VCarve Pro, and is a 2D/3D CAD and CAM software. In other words, you can “puff up” 2D vectors into 3D models. Another of one of the tools in Aspire allows you to import a black and white image and create a 3D component based on the grayscale of the photo. As an example, we snapped a photo of a fish on the wall at our restaurant, and used Aspire to create a 3D carving.
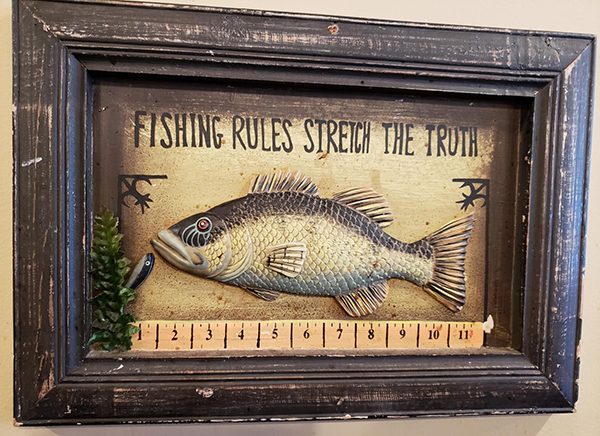
Art object on the wall. Photo snapped to be turned into a 3D component in Aspire.
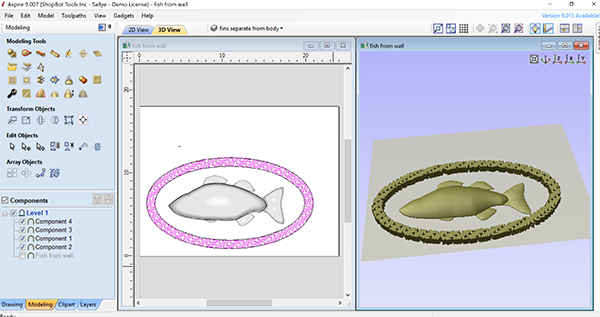
Underlying vectors of fish and a border “puffed up” into 3D in Aspire.
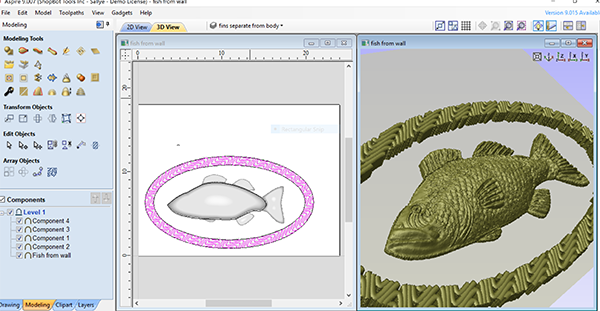
Pattern of fish extracted from photograph and laid over the underlying 3D model.
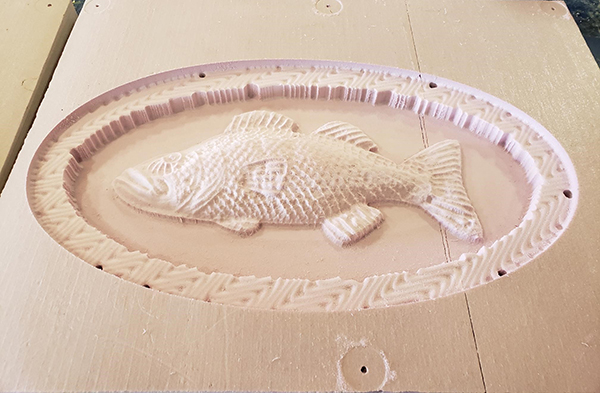
Model machined in pink foam with a .25” ball nose bit.
With the small size of the second session, attendees could get some in-depth instruction on options or ideas that they were interested in. Two-sided machining, setting up jigs for multiple copies, and the rotary indexer for machining in the round were but a few of the topics that had heads spinning and ideas flowing as folks headed back to their own shops.
Leave a Reply