By Jeanne Taylor, August 18th, 2017 
Fab13, the 13th International Fab Lab Meeting, was hosted in Santiago, Chile from July 31 to August 6, 2017. This year’s “Fabricating Society” theme was in action throughout the event. There were six strategic categories: city, housing, innovation and entrepreneurship, environment and energy, education, and decentralization–and each had clearly defined projects.
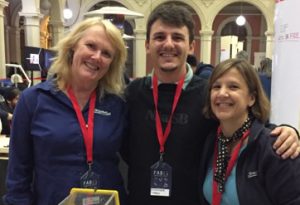
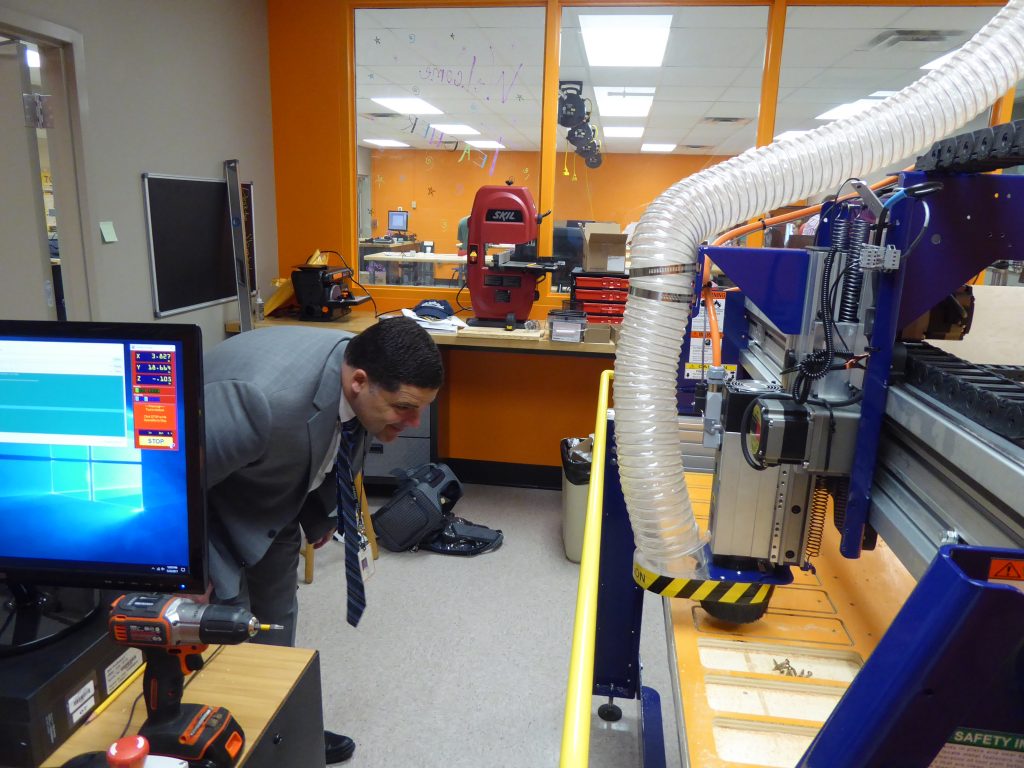
I was able to tag along with Sallye Coyle on this adventure and had the opportunity to participate in the conference, symposium, and the festival. We also visited a couple of University Fab Labs in Santiago that have ShopBot tools, did some ShopBot training, and did a tool tune-up at the Center for Innovation at Pontifical Universidad Catolica De Chile.
During the conference, presentations and smaller working breakout sessions happened daily, where attendees were active participants and took on specific roles/tasks to help move the six defined initiatives forward. Discussions included: Prototyping a Sustainable Future, Making New Economies, Decentralization– Mobile Fab Labs & Emergency Solutions, Foundations and Regional Networks, Fab City Working Groups, How to Make Spaces and Things: A Pedagogical Approach, and so many more.
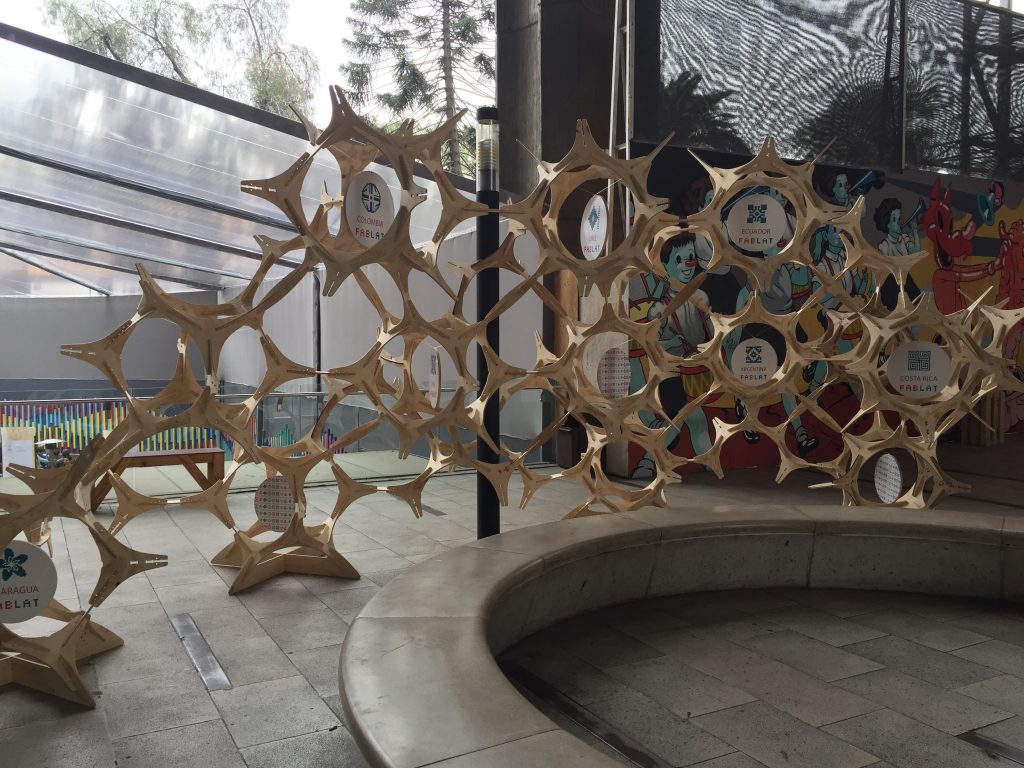
The impromptu discussions and collaborations that extended beyond the scheduled events provided a great deal to think about. Groups from the US, Brazil, Israel, Peru, and Africa, to name a few, were working together to discuss moving forward on the six initiatives–as well as other ideas–well into the evenings throughout Santiago. We talked with the FabLat group at length about their project installed during Fab13 and about their plans for another collaborative project at Fab14. See the video about their project.
(Translated Video description below)
PABELLÓN LAT. is a project that was born as an initiative of the Latin American network of digital manufacturing laboratories. Its objective was to integrate Latin American countries and create a team committed to the development of the region and improving living conditions in Latin America.
The pavilion was placed in the context of the world congress of Fab13 digital manufacturing laboratories “fabricating society” in Santiago, Chile in August 2017.
To achieve this objective, the REGIONAL INTEGRATION LAT PAVILION was visualized by using wooden components cut by computerized numerical control (CNC) machines in a shape simulating atoms. When connected, the atomic shapes generate a larger molecular structure. Each of the atoms represents one of the countries that contributed to the project, which, when united with the each other, represent the Latin American network as a single molecule. In the process, the identity of the Latin American network has also been developed, which is applied to show the link between the 12 countries that have joined the project.
The manufacture of the pavilion was contributed to by several countries Brazil, Ecuador, Uruguay, and others. The pieces were transported to the event to be assembled in Chile along with locally made pieces, resulting in an assembled structure with materials from different countries in a united effort.
LAT PAVILION became the materialization of a collaborative and distributed effort among 12 countries of the region that united their ancestral identity with modern technology—and an incredible human team with a view to generating projects of high impact in the region.
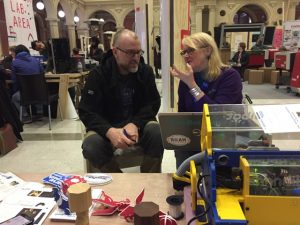
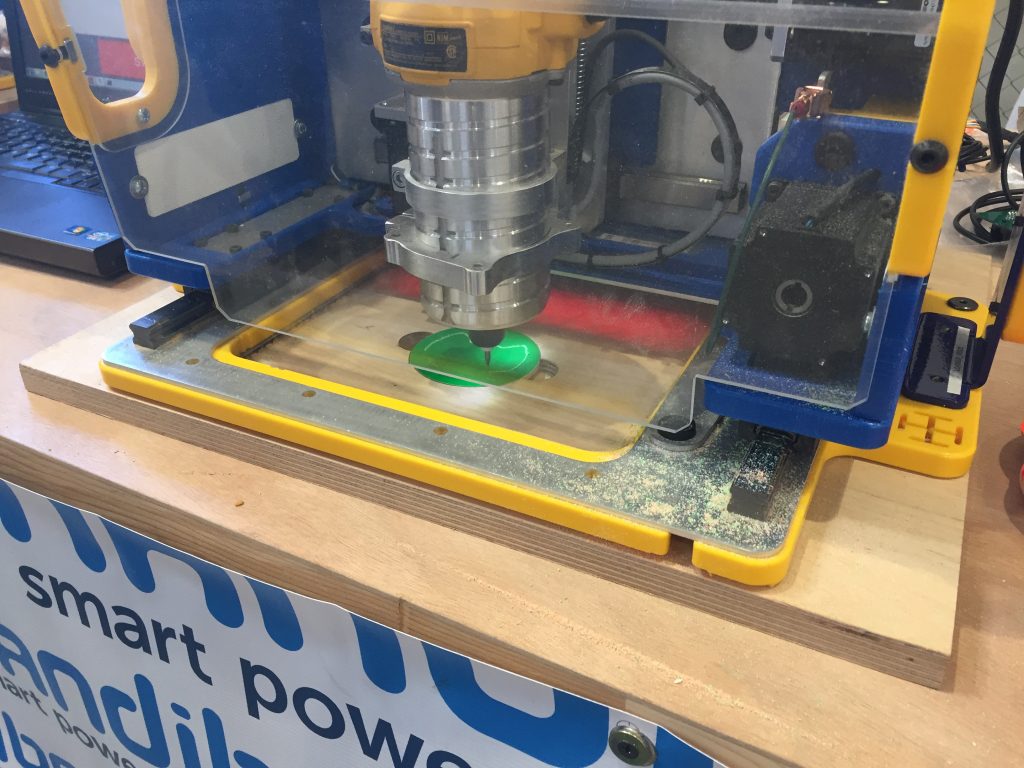
Sallye and I brought along a Handibot® Smart Power Tool to show during the Humanitarian Lab Brainstorming and Strategizing Session. We shipped the Handibot in a plywood crate and brought along a zip tie connected plywood box (both designed by our very own Bill Young) to demonstrate how tools and other supplies might be transported for the Humanitarian Lab effort globally.
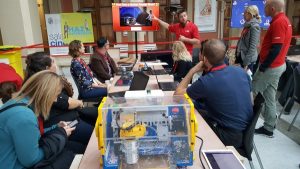
Handbot in tow, we talked digital fab, ShopBot, and Handibot throughout the week. The Carnegie Science Center in Pittsburgh, PA invited us to help with cutting parts for their workshop: The Sphero Robotic Rescue Mission, A Making + Coding Engineering Challenge; teaching leaders from other Fab Labs workshop ideas to take back and integrate into their programming.
We held a raffle for one lucky winner to take the Handibot home. The winner, Dominique Torrin from New Caledonia in the South Pacific, now has the very first digital fab tool for his brand new lab. Can’t wait to see what fun things this group makes! Congratulations!

Of course, we had to take a couple days to check out the sites in Chile while we were there. We went from the middle of summer in North Carolina (90-102°F) to Chile’s winter (40-60°F). One highlight was getting to visit two of Pablo Naruda’s three homes. He’s known as “the Poet” in Chile and beyond, and we learned about his impact on the people and politics of Chile. Whether we were pausing for a bite at a street cafe in Santiago, climbing the steep steps in Valparaiso, or admiring the majestic snow capped mountains; we found Chile to be a vibrant country with a thriving culture that respects the past and visibly looks towards improving the future.
We are looking forward to participating at Fab14 which is scheduled to take place in July 2018 in Toulouse, France. The Fab Lab Festival will be held in different cities throughout France. The Fab City Summit in Paris will be held the following week. Take a look at this video for more information.
Getting to know the amazing people involved in Fab Labs across the globe is an ongoing and incredibly inspirational.
By ShopBot, August 4th, 2017 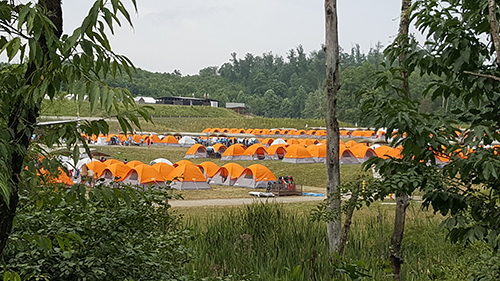 One of the many campsite areas from the 2017 National Scout Jamboree The 2017 National Scout Jamboree at the Bechtel Summit Reserve in West Virginia was a huge event for makers and an opportunity for 40,000 scouts and scouters to learn how much fun a Makerspace can be. The National Jamboree set up a large area full of tents called STEM Quest with opportunities for scouts to earn merit badges and discover multiple technologies. One of these tents was a MakerSpace tent set up by Cognizant that included many activities, such as drone flying, robot programing, sewing, silk screening, soldering, and CNC machining, to name a few. ShopBot sent a couple of guys to help introduce the scouts to CNC with two Handibot® Smart Power Tools and a ShopBot Desktop.
Throughout the 10 days of the jamboree, and with the help of several adult scout volunteers, almost 2000 scouts took the opportunity to make badges on the two Handibots that were brought to the event and using the FabMo app, Badger. There were also multiple opportunities to teach some of the scouts how to make a project that was a little more involved. Most of these scouts chose to make a name badge that they could wear on their uniform after the jamboree. The training to make these badges involved VCarve Pro for converting a raster image to lines and arcs, toolpathing, how to set up the tool and then cut. This was an amazing experience, it was a ton of fun to teach these scouts about CNC and see the smiles on their faces when they finished making something on their own, for the first time in most cases, on a CNC machine.
~ Reported by Gordon Bergfors
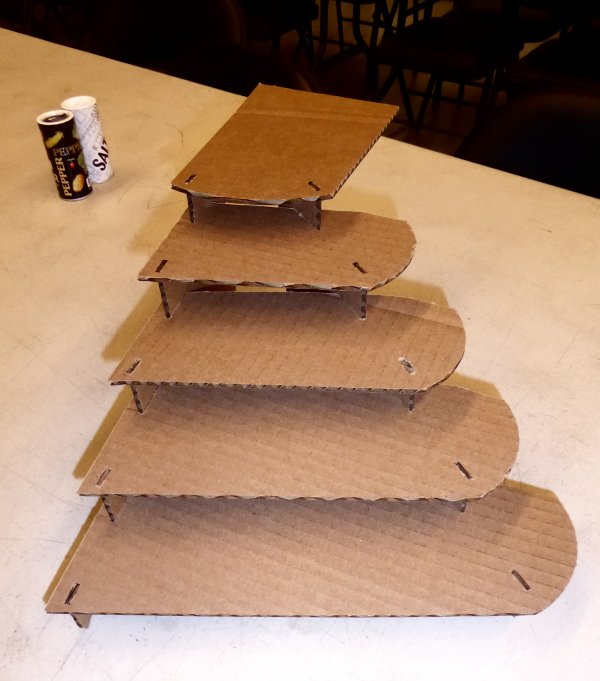
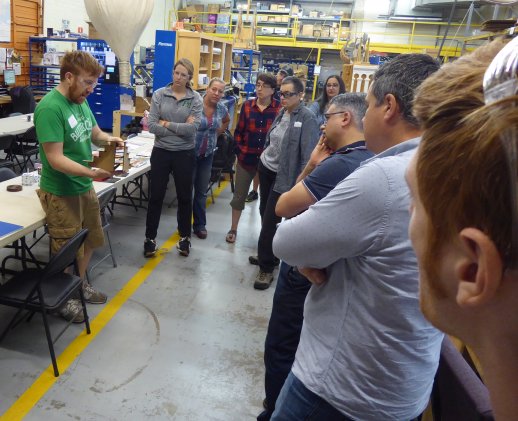
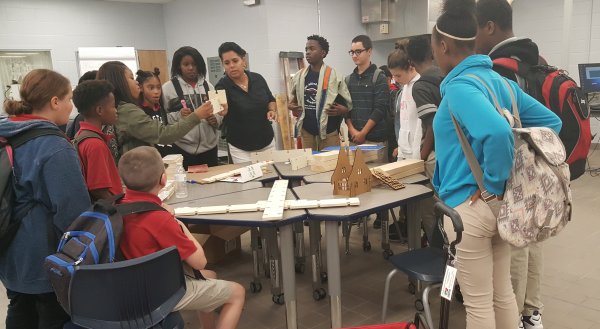
By Sallye Coyle, August 3rd, 2017  Slide together steps prototyped and produced during July’s Digital Fab for Educators.
Traveling to Durham, NC from Baltimore, MD with his wife and elderly dog gave one of the July 2017 Digital Fabrication for Educators Workshop attendees, Frank, an idea of what to create during the workshop at ShopBot. The old girl (canine) had a difficult time getting into the back seat of the car, and helping her by lifting her hind end into the car seemed to cause her pain. So Frank decided to design and fabricate a set of slotted stairs that he could assemble without hardware.
Frank used SketchUp to design the steps. Since SketchUp is a 3D rendering CAD program, he could view the design from several orientations, as well as change the thickness of all linked components (like the slots) in one fell swoop. Plus, it is easy to import a SketchUp file (.skp) into VCarve Pro for machining in 1/2” plywood. Once he had all of the parts, Frank scaled them down so that he could use the Epilog laser to cut a prototype in cardboard. He then exported the vectors from VCarve Pro in .eps format to bring them into Corel Draw for “printing” on the laser cutter.
 Cardboard model of car steps.
 Frank talking to the class about his cardboard prototype cut on the laser cutter. Thank you to Epilog laser for loaning ShopBot a laser for the workshop.
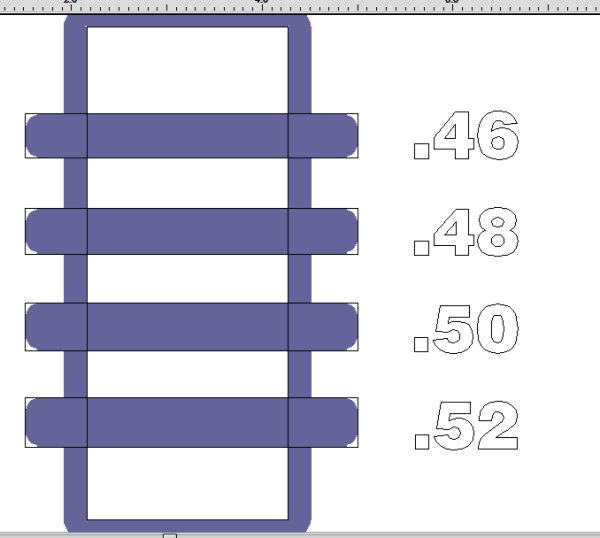
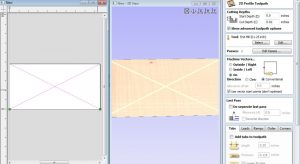
Once he was convinced that the design would be stable and easy to assemble, Frank set about prepping it for machining on a ShopBot. The first step was to test that the slots were the correct size for the half inch sheets of plywood that were available in the shop. Sallye (the workshop instructor) helped him to create a test piece that could be fitted onto the edge of the plywood to determine what size to make the slots so that the pieces fit together easily and without too much slope.
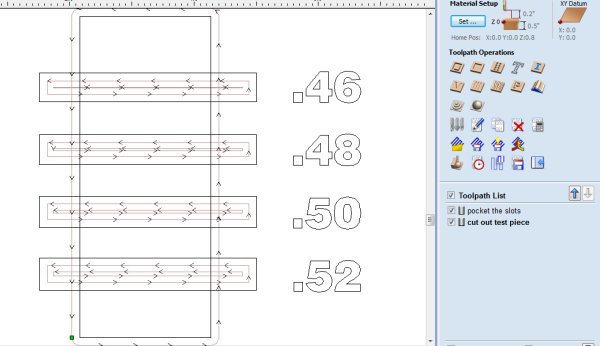 Start with a larger rectangle that defines the total size of the test piece. For the slot sizes, create a series of rectangles of different heights that extend beyond the test piece. (See below for why the width of the slot test pieces extend beyond the test piece.) Toolpath the slot test rectangles as a pocket that goes about halfway through the test piece. Use “profile” to the outside to cut out the test piece. Remember to use the same bit and cut direction for the test cut that will be used for cutting out the final parts.
 Clicking the solid box in the lower right corner of the toolpath screen will show what the bit will actually machine away. Note that the radius on the inside corners of the slots. By having the slot test rectangles extend beyond the actual cut out, the rounded inside corners will be cut off when the test piece is cut out, so the slots will fit on edge of the board.
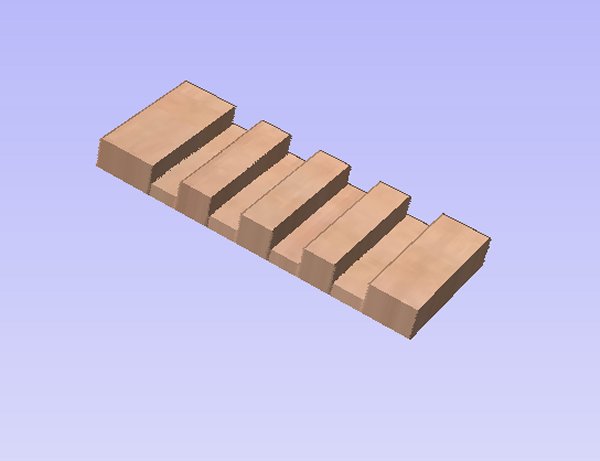 A simulation of the resulting test piece. Mark the slot sizes with a permanent marker, and indicate which bit (size and geometry such as up or down spiral) and cut direction (climb or conventional) was used for future use.
The half inch Baltic birch available was actually a 1/2” inch thick, so the slot size did not have to be adjusted in the original CAD drawing. Frank used VCarve Pro to add dogbones to each of the inside corners to allow for a square edge to fit into it. Then, he laid out all the parts on the 4 x 8 sheets of plywood and set the toolpaths to machine with a 1/4” down spiral bit.
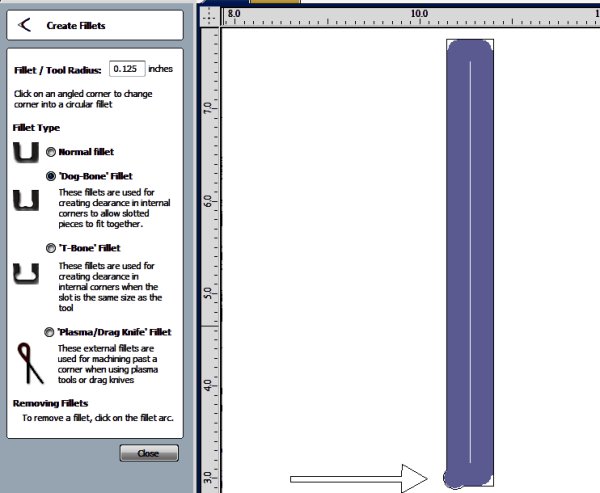 The closest that the spinning bit can get into an inside corner is the radius of the bit. Adding a dogbone to each inside corner creates space for a square corner to fit into the slot. Look under the “Fillets” icon to find the dogbone feature.
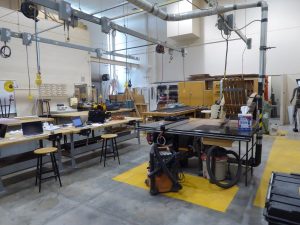
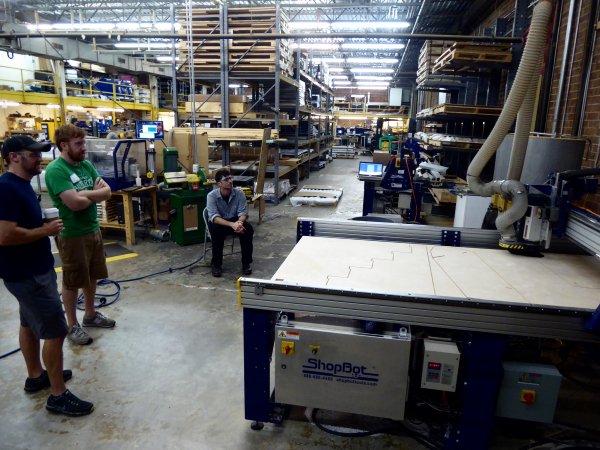 Watching ShopBot’s production tool with Automatic Tool Changer (ATC), vacuum hold down system, and dust collection cut out the parts is a group activity.
The actual machining on ShopBot’s production tool with Automatic Tool Changer and vacuum hold down system took a matter of minutes. After a little sanding, a group took the steps out to his car for a test run (as seen in the photo at the start of this blog post). Frank found he could assemble his steps in a minute and a half. The half inch plywood flexed a bit more than he would like for his 50 lb. dog, but another attendee, Kirsten, suggested that he use plastic drink cups as supports to increase the structural integrity of the wider steps. We can’t wait to hear (and see) how his pup likes her new stairway.
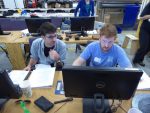
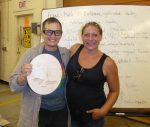
Below are more pictures of the projects completed and the friendships made during the 3 day workshop.
-
-
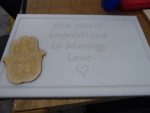
Dare (Oser) to take part in this workshop.
-
-
-
-
-
-
-
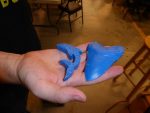
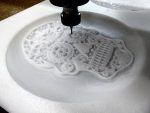
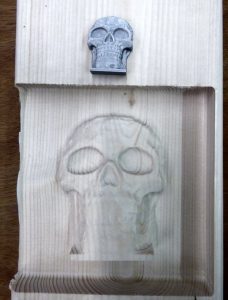
3D Carving of a cultural symbol for molding and casting.
-
-
-
-
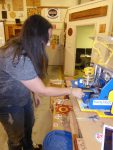
Handibot station
-

-
-
By Tim Babiasz, August 1st, 2017 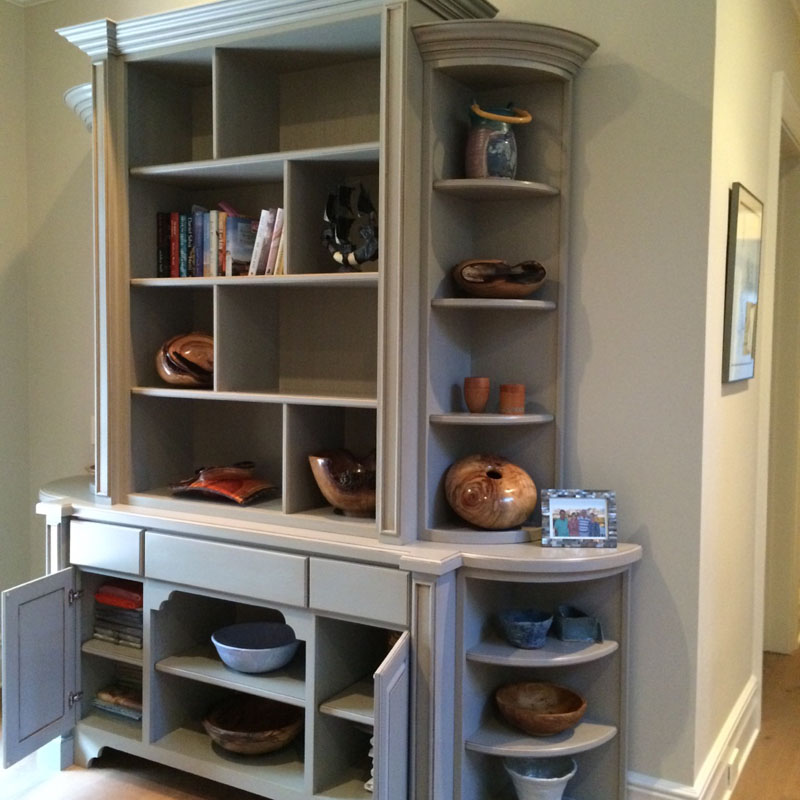
syz·y·gy [siz-i-jee]
noun
Astronomy: An alignment of three celestial objects, such as the sun, the earth, and either the moon or a planet.
Any pair of connected or corresponding things.
For most people, the word “syzygy” seems like something out of a foreign language dictionary. Primarily used in astronomy, the term refers to the lining up of multiple objects in space. However, it also can refer to any pair of connected or corresponding things. For Keith Larrett, the word has an even deeper meaning: his wife used it in conversation one of their first dates, and it stuck with him. So much so, in fact, that he took it as the name of his Palm Coast, FL woodworking business, and he’s been producing some amazing built-in cabinetry and CNC furniture projects for both local and out-of-state clients.
A Built-In Client Base
Prior to going full-time with Syzygy, Keith spent over a decade installing cabinets in the Palm Coast area. In tackling all different kinds of installation situations, he became more and more interested in the design and brainstorming aspect of working with unique spaces rather than just hanging them, and eventually started doing some design on the side. Thankfully, the client base looking for design overlapped with those in need of installation, and after a while he found himself providing both.
As his client base grew from word-of-mouth and referrals, the possibility of full-time custom furniture became more of a possibility. Keith found himself becoming more and more involved with the planning, brainstorming, and design component of CNC furniture installation, which required more onsite measurements and working from pictures to figure out how things would work in unique spaces throughout homes and businesses. Eventually, he realized that with an upgrade in equipment, he’d be able to open up a whole new world of possibilities.
ShopBot and Cabinet Design
When looking for a tool that would allow for Syzygy to work full-time, it was very important that whatever he bought be compatible with eCabinets. Keith had gained some experience with the program over the course of the past several years, but he had some trouble finding a well-built tool that could withstand daily use and make the most out of the software. He was fully new to the idea of a CNC tool, but everyone he had spoken to had mentioned that it was a must for any woodworker’s shop. After asking around, the lone candidate was the ShopBot PRSalpha. He invested in a PRSalpha with 5′ x 8′ table with Automatic Tool Changer and immediately realized its importance to his business. Not only was it compatible with cabinet software, but it could handle sheet goods of every type, from MDF and plywood to plastic and acrylic.
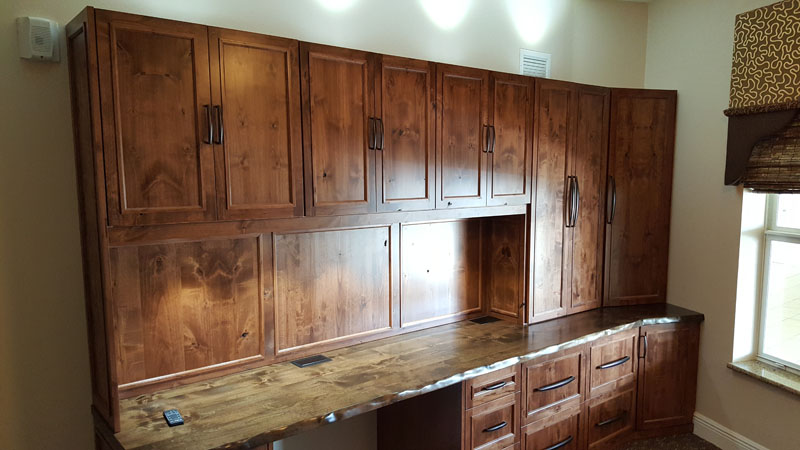 One of Syzygy’s most recent installations, a built-in office desk. “When I first bought my PRSalpha, I thought it would do everything for me,” says Larrett. “But what I’ve learned since is that it’s even more important than that: it doesn’t do the work for me, it allows me to do work that wasn’t possible before, and do it with more speed and precision.”
Unique Process for Unique Projects
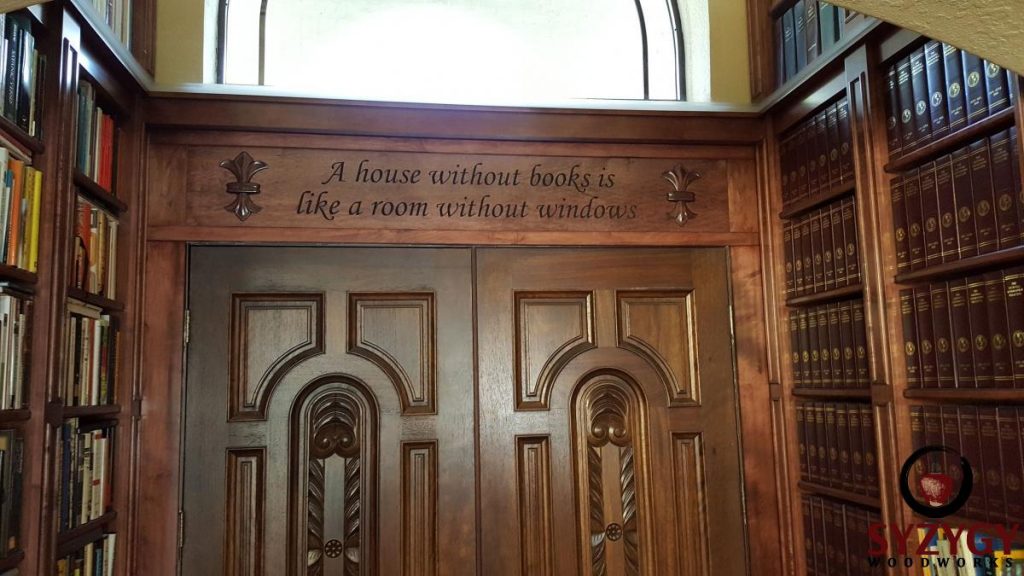
When it comes to difficult projects, Keith doesn’t shy away from trying new things: he often goes into a client’s space having little more than a vague idea of what they are looking for. In fact, his first client challenged to create a huge bookcase installation that filled a 20-foot high 4′ x 8′ foyer and had a layer of acrylic that one could actually walk out on! After going over to visit and take measurements, he entered his shop with a rough sketch, dimensions, and a few ideas.
Knowing that he could cut all of the parts and make adjustments on the ShopBot made things a little easier for Keith. He was able to machine the intricate designs needed for all of the detail work, including the Horace Mann quote that appeared on the header into the main home: “A house without books is like a room without windows.”
A job of this scope was something that Keith had never done before, but as he puts it, he “figured it out as he went”, since he was able to carefully engineer the entire installation just as if it was kitchen cabinetry: by making sure everything is properly mounted and built into the space, there’d be no worries that it would be done right. And any prototyping could be done on the ShopBot before it was officially installed.
Still, with all of his confidence and experience, it was his brief time as a professional skydiver that came in handy the most once installation was completed.
“I’m not going to lie,” laughs Keith. “That first step out onto the acrylic floor was kind of a ‘leap of faith’. But I’m confident that everything in that room is there to stay.”
 Keith Larrett demonstrates the support of the clear acrylic floor. Keeping the ShopBot Busy
Thanks to his great work, reputation, and huge fan response on social media, Keith has no problem finding work these days. As if running a full-time furniture business wasn’t enough, however, there are still times when the ShopBot isn’t being used. During these hours, while Keith draws up plans or uses the woodturner, he offers CNC routing services to his local Palm Coast community. This way, as Keith says, “the ShopBot stays as busy as I am”.
By Tim Babiasz, July 14th, 2017 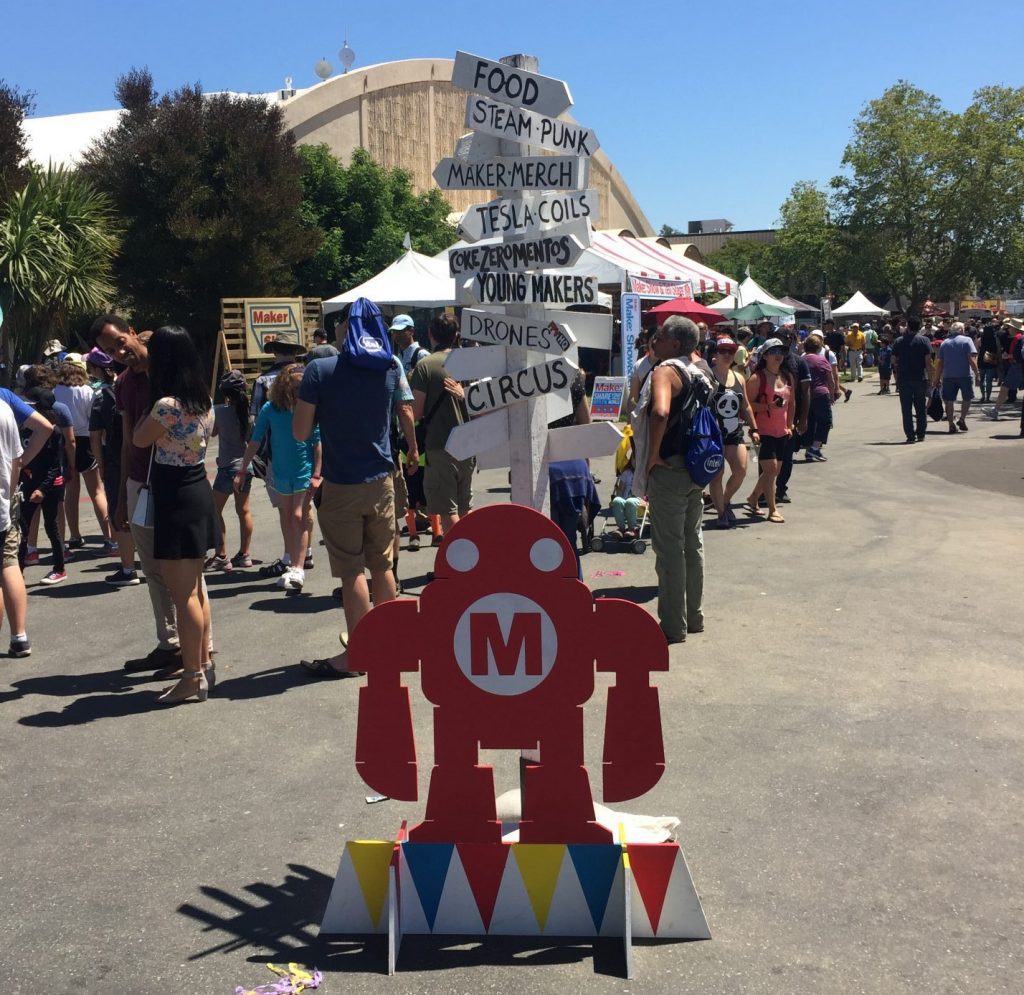
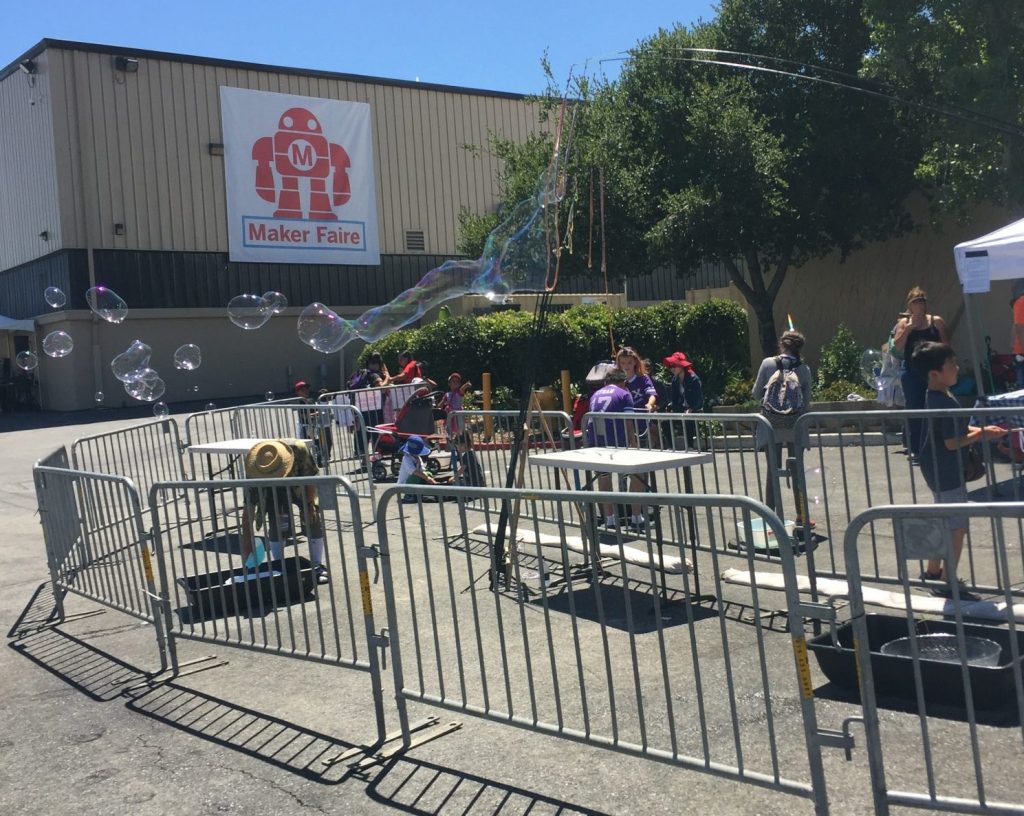
This last May, ShopBot headed to San Mateo, CA for Maker Faire Bay Area, the West Coast’s premier gathering of makers, tinkerers, creators, and thinkers. While the event’s intensity and creativity was familiar to past Maker Faire events, there was also a distinctly Californian vibe to all of the proceedings, from the consistently beautiful weather to the intense arts and entertainment-driven crowd.
 Sunshine was in no short supply at this year’s event, making for some wonderful outdoor displays. The ShopBot booth was the first to greet Makers as they entered the gargantuan Warehouse 2, which housed all of the event’s fabricators, craftspeople, maker spaces, and science displays. At the booth were two Handibots cutting badges with the FabMo Badger app, and a DesktopMAX cutting skateboards, which were a huge hit at New York Maker Faire back in October of last year. In addition, the ShopBot team was joined by Russ Wade, who drove all the way from Chiloquin, OR to help out and show off some of his fantastic O-scale model train buildings and boxcars cut on a ShopBot.
Interactive Nametag Cutting with Badger
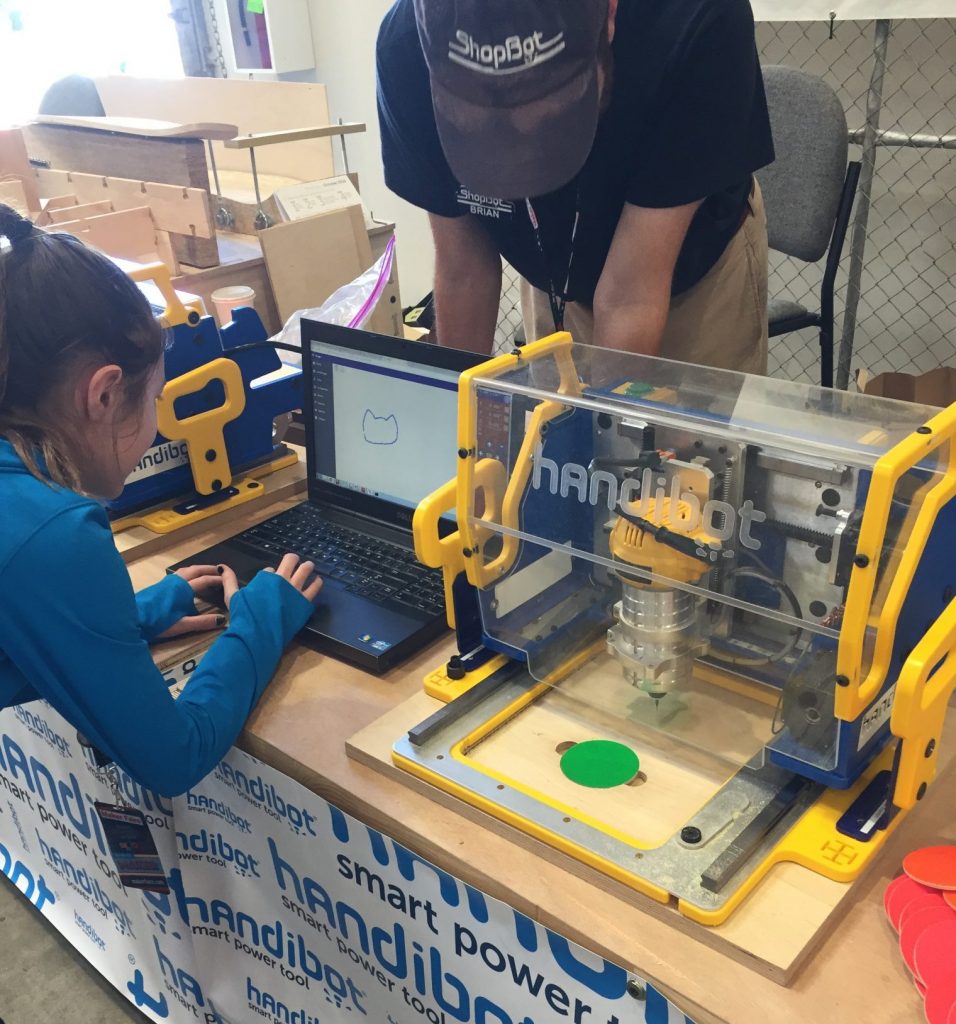
One of the most rewarding and engaging activities at the ShopBot booth was showing off the Handibot’s capabilities to Makers of all ages with personalized name tags cut on the FabMo Badger app. Similar to SmoothSketch, which turns an image drawn on a tablet or device into a cut file, Badger scales the image down to fit on precut colored badges made exclusively for the event. Each one has a small magnet stuck onto the back which not only prevents people having to deal with pinning them to fabric, but also holds it in place in the jig while the tool cuts.
 The magnetic backing holds the badge in place while the Handibot cuts. Visitors to the ShopBot booth were able to choose from one of three colors and two shapes, then were able to draw or write with their finger on the provided tablets. Upon submitting the file, the FabMo control software did the rest of the work and sent the job to the tool wirelessly. Makers of all ages were entertained watching their quick designs turn into permanent carvings, with some even returning later to show their friends.
 Onlookers watch as a young Maker designs her masterpiece. This group returned several times to spread the word to friends. CNC Skateboards on the Desktop MAX
In addition to the two Handibots, the ShopBot team brought along a Desktop MAX, which cut several Skateboards over the course of the three-day event. Building off of a method conceived by Bill Young, the MAX was set up with a jig designed to hold the material. The boards themselves started off as three layers of 1/8″ baltic birch glued together, then placed in a specially designed clamp to provide the curves as it dries. For MFBA 17, the ShopBot team brought along six pre-glued, ready-to-cut boards.
 Screwing the ready-to-cut board down to the jig on the Desktop MAX.
Other Happenings Around MFBA ’17
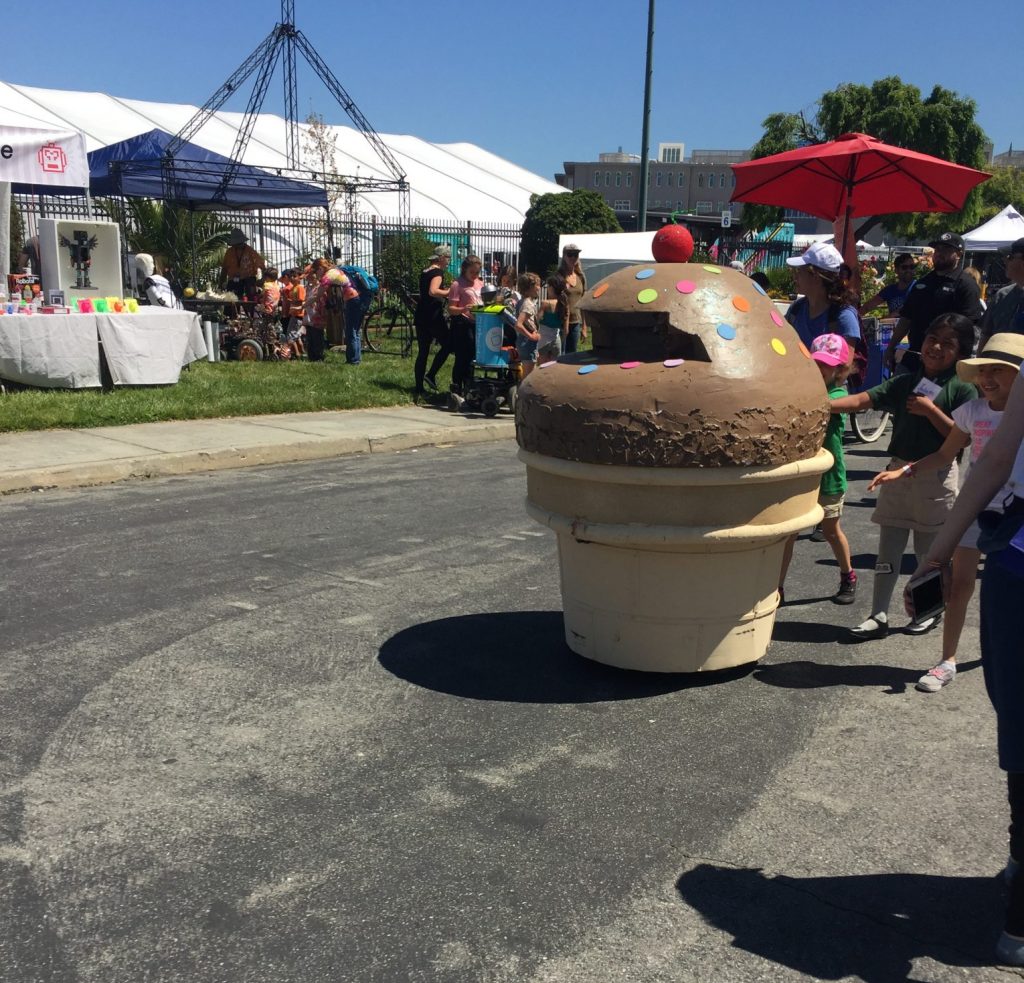 One of many “cupcake cars” weaves its way through the crowd.
The spirit of creativity and collaboration was in full force all around the event. From small tinkerer’s shops all to the way to tech giants like Google and Microsoft, everyone came together in the spirit of making cool stuff. It was great to take part in an event with such a passionate, inquisitive, and unique crowd. We can’t wait for the next one!
By Sallye Coyle, July 6th, 2017 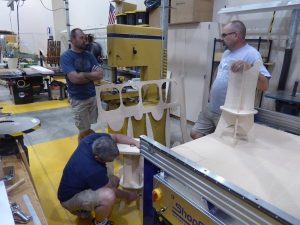
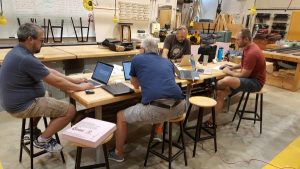
Whether it takes place at ShopBot, or on site, a 2 – 3 Day Professional Development workshop gives teachers a chance to hone their skills with digital fabrication machines. Educators starting at all levels, from newby to someone with a year or more experience running their ShopBot CNC router, end up with new techniques that they can introduce into their lesson plans and curriculum.
After leading Digital Fabrication for Educators (DFFE) workshops at ShopBot in May and June of 2017, I flew to Spokane, WA to work with teachers from two high schools in Mead, WA. Both are Project Lead the Way schools, so two of the teachers were well-versed in Inventor 3D Rendering CAD software. They also have laser cutters and 3D printers at their disposal. The other teachers were not so computer-savvy, but were experienced woodworkers and builders. All of the teachers, Spokane natives, were passionate about exposing the kids to the possibilities available in CTE and STEM programs.
The wood shop at Mt. Spokane High is beautifully organized where everything has its place. Bill Patrick, the lead teacher at Mt. Spokane, also teaches an after-school welding class to expose the kids to another skill. Girls and boys participate, although it’s still about 75% boys.
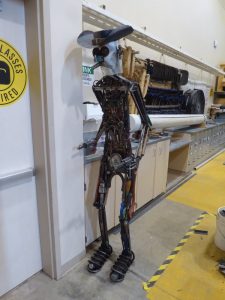 Bill Patrick welded this Cowboy from old tools salvaged from a shop being shut down There is a list of topics to be covered during each Workshop, but the order of presentation flows according to the skills and interests of the participants. A “newby” with virtually no experience in CAD/CAM and running a tool can work alongside someone who has had a CNC router for 12 years, but now wants to move into designing and machining in 3D. At Mt. Spokane, the session started with a tune up of their newly assembled PRS standard with a 2.2 HP spindle. With the ShopBot Troubleshooting guide in hand, a few wires were switched around, a few set screws tightened, and a few bearings and proximity switch targets were adjusted until the ShopBot was running smoothly. The first group VCarve Pro CAD/CAM project was a file to surface the sacrificial board with the 1.25” surfacing bit.
 The first step for surfacing the ShopBot table is to run a “cross check” across the sacrificial board to determine what depth to machine the entire table. 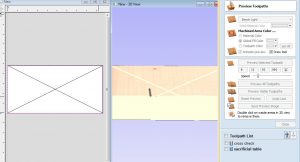 Then, a pocketing routine (raster) levels the sacrificial board. The first set of personal projects were signs VCarved in a piece of Melamine found in the scrap bin. Each person designed their own, then we machined them with the 60 degree V bit found in the ShopBot starter bit kit. Because each font was different, the look of each sign varied even though the 60V bit and the Engraving toolpath was the same.
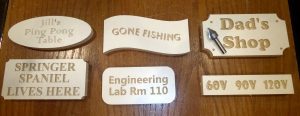 A variety of signs created as a first project at Mt. Spokane High School. Five of the signs were all carved with a 60 V bit (displayed on the sign for Dad’s Shop.) The different in cutting depth and look is related to the different fonts used in the design of the sign. Mt. Spokane also ordered the signmaker’s bit kit (second 60V bit swapped out for a 120V), so we had the opportunity to see how the same font would look machined with a different V bit (60V, 90V and 120V.) Since VCarve Pro uses the geometry of the bit to determine how deep to plunge the bit to fill the space of the design, letters carved with a 90V bit are shallower than those carved with a 60V bit. When using a 120V bit, the carving is shallower still.
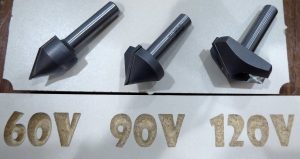 The same font will be carved at a different depth with a different V bit. While a 60 V is a better choice for small, detailed engraving, a 120 V is the better choice when letters are large. The light from the letters will reflect out to the viewer rather than into the recesses of the carving. A 90 V bit can be used for engraving, and also for mitering the edge of the material to make a mitered box. By midmorning on Day 2, each teacher was deep into following their own path. While we would gather for a brief lesson on a particular topic, my role became that of a guide helping each teacher pursue their particular goal.
 Too busy working to break for lunch. 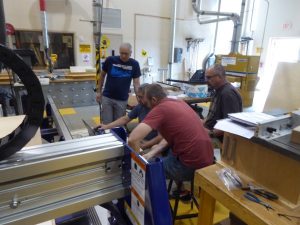
On Day 3, I left the teachers deep in conversation in how they would organize their classes for the next year. How about: give each student a sheet of plywood, and score them on the designs they create as well as how efficiently they use their material?
Teachers discussing how to integrate the Step Stool Project downloaded from the ShopBot website into their classes for next school year. Peruse the photos below to see some of the projects created during the DFFE workshops, both in Washington and at ShopBot. The July Workshop is filled, but check the Events page on the ShopBot website for more dates to be added in the Fall.
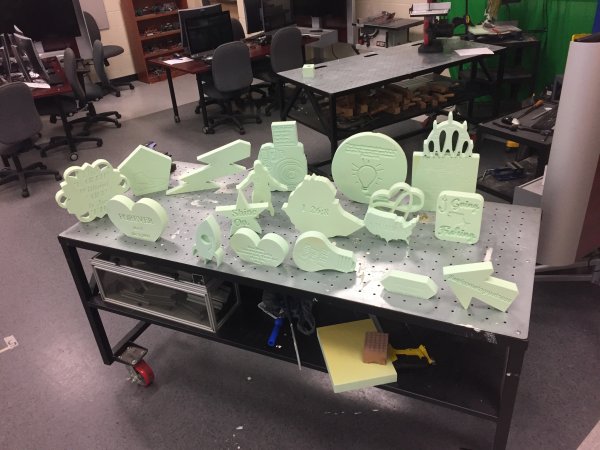
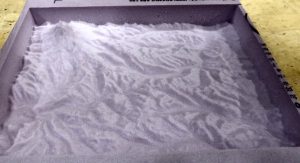 This topographic map of the Mt. Ranier region in Washington State was generated as an .stl file, then imported into VCarve Pro and machined with a .125” ball nose bit. Because the material was insulation foam, there was no need to run a roughing pass. 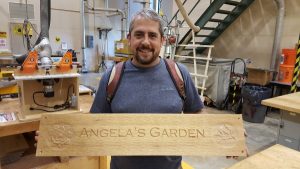 Sign incorporating V Carving and 3D medallions from ClipArt in VCarve Pro One of the topics is to show how the same design (2D or 3D) can be machined or printed on multiple digital fabrication tools.
 ShopBot 2017: Same .stl file printed on a 3D printer and machined in wood on a ShopBot CNC router. It took longer to 3D print than to machine on the ShopBot. 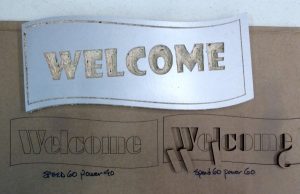 Same 2D design file Engraved on a ShopBot and cut on laser cutter. Keeping a record of the results is a valuable lesson.  Teachers from Oregon used their Perkins grant for Professional Development to return to ShopBot after having used it in the classroom for a year. They reversed-engineered a spring-joint-box designed by Randy Johnson  Spring box completed and VCarved on the Handibot. No need to shop for a birthday present. 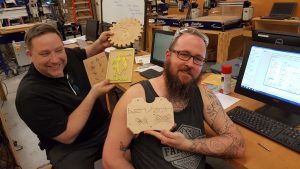 New users from Fanshawe School of Art and Design (Canada) got experience on the laser cutter and ShopBot.  Trying out the Handibot
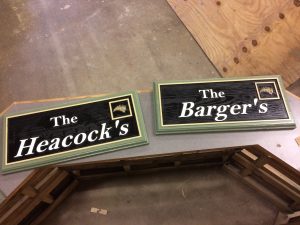
By Devin Wilson, July 2nd, 2017 Our ShopBot CNC has proved to be more than just an educational tool. Once they learned about the capabilities of the tool, students got excited about making something special for those they care about. In the 6 months since we received our Desktop MAX, students have made a multitude of signs for various people and various occasions:
- A sign for a teacher designed by them.
- A sign to celebrate our secretary’s new grand-baby.
- A sign to honor their parents as a meaningful gift.
- A sign for players and coaches alike, wanting to honor each other.
I don’t get to see the recipient of these gifts very often, but I do get to see a student’s desire to honor someone else with their work. To create something for someone and have them say, “this is perfect” or this is “it.” This is “closure to a season of life,” this is “the beginning of something new,” this is “celebration,” this is an “expression of heart.”
Ultimately, relationships matter, because people matter. But it can be hard to give a gift to someone we care about. The kids got to learn some skills and really express honor to those they care about by making something for them! This is one of the real values of the ShopBot – and it came to me by surprise this week.
The ShopBot can enhance a shop program. You can even make money with it! But more importantly, the ShopBot can help connect a school project to the real world. A 60° V bit can engrave some amazing detail, but what we etch in student’s hearts can create lasting change. I am grateful to have had the chance to connect with students through the use of the ShopBot.
 Signs our school is making for a local development. 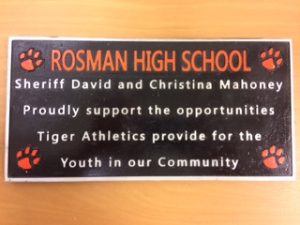 We even cut a sign from aluminum this year!  We used a 1/16″ tapered ball nose bit to cut the details.  60° V bit on a piece of South Carolina cedar. 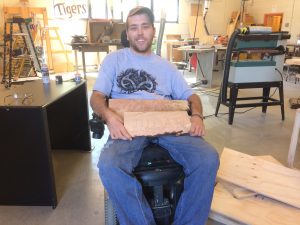 Former student, and fellow woodworker, Cody making signs for his nephews.
By Devin Wilson, June 23rd, 2017 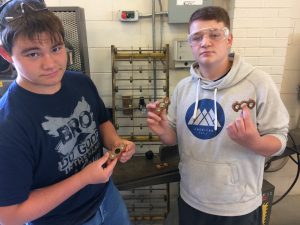
In an attempt to keep the kids involved through the end of the school year, I asked my students what they wanted to make with the ShopBot. You can probably guess what they said if you’ve seen what the latest craze is: fidget spinners. My response was fidja-what? They proceeded to introduce me to the new fad in toys. The next shiny thing will replace fidget spinners soon, but in order to establish relationships with the students, we began our fidget journey.
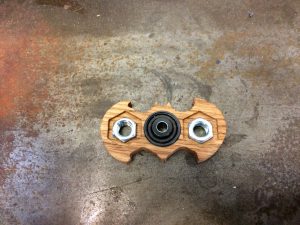 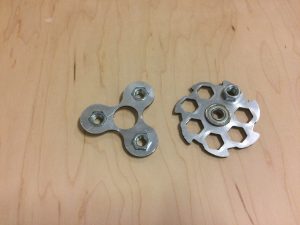
We ordered the skate bearings used for the fidget spinner mechanism in bulk, and set to work figuring out how to recreate this toy in our shop. We decided to use nuts as weights. Using an 1/8” straight bit, we used the ShopBot to cut a perfect hexagon. Even using a digital caliper on one of the commercially made spinners, it took a few tries (probably 15) to get spacing and openings perfect. Also, the weights have to be evenly spaced or the fidget will spin with a wobble. The first material we used was some reclaimed oak we took off an old shed next to the school. This made it feel like a woodworking project. We planed it down to the thickness of the bearing and cut it to fit the jig we made on our spoil board. This was our first lesson on the importance of using tabs, being that fidget spinners are pretty small. Tabs keep the material attached when making a profile cut and keep the batman shaped spinners from becoming flying batman throwing stars! We used a bandsaw to finish cutting the tabs and then sanded the edges smooth. We chose to use a Danish oil to bring out the oak grain.The downside to using wood is you have to maintain a certain thickness of material to keep the wood from splitting. Also, it is a harder balance of getting the bearing and nuts to be tight but not so tight that the wood splits.
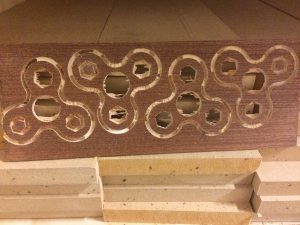
The next material we used was some scrap sign board. This material was able to be cut without much material being left. The downside to using this was it would bend easily, the edges would cut you if you didn’t sand them smooth, and it lacked overall weight. The last material we used was plywood. Again this lacked weight and was harder than the oak to sand smoothly. However, it kept its structural integrity better than the oak on thinner material margins.
It only took one class period to teach the kids how to set up their project file and locate a few of the design icons. Most of the them chose to find an image from the internet and bitmap it into their own spinner design. We have 5 desktop computers set up in the back of my classroom. With 20 students we rotate through in groups to give each student a chance to design. I had about 2 students in each class that could brace the material, tool path the designs, and run the files on the ShopBot. That just left me having to zero out the Z-axis and do the initial bit change since we used the same bit for the pocket cuts and profile cuts.
Overall, this proved to be a good project for students. We got to work on design and problem solving. Our semester ran out before we were able to cut out most of the designs, but it served as a good reminder that what we produce in shop isn’t as important as the process and people involved.
By Sallye Coyle, June 16th, 2017  Alberta shows off the sign she made on a ShopBot. May and early June was the time to visit a number of digital fabrication labs in middle schools, high schools, and community colleges around the US. Some labs are fine tuning their plans after being in existence for a year or more, while some are just starting their journey.
PENNSYLVANIA
Southwestern Pennsylvania is coal country, with all of the economic consequences of a shifting way of life. It’s also beautiful there: small towns nestled into valleys connected by scenic mountain roads. The Chevron Lab at Intermediate Unit 1 (IU1) near California, Pennsylvania, has a thriving program. Follow them via Twitter (@IU1FabLab) to see how they are using the ShopBot CNC routers, laser cutters, 3D printers, and electronics to bring art projects and technology to students from kindergarten through high school. In one of his recent tweets, Brandon Prentice, guru of their mobile lab, showed a living wall created by art students with the ShopBot Buddy® that is a part of the mobile lab. The stationary lab at Colonial Middle School also has evening classes and workshops for teachers, students, and community members to learn about digital fabrication and making.
 Assembling a living wall. 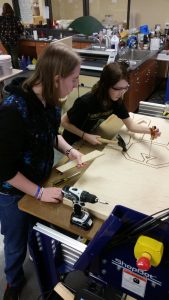 Parts machined on a ShopBot Buddy. IU1 recently added three Handibot® Smart Power Tools (with rotary indexers) to their suite of digital fabrication tools. One will reside in the stationary lab, one will ride in the mobile lab, and one will be available at a tool lending library. The Handibot in the stationary lab will be drawn into service for creating circuit boards, as well as being available for machining in 3D for molding and casting projects. Brandon really likes the Handibot app, Smooth Sketch, for working with the very young students (K-2).
NORTH CAROLINA
Charlotte Mecklenburg School System added digital fabrication to their curriculum in the 2016 – 2017 school year. Two high schools have ShopBots: Phillip O. Berry Academy of Technology, has a 3D lab (CNC routers, laser cutter, 3D printer, etc.) as well as a home construction program and an automotive program. Teachers and administrators from the 3D lab and the home construction program received a 1-day refresher course on the ShopBot in May.
 Watching the ShopBot in action. Olympic High School in Charlotte also has a full sized ShopBot for use in their School of Technology Entrepreneurship & Advanced Manufacturing and with Project Lead The Way. Matt Wykoff, the PLTW teacher at Olympic, says his CIM (Computer-Integrated Manufacturing) students have embraced the ShopBot. Matt is putting the ShopBot to good use for himself as well, he is making a new home entertainment system.
 A few of the student projects from Olympic High School in Charlotte, NC.
OHIO
The installation of the digital fabrication lab at Brady Middle School in Pikesville, OH (near Cleveland) was completed at the end of May. After the ShopBot PRSalpha 4 x 8 for big projects, and a ShopBot Desktop for circuit boards and smaller projects were installed, Christie Kohn and Jake Miller, interim managers of the lab, invited 6th, 7th, and 8th grade teachers for a tour and “make and take.” The digital fabrication lab is not just for STEM education: Language arts teachers began to think of how they can use the ShopBot for “printing” their students’ favorite quotes, and social studies teachers thought of making as a way of bringing cultural diversity and customs into the classroom. TIES will return to Brady for professional development when the new school year starts. News update: Brady has now ordered a Handibot to join their suite of digital fabrication tools.
 Chris Carter of TIES demos the ShopBot Desktop to one group of teachers, while another group works with the 3D printer and laser cutter in the digital fabrication lab.
 Principal of Brady Middle School watching ShopBot cut out his name plate. Note the material is pre-painted and pre-cut to size for each name plate.
 Christie tightening bolts on X motor after reseating the pinion gear in the rack. Part of the training during installation includes how to tune up the ShopBot.
LOUISIANA
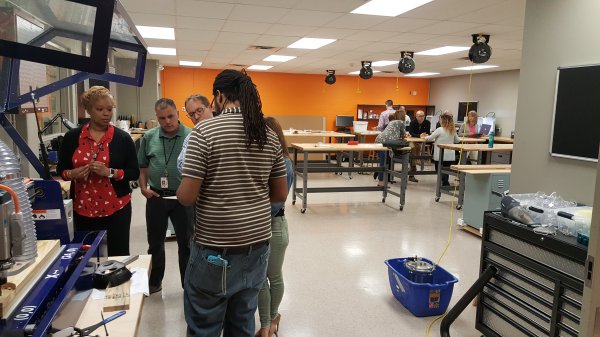
The Chevron Fab Lab NOLA at Delgado Community College in New Orleans is reaching out to the community to share its resources. Fab Lab manager Sam Provenza and Sallye Coyle hosted a diverse group of teachers and community leaders from Delgado Community College, local public and private schools, and extracurricular programs that are a part of Bricolage Academy and the Youth Empowerment Project. The two day FFI include time on the ShopBot, laser cutter, and vinyl cutter, as well as how to integrate digital fabrication into curricula, from primary school to high school programs such as PLTW.
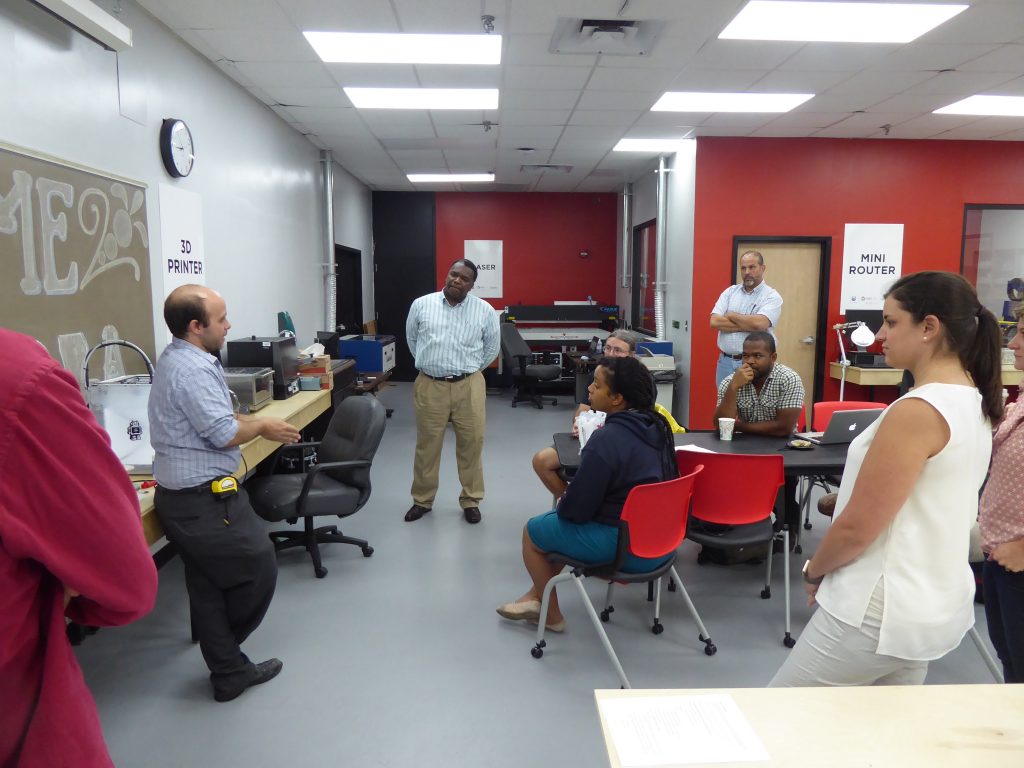 Sam introduces the FabLab concept to the attendees.
 Same design file, three different digital fabrication tools: ShopBot CNC router, laser cutter, and vinyl cutter.
By Sallye Coyle, June 13th, 2017 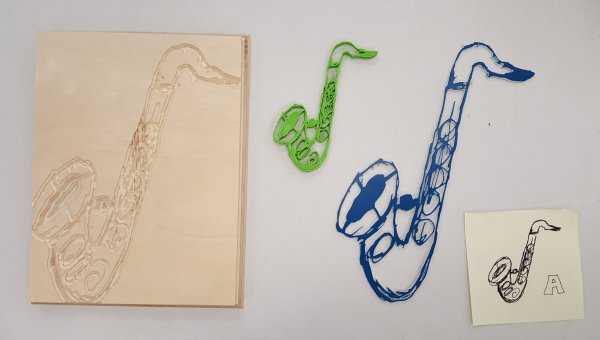 Four Saxes: An original drawing (right) scanned and re-conceived with 3 different digital fabrication tools: Engraved in wood (ShopBot CNC router), 3D printed with ABS plastic (Ultimaker 3D printer), and laser cut out of thin acrylic (Epilog laser). Early in May, I visited Polk County, Florida as a part of a TIES team. Polk County now has digital fabrication labs (FabLabs) in 6 magnet middle schools, and more labs are spreading down into the elementary school level. The county’s investment in training their teachers is impressive. Teachers and resource staff from four middle schools spent four days at Lake Alfred PolyTech Academy honing their CAD design and machine skills. Their fields included theater, social studies, language arts, business, art and photography, home building/construction, and math. Some of the resource and support staff who had been part of the install teams and/or participated in the training for middle schools then served as instructors for the 27 elementary school teachers who attended three days of training later in the week.
 Sallye with Rick Runion, art teacher and FabLab manager at Rochelle School of the Arts in Lakeland, FL. Rick designed his step stool in VCarve Pro, then scaled it down to create a prototype in cardboard on the Epilog laser cutter before cutting the real one out of plywood on the ShopBot PRSalpha. Continuing their mission of making digital fabrication available to all in Polk County, Carla McMullen, Senior Coordinator of Operations & Evaluation (MSAP) in the Office of Acceleration & Innovation for Polk County Schools, invited teachers and administrators of schools that do not currently have digital fabrication labs to visit the new mini lab at the district headquarters. Some equipment, like the Handibot® Smart Power Tool, can be checked out of the office for use in the schools. Teachers can also make an appointment to bring small groups of students to use the Full Spectrum laser, Roland vinyl cutter, and Ultimaker 3D printer in the office.
 Mixing LEDS’s and CNC machining. A teacher from Jewett Academy used the Handibot to carve the school logo in acrylic, then lit up the sign with a strip of LED’s. Handibot’s Brian Owen joined a couple of the trainings to observe how teachers are using Handibots in school settings. Polk County chose Handibot as the CNC for their elementary schools because it is capable of doing great (and intricate) things while being easy to use and having a friendly demeanor. This makes them a good case study in education for Brian and the other people at Handibot.
 Brian (left) deep in conversation with the teachers who will be using the Handibot in early school and middle school education. Note the files that the Handibot has carved in the plywood sheets laid out on the floor of the lab. It is a lot to introduce a whole new set of equipment, software and techniques into the school day and expect teachers to immediately embrace it. The Administration at Polk County is committed to making it work. By giving the teachers sufficient time and training, they can become confident enough to share the possibilities with their students. The Administration also supports the development of new curricula that go beyond just using the tools. Finally, schools are encouraged to connect with their communities and develop business relationships that will both sustain the labs, and introduce the students to real world problems and solutions.
 Ms. Vega showing of her students some of the possibilities. 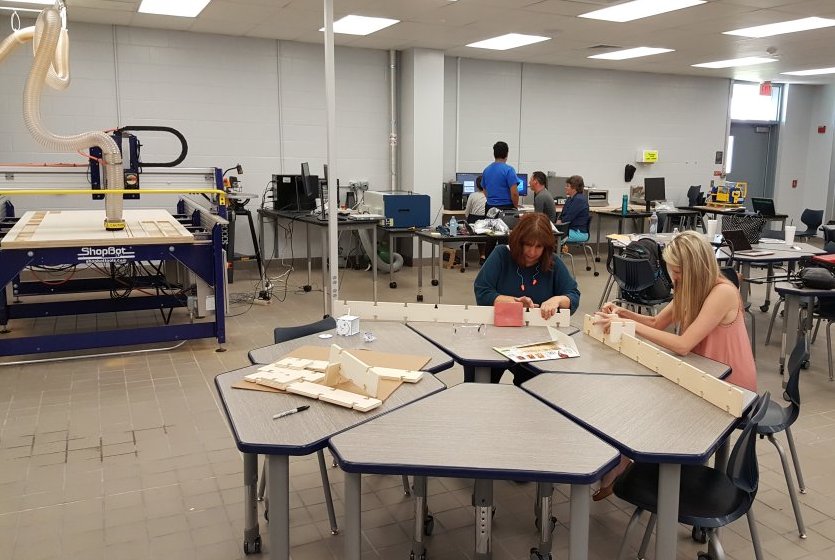 Mijana and Candy sanding Linkerlogs. Mijana is developing a curricula where the middle school students will fabricate the Linkerlogs on the ShopBot, and elementary students will use them in their math and other classes.
|
|


