This is my third go around on building a table for our ShopBot. Each one has used a different system to allow us to index our parts on the table for accurate placement. This time I wanted to implement a system that would allow us to align full sheets accurately on the table, accommodate alignment of smaller parts and allow us to take full use of the “Flip Ops” function of the ShopBot Link. Flip Ops allow us to add machining to the “flip” side of cabinet parts cut using the SB Link. Most parts of a SB Link cutting file seem to fly by fairly quickly, so having an index system that is both robust and fast acting is a real plus. As a side benefit this one is simple, too.
For the full sheet index, I don’t need something extremely accurate, but the system has to be able to withstand hundreds of sheets being slid into and against it. I also wanted something that would virtually disappear when not in use. I chose pancake cylinders for this as they have a 5/8” shaft and are very tough. I have used standard cylinders in the past, but have found the shafts to be too flexible when extended to give reliable accuracy. To ensure that the 2” stroke versions that I had on hand would reach above the Spoilboard from their under the table mounting location I extended the shaft with a 5/8” bushing cut in length and bored on the lathe to accept a mushroom head cap screw. Here is a picture of a cylinder, ready to mount under the table:
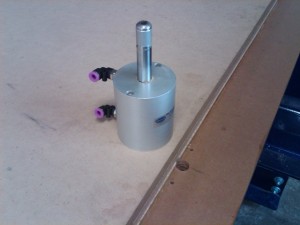
You can see the holes for the piston and mounting bolts next to the cylinder. Note the extension bushing and bolt added to the piston. I cut 3 sets of these holes with the Bot. Due to table framing, these were centered at 6”, 32” and 70” in the X direction and at -.3125 in the Y. This puts the edge of the 0.625” piston at zero in the Y.
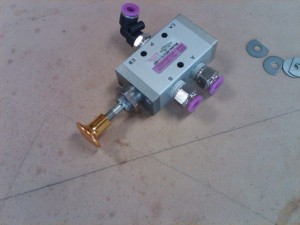
Since these are dual action cylinders that use air to move both up and down, I used a 4 way, 5 port valve to operate them. A 5 port valve has a pressure port, 2 switched ports (1 for up and 1 for down) and 2 exhaust ports. Here is a picture of the valve with one touch fittings installed:
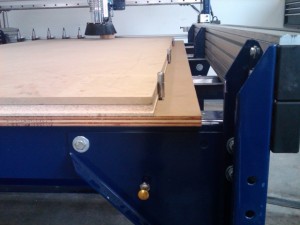
I installed the valve into the corner brace near the 0,0 corner. Here is a picture of the installation with the pins up and the valve installed:
To accommodate our smaller parts and the Flip Ops, I decided to make an “L” shaped fence from plywood that, depending how it works, will be made from acrylic or aluminum later. I drew an oversized version in VCPro, and cut it, along with 2 holes .005 oversize for the pins at 6 and 32. I also made a single vector toolpath to trim the fence to 3” in both the X and Y. I also added a corner relief to allow for chips and splinters. Here are screenshots of the Fence cutout and the trim toolpath:


Trimming the oversized fence after it has been installed on the pins assures both positional accuracy and squareness of the fence. In my case, both the X and Y position is 3”, but any number can be used. To use this fence for Flip Ops with the SB Link, all that is required is to add those coordinates into the Link’s Flip Op fence location.
For VCPro cutting files, adding 3” as a 2D offset into both the X and Y boxes of the fill-in sheet is all that is required. Parts are designed at a normal 0,0 position. You could also place the parts with the corner at 3,3, but my personal preference is to use 0,0 and the offset. The 2D offset feature allows us to change the location of the fence at a later date or trim it if damaged. The picture below shows the fence in place, after trimming.

Since we have used variations of these indexing fences for a few years, here some additional uses that have not been mentioned above:
In conjunction with disposable plywood zone masks placed tightly to the parts, helps stop parts from sliding.
By using holes bored into parts or their borders, a part that is larger than the table can be moved and repositioned onto other pins for second half cutting.
Long parts can be very accurately positioned at the Y=0 edge of the table.
For repetitive work, parts holding jigs with pin holes in them can be used interchangeably as needed.
I am sure that after using your version of this versatile accessory, you will come up with a myriad of uses.
Next Month: Vacuum manifold…. Have I ever said how much I hate plumbing?
Leave a Reply