 Back in the Fall of 2007, Brenda Aldrich of Harman’s Cheese gave me a call about possibly updating their sign. The timing wasn’t quite right for her when she called (but we do love the customers that plan ahead, thanks!) but the project stayed in the back of my mind through the winter, and by the time she called this spring to pull the trigger, we were raring to go on the project.
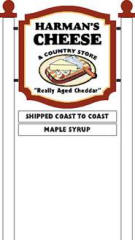
This sketch is for a carved, western red cedar sign. The cheeseboard will be carved in three dimensions (a combination of ShopBot carving and hand finishing) and then will be realistically painted. This Sign Story will be a bit unique, as much of it will be told using video.
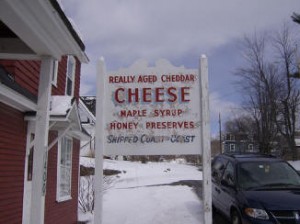
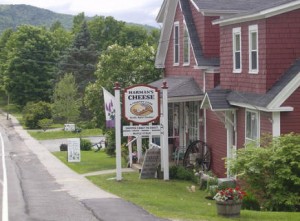
The picture above is the “before” of this project. I have no idea how old this sign is, but I think “really old” covers it pretty well.
An opportunity like this is what we really enjoy here at Lincoln Sign Company. There is nothing better than giving a well-established business the ability to update their look and put their best foot forward. What many business owners fail to realize, is that many potential customers size a business up based on their sign, first and foremost. Why not give them the best possible first impression? I would like to thank Harman’s Cheese in advance for letting us give them a hand with this project.
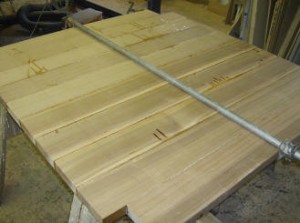
Here is the “glue-up” of the sign blank. We take Western Red Cedar, 2″ x 6″ boards, and glue them together to make a large, continuous piece of wood for our sign. The “glue” that we use is West System Epoxy, the same glue that boat-makers use. When I was helping Lee with this glue-up, I managed to get the epoxy all over my blue-jeans. Fantastic! There is nothing that ruins clothing faster than West Systems!

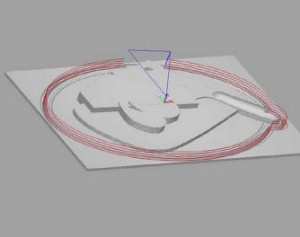
Here is what things look like once a sign design goes into our 3-dimensional carving software, ArtCam Pro. It allows us to tell our ShopBot what we want to carve, and how we want to carve it, and it lets us see a “simulation of what the carving will look like.
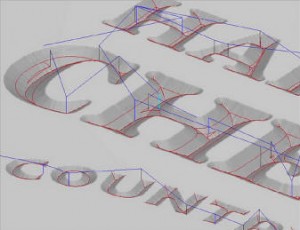
The red lines in the above screen shot show where the various carving tools will actually be cutting into the surface of the material. The blue lines show where the tool is raised so it can safely move to carve the next letter without accidentally cutting into the sign surface.
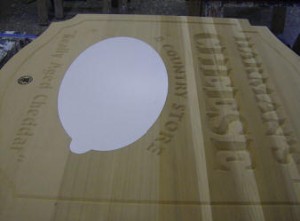
Here is the sign after the lettering has been carved, and we are getting ready to prime and paint it. We have masked off the area on the sign where we will laminate the carving onto the cedar. This is so we get a good, strong bond between the carving and the natural wood of the sign. This is a much stronger bond than glue on top of paint would be. We try to do this wherever possible.
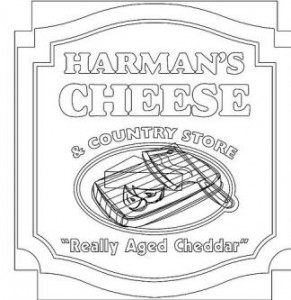
Here is the vector art that we exported into ArtCam Pro, and this project is a really good example of what I talked about in last month’s article. There is a huge amount of detail in the carving, and a great many complex angles. I certainly could build a 3D model in my ArtCam Pro and have the ShopBot carve this on its own, but by the time I do all of the 3D model work, I probably could knock out two of them by hand. So I took a middle-of-the-road approach to doing this carving, and “roughed out” the shapes and depths using the ShopBot, and then finished it by hand. This probably saved me 4-8 hours on this project.
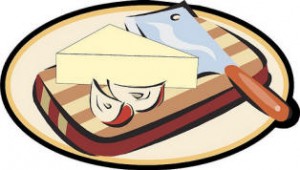
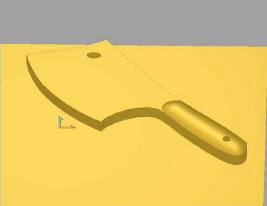
This is the cheese knife rendered in ArtCam Pro as a 3D model. This was the one element of the carving that I let the ShopBot carve all by itself.
Here is what my finished “rough-out” carving will look like. Mainly I was going for depth and definition of all of the objects, so then I would be able to jump right in with a chisel and finish them off.
The following is a series of videos that we shot while we were working on this project. (We occasionally use video on my blog, www.signsneversleep.com.) The video was shot and edited by a talented teenager named Cam. We found that attempting to do video on the blog as a regular feature was much too labor intensive (after all, we are supposed to be concentrating on making signs!) but this series of videos does give you a unique look inside of our shop.
Video 1
Video 2
Video 3
Video 4
Here is the completed carving fully painted and ready to mount to the completed sign.
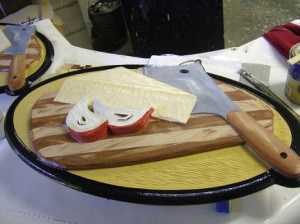
This was a terrific project, and we were thrilled to be able to contribute to the makeover of a Sugar Hill, NH landmark.