There are lots of times when you want to be just as clever and creative as you can be when you’re designing a project, and others when you just want something that solves the problem…something simple. Just recently I was asked to come up with some outdoor seating for the Maker Faire in Austin, so that attendees would have a place to sit and eat or just take a break. Both the design time and production time were short, so instead of spending a lot of time developing fancy joinery or very elaborate design features I decided to do the most basic design that I could come up with. It just needed to be sturdy and functional…nothing more.
Seating like this really needs some weight and to look like it has some substance to it, so 3/4″ material seemed like the right choice. They needed to easily come apart for storage and shipping, so each one needed to have a minimum number of parts and should only go together one way…foolproof assembly was critical. Although it’s fun to figure out fancy snap-together joinery, this time a couple of drywall screws would work well enough. And of course the ShopBot and Make logos had to appear somewhere!
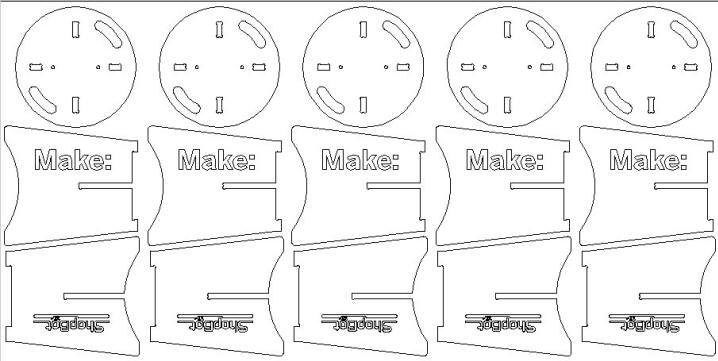
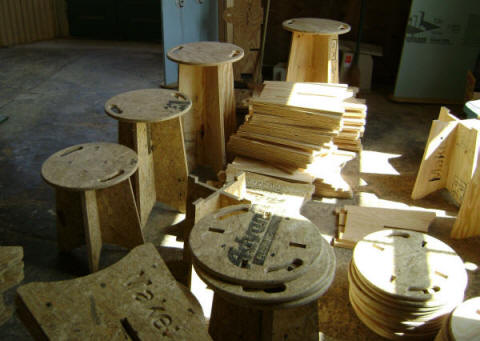
A simple circular top seemed logical, with crossed legs that slotted together and screws through the top to hold it all together. Tabs on the top of the legs fit into slots in the seat, and to make sure that it was easy to assemble the tabs and slots were of different lengths for the two leg pieces so that the seat would only fit one way. Handholes in the seat would make them easy to carry, and since we were v-carving the logos already, a couple of dimples in the seats would both mark the screw locations and give them a countersink. A little time drawing with TurboCAD and the design was done…5 stools fit on a sheet of ply.
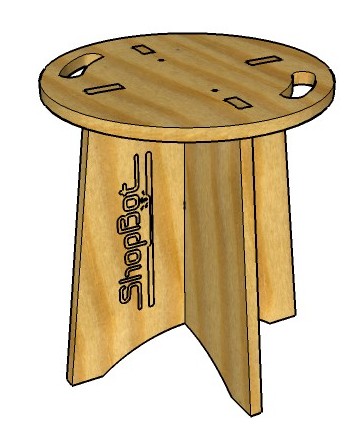
Once the design was finished, importing the CAD file into Sketchup let us see what the assembled stool will look like…
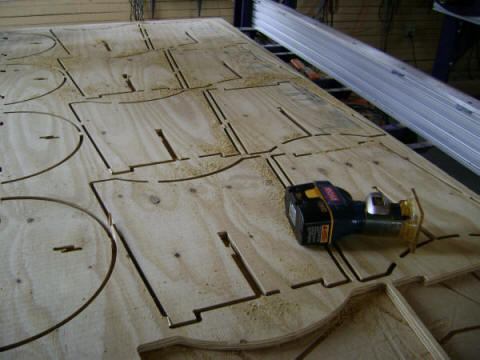
…then into Partworks to create “dogbones” in the inside corners where parts fit together, so that there wouldn’t be an fit problem caused with the radius that’s left in inside corners by router bits. Next came creating toolpaths. The first toolpath used a 90 degree v-bit to cut the ShopBot and Make logos and the dimples for the drywall screws that held it all together, and the second a 3/8″ straight bit to cut out the parts. Even though I use vacuum to hold the sheets down to the table, tabs were generated in PartWorks to help keep everything in place, just in case. The v-carve file took about 11 minutes to cut and the profile cutout took another 13 minutes to cut in 2 passes. Once the cutting was finished, the sheets were flipped and the tabs are cut with a laminate trimmer and piloted trimmer bit.
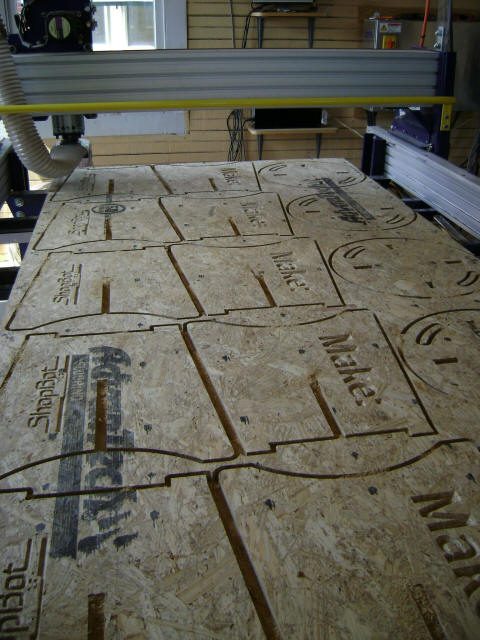
We tried cutting the first couple of sets out of both AC Pine and AC Fir plywood, but it was just too splintery to make a good seat and there wasn’t time (or motivation!) to do any sanding. We finally settled on Advantech, an underlayment material that’s similar to OSB but with a protective coating and a 50 year warranty. I’ve never used it before for anything that will be outside, but it cuts well and is reasonably priced.
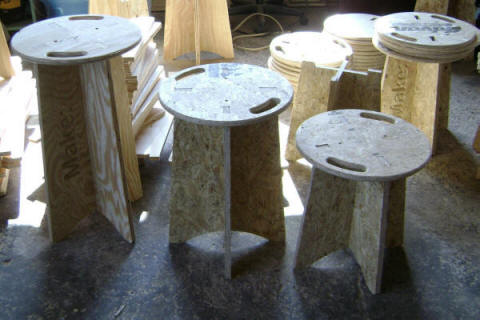
At this point it was easy to make changes to the drawings…it was just a matter of modifying the drawings…so some taller stools for our booth at the Maker Faire made sense. The original stools were 18″ high…23″ and 28″ seemed like good options for booth seating. Here are the three sizes of stools:
Start to finish we’ve probably got 8 hours in this project, including design and cutting time. There are lots of ways that these could have been done differently and been much more interesting, but sometimes the simplest solution can be the best one for the job at hand.
During the Maker Faire a lot of ShopBotters asked for the files for the stools, so I’ve assembled a zip file with the part files to cut out 5 stools from a sheet of 3/4″ ply and to v-carve the ShopBot and Make magazine logos. There’s info on cutting the files along with the standard licensing information in the header of the part files, so be sure to read the files with the ShopBot editor before running them.
The material I used was actually .72″ thick so that’s what the files were created for, but the PartWorks file is included as well so that you can modify it to fit your material or preferences. It also includes a dxf file of the parts, which includes 23″ and 28″ tall versions. The dxf file just has the basic geometry and none of the fillets or “dogbone” corners where parts intersect…they are included in the PartWorks file though.
My hope is that you will use this as a starting point and that you will modify the design to make it both more interesting and more personal. If you make any changes it would be great to see what you do, so please send pictures.