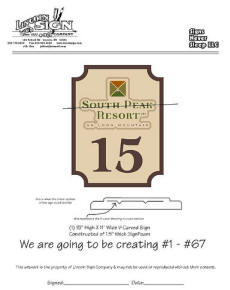
Back this past December of 2005, we were asked by South Peak Resort on Loon Mountain, to create some interesting and innovative Lot Signs for some properties that there were selling here in Lincoln, NH. Traditionally, when we do Lot Signs, they are flat-painted wood or aluminum, as they are very temporary signs by nature, but South Peak Resort made it clear that they wanted something a little more distinctive to set these properties apart.
 I am a big believer in carved signs, not only because they hold up well over time, always look distinguished (not to mention the fact that it is the primary type of sign we make here at Lincoln Sign Company). Carved signs send a “message” to a businesses customer or prospective buyer. A carved sign shows that the business is “solid”, that the business takes its image very seriously, and that the business will stand the test of time. I am always very pleased when a customer chooses any type of carved sign.
I initially spent some time prototyping these signs since there were going to be 67 of them. I spent about 3 and a half hours doing this “prototype” from start to finish.
Most of that time was spent in the 3D modeling software that we use (ArtCAM Pro) and planning how our ShopBot was going to cut everything efficiently and cleanly. Also, I spent some time watching the router cut and tweaking the speeds that it will be cutting at to get the best balance between speed and clean finish cuts.
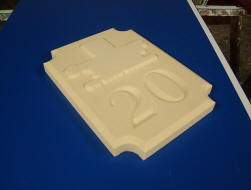
After the prototype you see in the photo above was done cutting, I was 88% happy with the result, and went back to the software to make the changes to get everything up to 100%. I was also glad that I consulted Lee in my shop on what he thought about the end result, as he suggested a tweak that is going to make painting the borders on these much, much easier.
Now, normally we do not create a physical prototype for every sign we do, because:
#1: The 3D carving software that we use actually allows us to create a “virtual prototype” on-screen so we can see what a sign will look like after it has been carved
#2: That would get expensive (just the material for this prototype cost about $15.00 ), not to mention the time and effort involved.
The only time we are really justified in doing a prototype is when we are doing something radical we have never done before and we need to see if everything will “work out” like we think it will, or, we are going to be doing a lot of them and want to make sure that we have gotten everything correct.
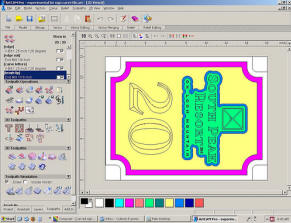
This is the control screen for ArtCAM Pro, which is the program that we use to control our ShopBot. It allows us to take simple line art, and tell our router to carve the line art with certain cutting tools to create shapes and angles.
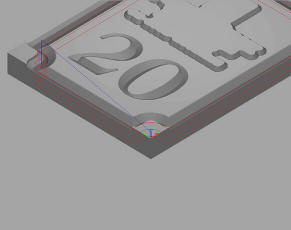
This picture shows the path that the cutting tool, in this case a 120 degree V-bit, will take as it cuts into the material to create that “20”. As you see, it is even showing us a “simulation” on the screen of what the finished product will look like, which is extremely helpful as you can imagine.
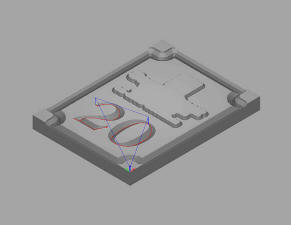
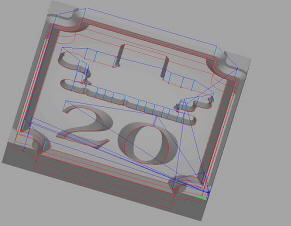
This view shows what will be the final tool-path that we will run, and this will be the one that cuts the sign out of the material.
Our ShopBot is a terrific tool, and I really don’t know how we could live without it, but the ShopBot is really only one small part of the equation that allows us to have fun every day creating memorable signs. The software we use, Gerber’s OMEGA design software and ArtCAM Pro, play an important part, as well as all of the quality materials that we use to build our signs. But most importantly, it is the people here at Lincoln Sign Company that makes our mission possible. I am lucky enough to be surrounded by genuine craftspeople who care a great deal about what they do, and through caring, have become extremely talented.
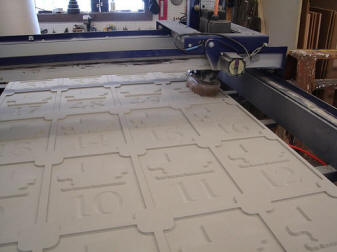
We were able to cut 24 signs at a time using the router, and that is using 5 different sized and shaped cutting tools to get all of the angles and effects that we want. How long does it take? The total-elapsed cutting time is just about 4 hours, but figuring in tool changes etc the material is on the table for about 10 hours (some of the time it is just sitting there waiting for a tool-change as I am not going to run out immediately after it is done with the next cutting tool, it can just wait, thank you very much!)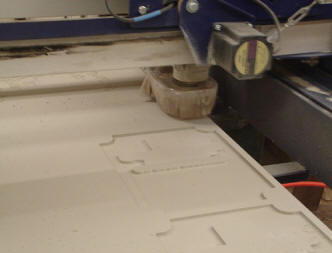
Now, don’t think all this technology makes our kind of sign-making effortless. Remember, I probably worked on the cutting files for about 12 hours to perfect them and get them set up for all the different lot signs. Still, it was nice to know that while I was out skiing at Loon Mountain my router was working on these…
Here is the first of these signs to make it through the entire production process.
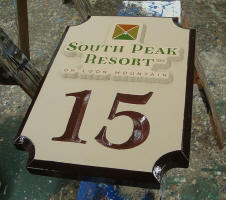
Originally we were going to go with one color of brown for both the letters and the border, but after getting into the actual painting process we opted to go with a dark brown for the border and a lighter, russet brown for the carved numbers. Worked much nicer with the overall coloration of the entire sign…
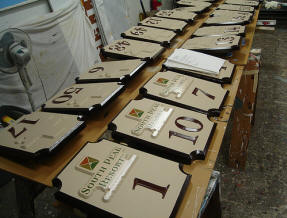
Once the production process started running full-bore, it was pretty much impossible to walk through the paint-shop without running into one of these signs. All the numbers and the border were hand-lettered, and the South Peak Resort logo was printing using our Gerber EDGE.
These signs would have been impossible to do cost-effectively without out ShopBot, and that is probably one of the things I like most about having one here in the shop. We can pretty much offer a customer anything that they want, or that we can dream up, and then we just need to take a moment to figure out how to make the ShopBot do it.
Throughout the process of creating these signs, I kept track of our progress on our company’s weblog. If you want to learn more about how we make signs at Lincoln Sign Company, feel free to visit [www.signsneversleep.com].