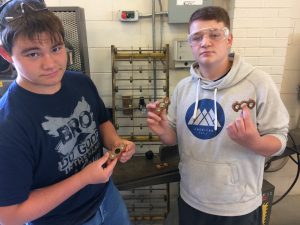
In an attempt to keep the kids involved through the end of the school year, I asked my students what they wanted to make with the ShopBot. You can probably guess what they said if you’ve seen what the latest craze is: fidget spinners. My response was fidja-what? They proceeded to introduce me to the new fad in toys. The next shiny thing will replace fidget spinners soon, but in order to establish relationships with the students, we began our fidget journey.
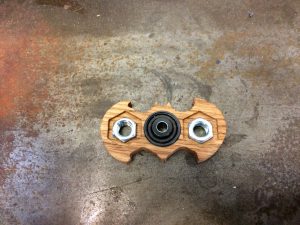
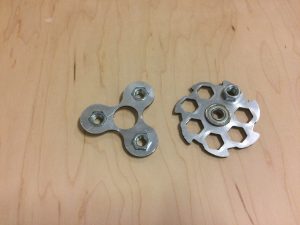
We ordered the skate bearings used for the fidget spinner mechanism in bulk, and set to work figuring out how to recreate this toy in our shop. We decided to use nuts as weights. Using an 1/8” straight bit, we used the ShopBot to cut a perfect hexagon. Even using a digital caliper on one of the commercially made spinners, it took a few tries (probably 15) to get spacing and openings perfect. Also, the weights have to be evenly spaced or the fidget will spin with a wobble. The first material we used was some reclaimed oak we took off an old shed next to the school. This made it feel like a woodworking project. We planed it down to the thickness of the bearing and cut it to fit the jig we made on our spoil board. This was our first lesson on the importance of using tabs, being that fidget spinners are pretty small. Tabs keep the material attached when making a profile cut and keep the batman shaped spinners from becoming flying batman throwing stars! We used a bandsaw to finish cutting the tabs and then sanded the edges smooth. We chose to use a Danish oil to bring out the oak grain.The downside to using wood is you have to maintain a certain thickness of material to keep the wood from splitting. Also, it is a harder balance of getting the bearing and nuts to be tight but not so tight that the wood splits.
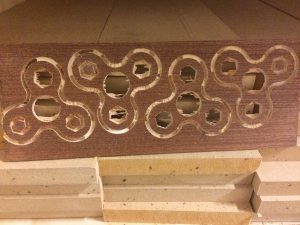
The next material we used was some scrap sign board. This material was able to be cut without much material being left. The downside to using this was it would bend easily, the edges would cut you if you didn’t sand them smooth, and it lacked overall weight. The last material we used was plywood. Again this lacked weight and was harder than the oak to sand smoothly. However, it kept its structural integrity better than the oak on thinner material margins.
It only took one class period to teach the kids how to set up their project file and locate a few of the design icons. Most of the them chose to find an image from the internet and bitmap it into their own spinner design. We have 5 desktop computers set up in the back of my classroom. With 20 students we rotate through in groups to give each student a chance to design. I had about 2 students in each class that could brace the material, tool path the designs, and run the files on the ShopBot. That just left me having to zero out the Z-axis and do the initial bit change since we used the same bit for the pocket cuts and profile cuts.
Overall, this proved to be a good project for students. We got to work on design and problem solving. Our semester ran out before we were able to cut out most of the designs, but it served as a good reminder that what we produce in shop isn’t as important as the process and people involved.
Leave a Reply