What an incredible time to be a fabricator! We have digital tools with incredible accuracy and precision and can make just about anything we can imagine. In reality though, we rarely need that much precision… we’re not making artificial heart valves! But if we had a need to fabricate something with ultra precision out of plywood, could we?
Let me start by saying I’m one of plywood’s biggest fans and have done some projects that used 600+ sheets. It’s easy to find, and relatively inexpensive compared to other materials. It is strong for its weight and is available in a multitude of styles and species. It’s available in big sheets and can span large distances, but can be flexible if needed. It can be easily glued, and when fastened face-to-face it holds fasteners well. It can be left plain or covered with paint, clear coatings, veneers, Formica, solid wood, and lots of other finish options.
So what’s the problem?
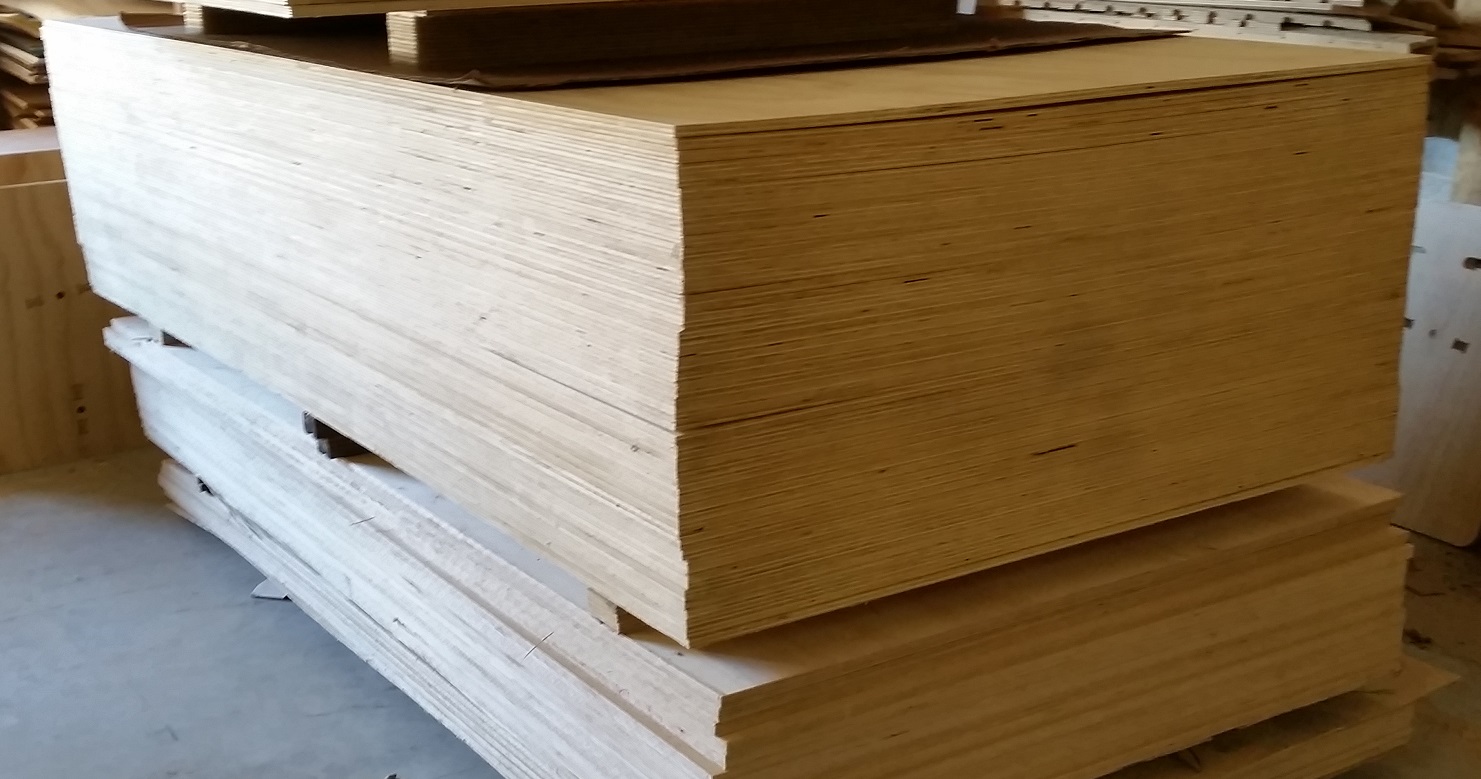
In many ways plywood is perfect for CNC fabrication, but unfortunately it also can be an incredibly frustrating material to work with. Plywood is almost never as thick as it claims to be and like 2×4’s that are never really 2″ x 4″, 1/2″ plywood is rarely actually a 1/2″ thick. It’s almost always thinner than it’s supposed to be, but not consistently thinner. A sheet of 1/2″ Pine plywood is almost never the same thickness as a sheet of 1/2″ Baltic Birch. And a sheet of 1/2″ Baltic Birch from one mill may not be the same thickness as a sheet from a different mill.
So how can you deal with this issue? You might think all that’s needed is an accurate measuring tool… you just measure a sample sheet of plywood, and design your chair or slot-together doghouse so that it fits perfectly for that thickness of plywood. And maybe you’ll cut one and it fits together perfectly. You’re a genius!
However, you might not be as much of a genius as you thought! Maybe you made your project during the cold winter and now it’s summer—and now the parts have swollen and are too tight to go together. Or you made a second one on the same day and that one is too loose? What gives?
Wood in general is a “living” material and can change dimensions based on temperature, humidity, and manufacturing techniques. Plywood from a particular mill may vary between batches, and even the sheets within a bundle of plywood can vary from the top to the bottom and from day-to-day because of environmental changes. It can even vary within an individual sheet, a sheet in the middle of a stack will generally gain and lose moisture in the edges but not on the faces. For projects where pieces need to fit together accurately for aesthetics and/or strength this can be a problem.
Should we give up on plywood? Not at all… we just need to learn some techniques for working with it:
What can a Fabber do?
1) Redraw the parts
We’re using tools that can accurately cut what the drawing says to cut, so the first instinct is to just keep redrawing the files and resizing the features to accurately reflect the material you’re cutting. This might be the best method in a lot of ways because you have an accurate drawing that really reflects the material you’re cutting, but it’s a ton of work and has to be done multiple times to hit the sweet spot for material with a wide variation in thicknesses. It also requires saving lots of versions of your files and keeping track of which one is which—not easy to do. If you’re not the designer the changes you’ve made can have unintended consequences, so be careful before making too many changes
2) Modify the existing drawings without redrawing the parts
You can also apply an offset to the drawing without redrawing the parts, essentially moving the edges in or out a fixed amount based on the fit you’re looking for. You can also sometimes scale the design to make everything fit. Remember that scaling is proportional, and if you were to scale things by 3% to make a slot fit just right it might be the perfect change for the slot, but features that were twice the size would show twice the change. Parts that were 24″ would grow by almost 3/4″ which might not matter in some designs, but in others, like chairs, it’s a big deal. Scaling certainly has its place and can work well in lots of cases, but it does require a lot of thought to be sure that you’re only scaling the things that help and not the things that hurt.
3) Make changes during toolpathing
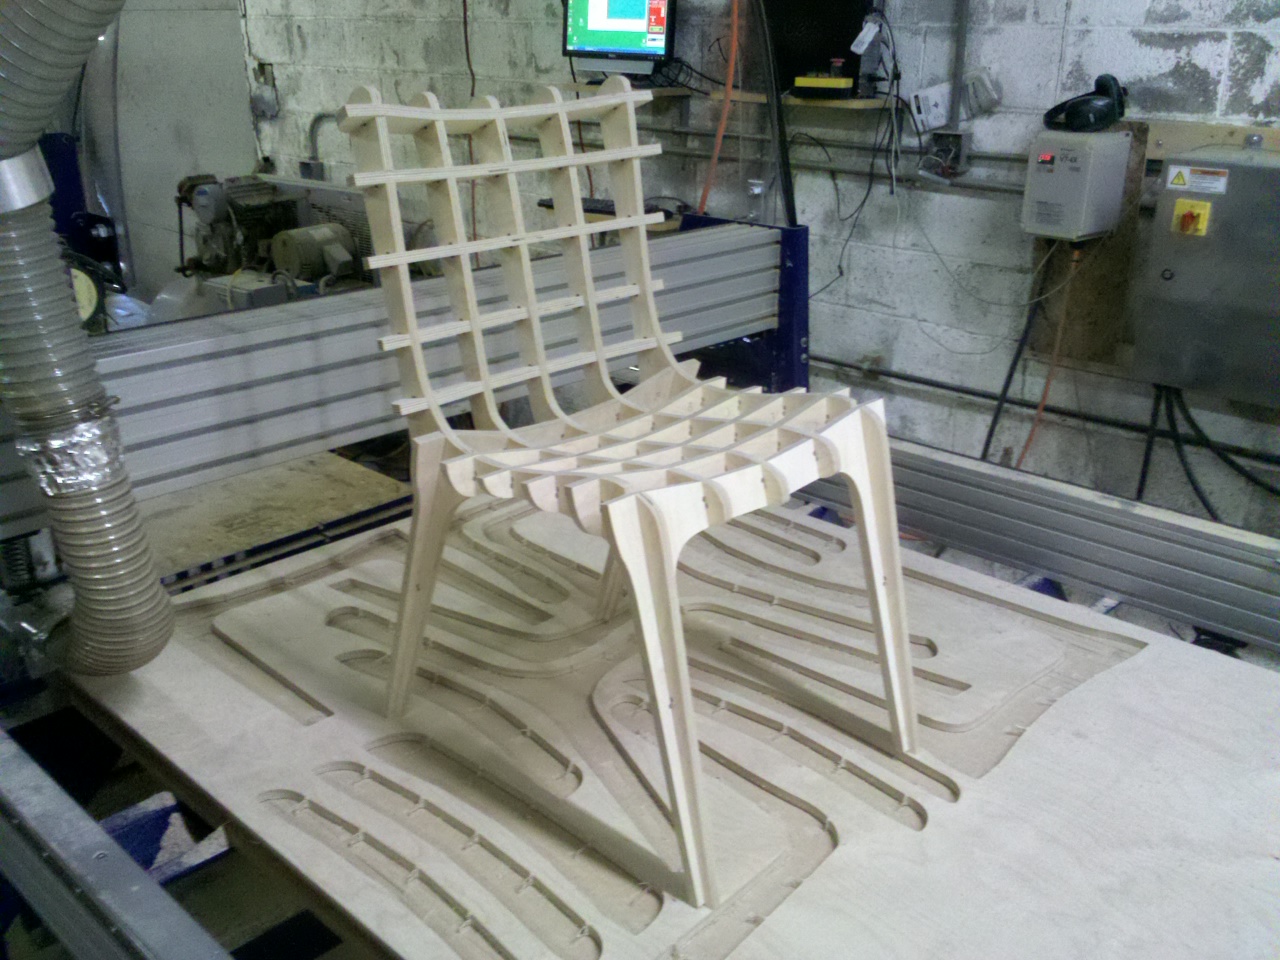
We were asked to fabricate some very cool Antler Chairs for SketchChair’s Kickstarter campaign, that were cut from nominally 1/2″ Baltic Birch plywood. Since they slotted together without any fasteners and would be shipped un-assembled and flat-packed, the fit had to be just right or they would either be wobbly when assembled or too tight to put together. We took delivery of the plywood (25 sheets) and started measuring the thickness of the sheets with a set of calipers. And guess what? They varied form .458″ to .487″ within this one batch! If we created the files for the average thickness then only a couple of sheets would fit right, the rest would be too loose or too tight.
Instead of modifying the original drawing by applying offsets, we used a technique called toolpath allowances, a version of temporary offsetting that doesn’t change the drawing, it just affects the toolpath instructions. It works well for slotted designs, quickly making slots tighter or looser with small adjustments because all the changes are small. We got the chairs cut and they turned out great, but it required accurately measuring every sheet and then using that thickness measurement to pick the right file from 5 toolpath files that we had created. That’s a lot of trouble to go to just to make 25+ chairs.
Be aware that when using toolpath allowances there are some weird geometry changes that happen. The dimensions of some features like slots and mortises are changed by twice the allowance value, and others (like tenon lengths) not at all. But when thought through and applied selectively, it can work quite well and leave your original drawing unmodified.
4) Cut and sand to size
You can also cut all your files based on the thinnest sheet and then sand the thicker ones. In many cases the variation between sheets will be more than the thickness of the outside veneer layers, so you will sand through the face before you get the fit right which will look pretty bad! In some situations it works great though, especially if the variation is small, the outside veneers in the plywood are thick, and you are careful with a sander. It works especially well for times that you want a feature like a tenon to be flush with a surface—a little careful sanding can give a really nice finish. In more cases than not you can’t count on sanding for fit, and the chance of disaster with this method is pretty big.
5) Cut for a fit tight and pound it together
One great feature of wood is that up to a point it compresses if you apply enough force. This means you can cut things to fit the thinnest sheets and then when you cut it out of a thicker sheet just pound it together with a blunt instrument! It’s not a particularly elegant solution, but will work more times than you would expect, makes good tight fits, and give you a great workout!
6) Machine the mating surfaces
Instead of modifying the size of entities in the design or toolpath to get a good fit, you can add features to the drawing that let you use the tool to machine just the faces of any sections that fit together so that they are a consistent and predictable thickness. This works best when you zero the bit to the table surface rather than the material top, then the cut depth is based on a known point and not the top face of an inconsistent material. It can give really consistent and accurate fits, but can take a lot of time to cut.
What can Designers do?
1) Design for modification from the start
All of the above mentioned techniques work in the right situations, but the best way to deal with the problem is to use software that lets you modify the design on the fly based on the material you’ll actually be using. This requires a marriage of design thinking and programming skills, and a pretty good knowledge of toolpathing and how changes in one part will affect others. If done right, it can go a long way toward making designs easily modifiable.
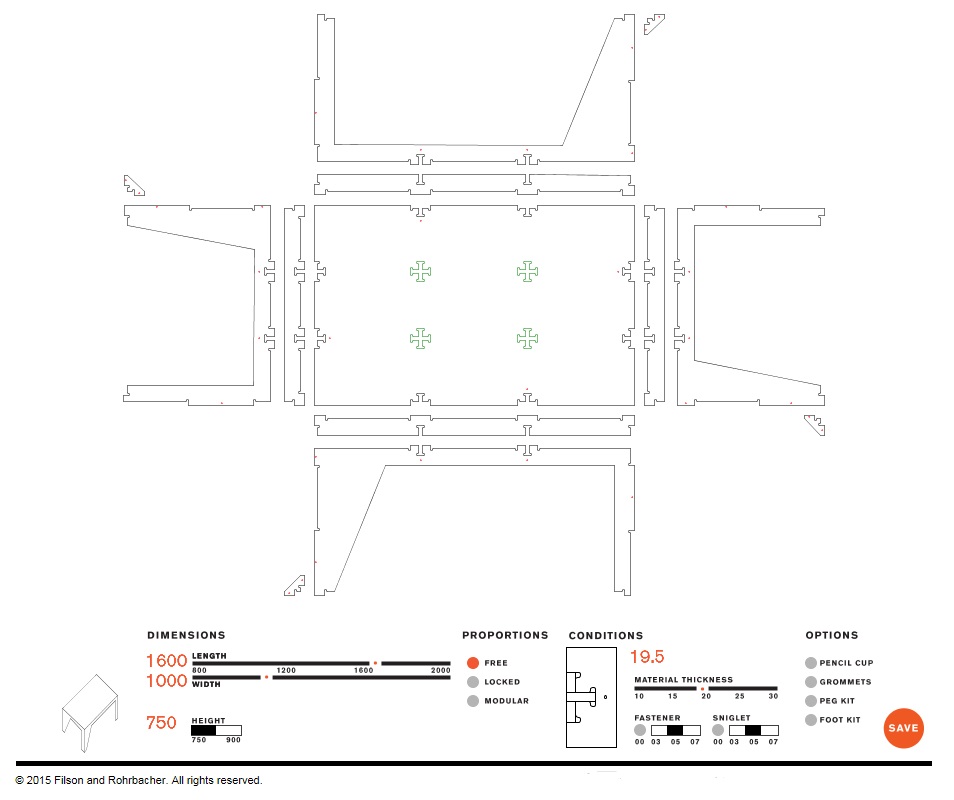
There are web-based apps that enable this kind of customization like the one shown above from our friends at AtFAB. Affordable parametric design software like Autodesk’s Fusion 360 allows you to define features with variables, instead of a measurement, so that a change to one instance changes every instance. Sketchup’s Dynamic Components allows you to add customizable features to your models. All these techniques require more work upfront to create the drawing and a strong understanding of the sometimes complicated relationship between features, but in the long run it makes it much easier to make changes based on accurate material measurements.
2) Explore different joinery techniques
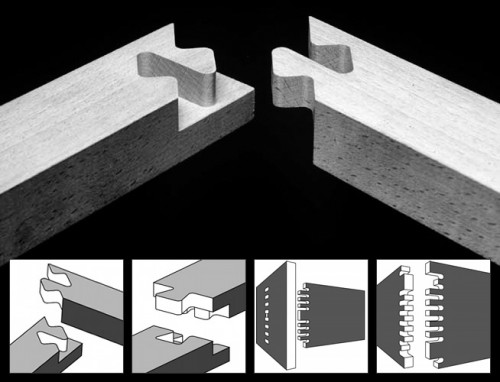
There are lots of connection techniques that are strong because of their design. Traditional Japanese joinery immediately comes to mind, along with joints modified specifically for CNC cutting like the fascinating 50 Digital Wood Joints. Other techniques include dovetails, mechanically fastening with wedges, 3d-printed connectors, zipties, or good old glue.
The opposite of “make the fit tight and pound it together” is to make the fit loose on purpose and then use hardware to tighten it all up and make everything sturdy. There are all kinds of specialty fittings and knock-down hardware systems, but the simplest are screws and bolts. Screws can work fine, but have limited holding power in the edge of plywood, tending to split the layers instead of digging into them. They also require pilot holes to pull the pieces together. If not, they can leave a dimple that holds the parts slightly apart. They also get looser and looser as they are removed and replaced, which makes them problematic for pieces that have to be disassembled and re-assembled periodically.
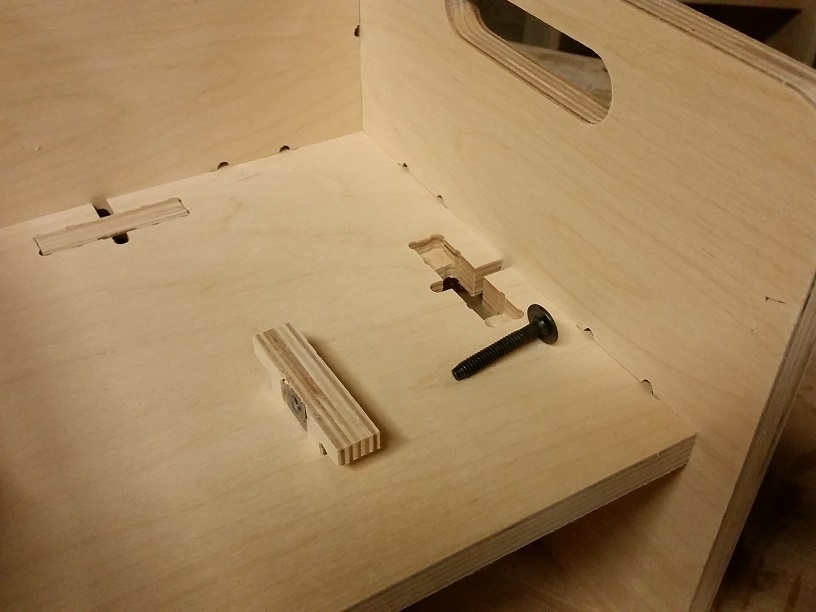
Bolts are my preference. If two pieces are connected face-to-face so that you can get to both sides, traditional bolts and nuts can be used to make strong connections. Sometimes you can’t easily access the other side of a connection or you are connecting the face of one part to the edge of another. In those cases, you can use one of many kinds of threaded inserts to replace a nut. Some are meant to be screwed in, some driven in with a hammer, and some are inserted into a machined slot. Philosophically some of these techniques are a little worrisome when we’re using an incredibly accurate tool, but anything that solves the problem is okay in my book!
3) Design to minimize flush fits and joints
There’s an old woodworker’s trick that’s called a “reveal” that can be both visually interesting and helpful. It involves purposely avoiding flush fits and making parts longer or shorter than they normally would be to create a shadow. When it’s part of the design, it can be both interesting and helpful.
If a reveal doesn’t work for you, go the opposite way and add an overhang. Make the seat of a chair overhang the sides, or a table top overhang the legs, or the tenons extend all the way through the mortice, maybe with a decorative edge
4) Build strength into the design
When getting ready for MakeLocal in New York I learned a trick from the designer of the Valovi stool. It looked like it used regular slotted construction, but when I examined the parts a little better I discovered that the crosspiece that connected the bottom had its slots a little bit further apart than the ones at the top. That way, when it was assembled, the bottom slat built a little tension into the piece and helped stiffen it up quite a bit.
My intention is not to discourage you from using plywood. Even with its shortcomings it’s an amazing material and my material of choice for most projects. Just be aware that your CNC tool is just one part of the digital fabrication equation and that sometimes problems arise that require creative solutions.
Leave a Reply