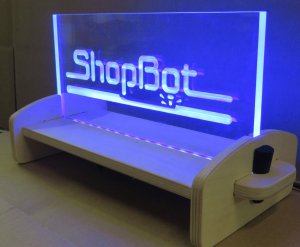
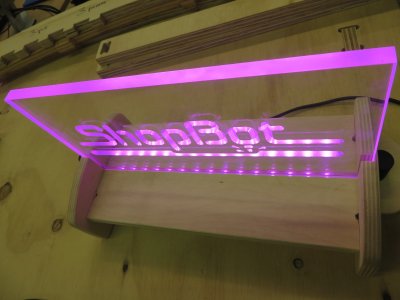
Bill Young brought in this sign, made from acrylic that has been V-Carved, plywood that has been pocketed and cut out, and a peg that was 3D printed. At the bottom of the sign is a strip of LEDs, their changing colors programmed with an Arduino. While it is a simple enough project, it contains a wealth of lesson plans.
To get the Design in to the Computer for machining or “Printing”, one would start with Computer-Aided-Design (CAD) software.
Computer-Aided-Design (CAD) software is available in all ranges of complexity, from 2D graphic software like Inkscape, Adobe Illustrator or Corel Draw, to engineering software to create parts, assemblies and render 3D images on the screen such as SketchUp, 123D, SolidWorks or Inventor. The cost of the software also ranges from free to not so very free.
You use CAD to determine:
- What you want to create
- Principles of Design
- Scaling
- Where you want to place it to machine it
- Common Core links to X, Y and Z axes, graphing, plotting
- Much of Prototyping and Design Thinking takes place at this point in the Design Process
Once you have the Design, you use Computer-Aided Machining or Milling (CAM) software to get it ready for “printing”
Computer-Aided-Machining (CAM) is where you give the computer instructions on how you want to “print” the Design. With CNC subtractive machines like ShopBot, you include instructions on how you want the parts cut out or engraved, what kind of router bit you are using, and what speed (feed rate) you want to the router to move through the material. Instructions to other digital fabrication tools may be less obvious in applications like Desktop publishing (are you printing in black and white or color? are you printing on regular or photo paper?) or laser cutting (what feed rate and power setting do you want to use for that material?), but you are still making decisions on how you want you want to “print” the design.
- How do you want to “Print” with a CNC machine like ShopBot
- Engraving with V Bit
- Profiling to Cut out parts
- Pocketing
- Bit selection: Size and material
- Feeds and Speeds
- Cross platform “printing” (same Design File sent to laser, CNC, vinyl cutter, 3D printer as applicable)
- Click here to link to a comparison of digital fabrication equipment, including additive (3D Printing) vs subtractive (CNC machining)
ShopBot ships with their tools a CAD/CAM software called VCarve Pro, ShopBot Edition, created by Vectric. You can visit the website and download a trial version of their many wonderful CAD/CAM softwares. Tutorials are also available on the website. The image below shows a sample of the Design and Machining Options available with VCarve Pro, and a simulation of the result.

You can use any number of softwares to Design and Create toolpaths for ShopBot and other digital fabrication tools.
While we are looking at the ShopBot Logo, let’s think about Intellectual Property
The ShopBot Logo is a registered trademark. Do we have permission to use it?
- Intellectual Property:
- Protected and Patented Property
- Open Source
- Copyright creation and permission to use
- Internet safety
- Branding/Marketing
The LED strip is at the bottom of the sign
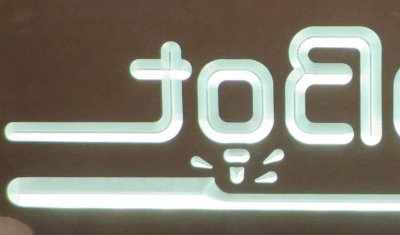
- Optics:
- Why is the light not visible as it travels through the acrylic yet shows up at the ends and carved locations?
- Lighting source:
- LEDS vs other forms of lighting
What about electricity and electronics components
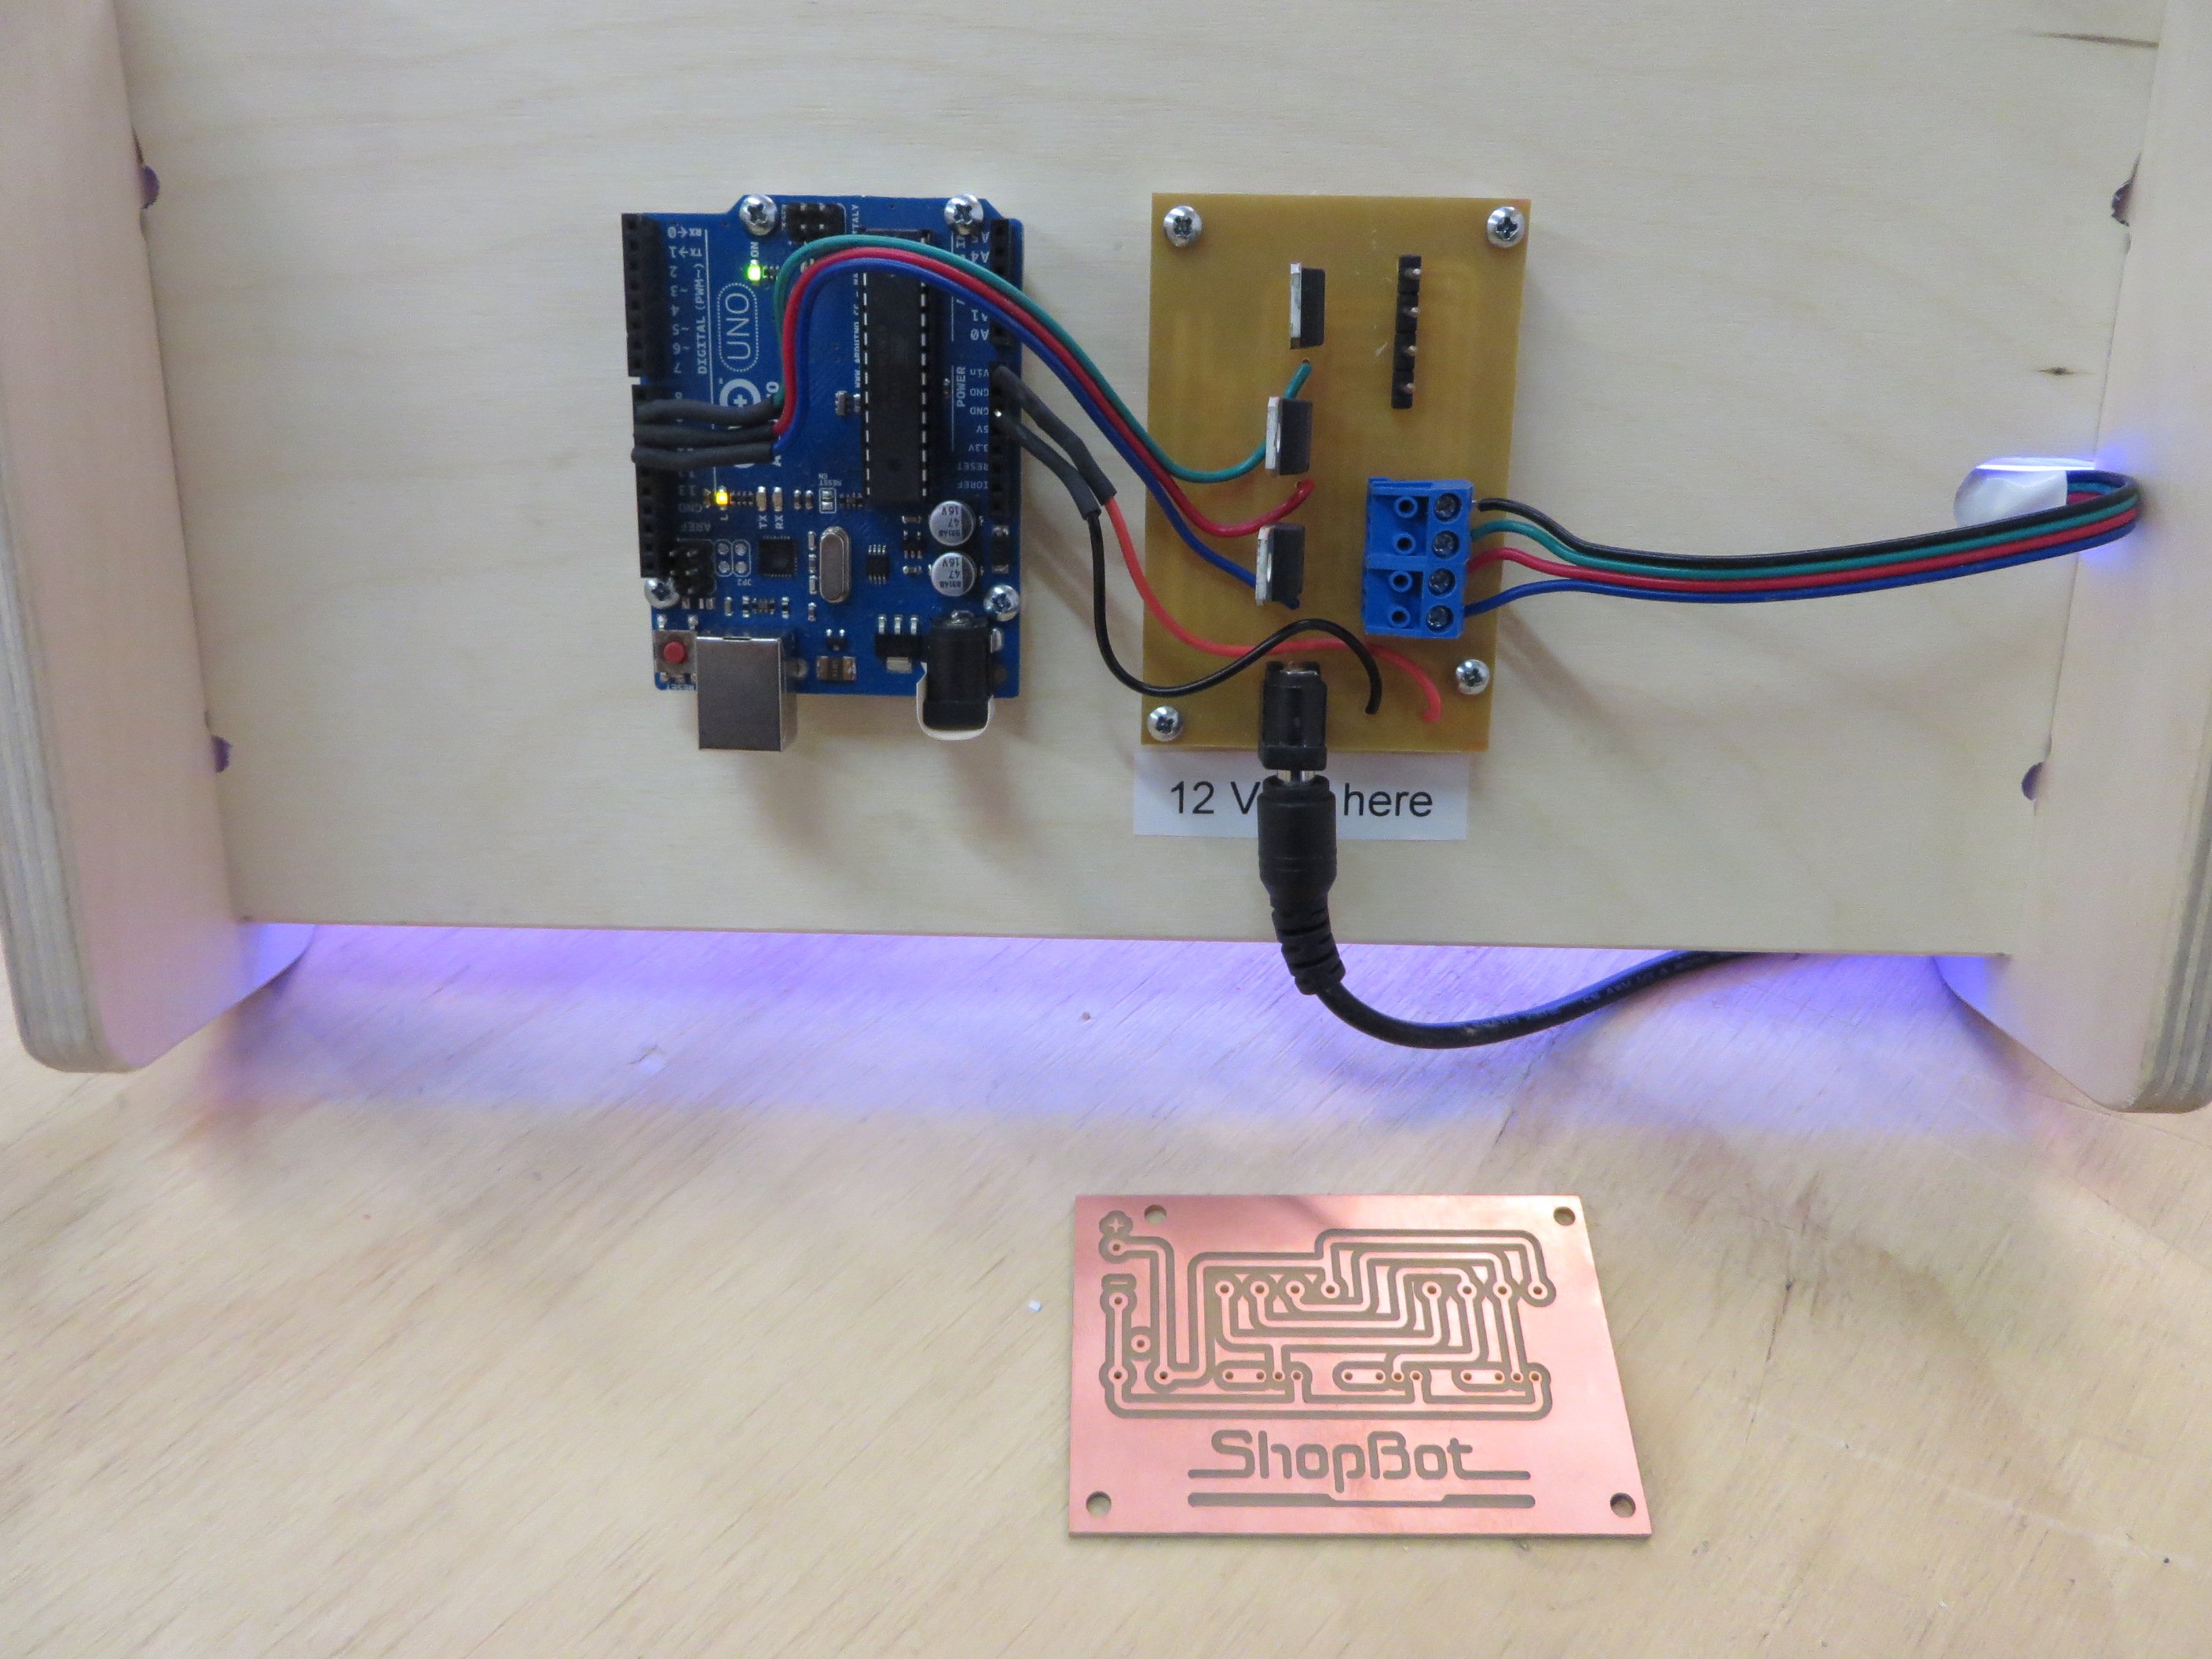
- Electricity:
- simple circuits to power the light strip, one color only
- Electronics:
- Circuit boards
- Arduino programmable boards to control display (color, flashing)
- “Shield” for the Arduino was milled with a ShopBot Desktop
Let’s talk about the Materials used for the project
Materials Science
- Wood: grain
- Plywood vs solid wood
- Acrylic: extruded vs cast
- Circuit boards: milled vs etched
- 3D Printing: Thermoplastics
Time Management and Literacy
Project Planning:
- Setting and meeting deadlines
Literacy/Documentation
- Reading Technical Documents
- Writing Technical Documents
Real World Applications
Business and Entrepreneurship
- Quality Control:
 Confession: The Acrylic was carved from the front, so the roughness of the cut is visible. If you turn the sign around and view it so that the V-Carving is on the back side, the lettering is much cleaner and clearer.
- Running a test cut in a test piece of acrylic or prototyping the sign would reduce the need to re-do the sign to deliver a product that meets the quality that a customer expects.


- Cost analysis:
- Time: Design, Setup, Production
- Materials
- Economies of scale: Producing 1 vs 10 vs 100
- Market analysis
- Who is customer (Are there restaurants/stores who would like a sign like this? Would signmakers be interested in your capabilities?)
- Who are competitors (Anyone else in the community making something like this?)
- How can school address needs of local community/business?
- Case Study
- Who are the companies providing the services/products?
- ShopBot
- Arduino
- Adafruit
Post-Secondary Plans
- Career and Technical Education
- STEM Careers
- Art
- Architecture/Environmental Design
- Industrial Design
Leave a Reply