I was taught that most tools, when first taken out of the box, have only been started by the manufacturer; it’s up to the user to fine tune the instrument to enhance its qualities and the quality of its performance. My teacher was talking about hand planes but the concept is the same with more sophisticated tools like the ShopBot. I don’t know of many ShopBot owners who have not added to, changed, or hot-rodded their ShopBot in some way after more than a few months of ownership. In addition, with repeated use parts wear out and need replacement, and as production needs increase and change there may be different requirements put on the machine, which may drive the need for a change..
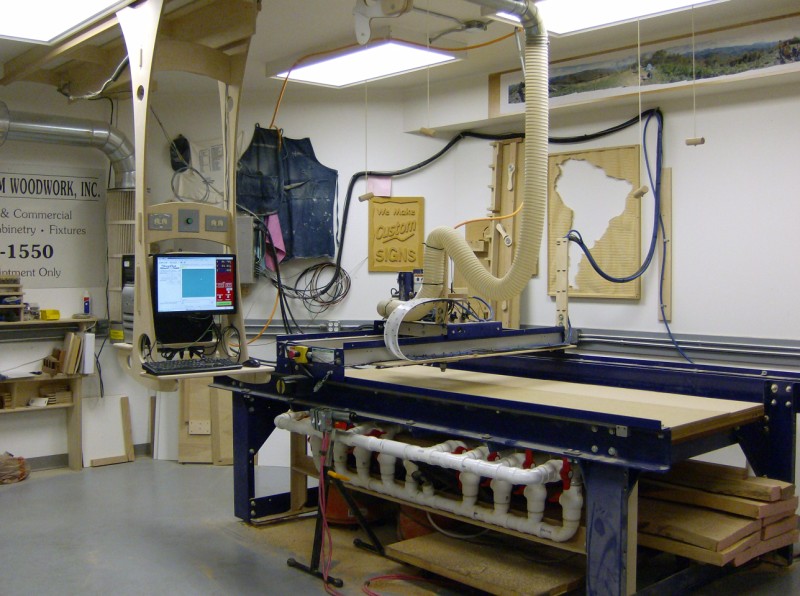
The overall setup.
So here are some of the ‘enhancements’ I’ve come up with for my current machine over the 6 years I’ve now owned it. The first major upgrade was the vacuum table which I have covered previously and which is still working hard every week. Soon after that I added an air drill, one of the earliest models ShopBot offered. Unlike the current PRS model air drills, which ride piggy-back on the spindle, the PRT drill is a stand-alone unit mounted to the Y carriage with a heavy steel bracket, which proved somewhat unwieldy and hard to keep in adjustment. I replaced ShopBot’s steel mounting system with a Baltic Birch plywood chassis (remember, I’m a woodworker) made to snugly fit the Y carriage that allows me to easily raise the drill unit up out of the way when working on thicker material with the main Z axis. The drill has proven itself indispensable for processing closet and cabinet parts; outfitted with a 5mm brad-point boring bit it has probably drilled about a quarter-million holes by now.
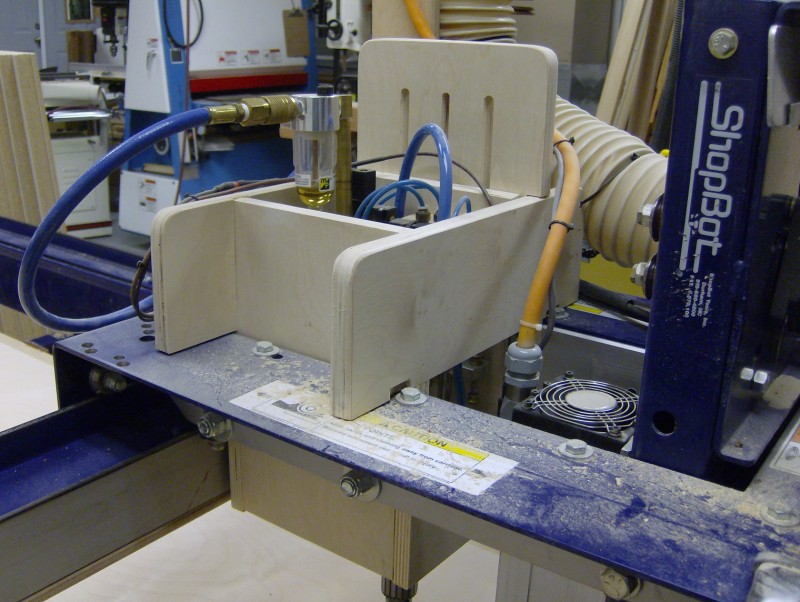
The Air Drill lives in a plywood housing and can be raised up out of the way when not in use.
As our volume of sheet materials increased, the Porter-Cable routers on which I had relied for years turned into a bottleneck, requiring frequent maintenance as the bearings would last only a few months, and limiting the cutting speeds we could achieve. Although I could only afford the cost and electrical requirements of the smallest spindle available, (the HSD 2.2hp), it has been one of the most significant improvements I’ve made to the machine. Cutting speeds and quality improved noticeably, the “waterline” that I used to get on the edges of hardwoods when making multiple passes with the Porter-Cable router all but disappeared, and the increased speed range without loss of torque allows greater flexibility for cutting strategies and leads to longer tool life, especially in difficult to cut material. Nothing lasts forever though, and after 4 years of hard use, the spindle started showing signs of being at the end of life, and was replaced a few months ago with an identical model.

The new geared motor with the larger 25 tooth pinion is on the right.
At about the same time as the spindle upgrade I replaced the X and Y motors with 7.2-1 geared motors, which along with their larger pinion gears provide increased torque and resolution. Paired with the new spindle, I finally felt that I had a machine that was capable of cutting sheets of melamine all day long, at a reasonable speed (5-6 inches per second) without worrying about the machine bogging down, or having to make compromises on cutting quality.
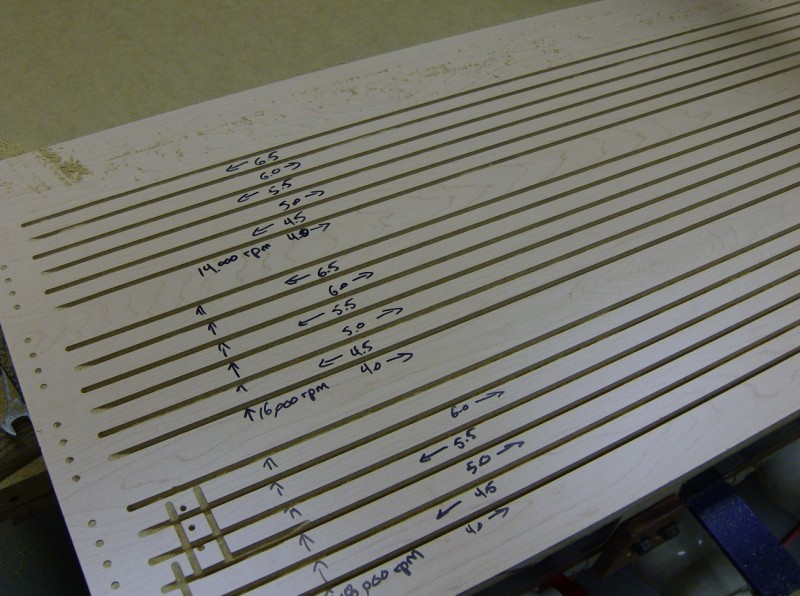
Testing combinations of spindle speeds and feed speeds with the new spindle and motors installed.
One basic task that many overlook is filing the rails smooth and clean. The rails were ground straight at the factory and they seem pretty smooth until you look really closely (try a magnifying glass). Realize that every little bump and imperfection will be picked up by the rollers and transferred to the workpiece. You can CAREFULLY, while maintaining the original angle, draw a file along the length of the rail to smooth out those tiny bumps and polish the roller bearing surfaces. Once it’s done the first time you should see an improvement in cut quality, after that it becomes more of a maintenance issue to be performed any time a rail gets nicked or damaged, or if you notice a build up of resin or pitting or rust. Adding felt wiping blocks should minimize the need for rail maintenance – something that’s on my list for the not-to-distant future. If you have the newer hardened rails this probably doesn’t apply.
This rusty rail was ripe for some attention.
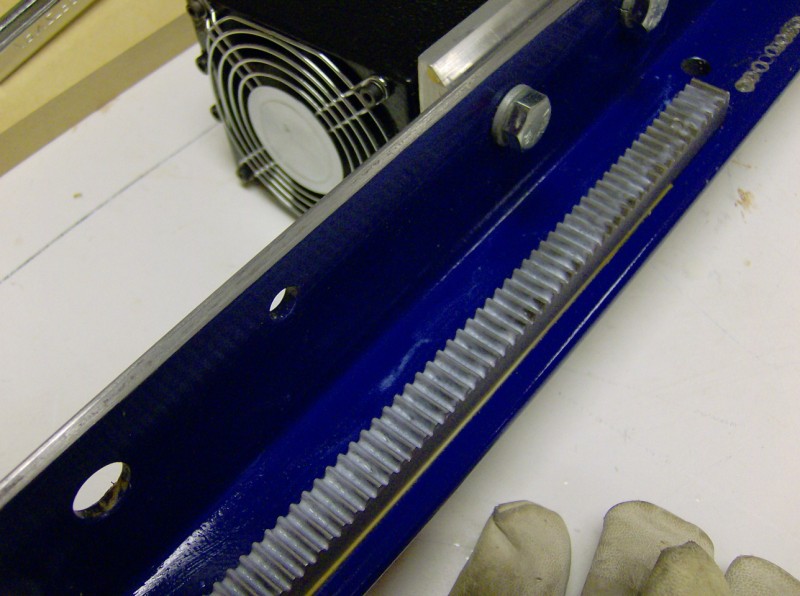
A little TLC and it’s like new if not better.
While re-working the wiring between the ShopBot and the control box for the new motors (my control box is mounted on a nearby wall), I decided it was time to get away from the arched plastic cable carrier that had been one of ShopBot’s signature features since the first few machines were made. Those plastic arches worked OK but had a habit of snapping in the middle after a few thousand flexes, and mine had been cobbled together with duct tape after being replaced once or twice. I figured I would order some of the “e-chain” which now comes standard with the PRS machines, and which at least a few PRT owners have retro-fitted to their machines. Of course, it was a Friday evening when I got started on the wiring, and not wanting to wait until the next week for parts to arrive, I started looking around the shop for something temporary that would work for a week or so. Four years later, my “temporary” solution is now my permanent solution, as it worked so well it never needed to be replaced.
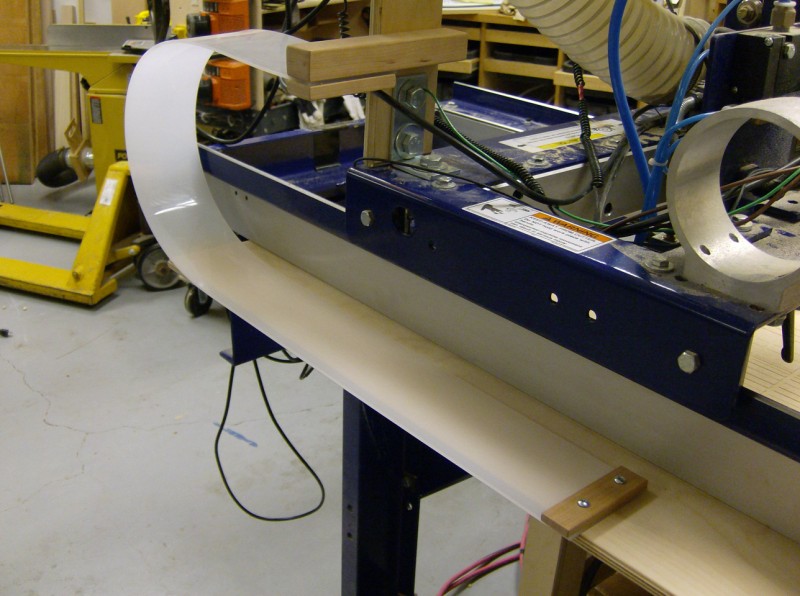
The bones of my home-made e-chain are a strip of polyethylene and a few blocks of wood, mounted to a piece of 1/2″ plywood.
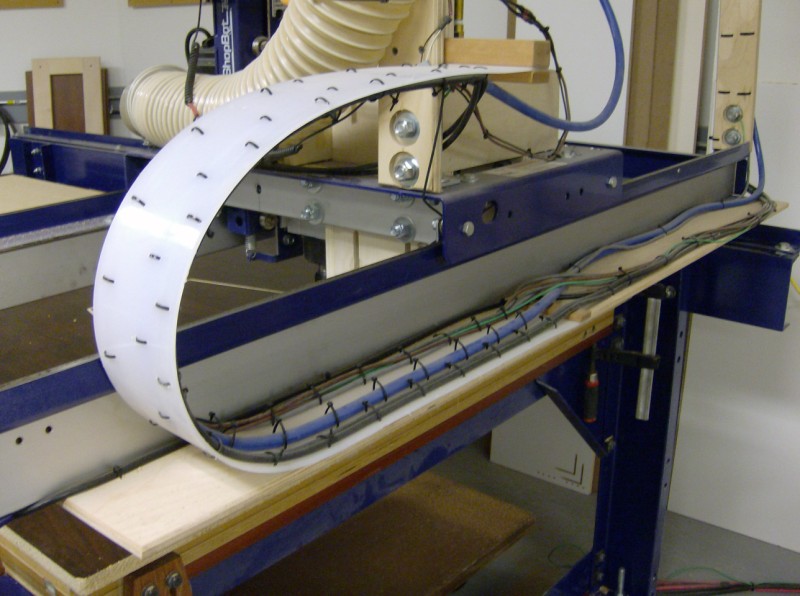
This shop-rigged e-chain equivalent has been working well for several years now. Those are nylon zip-ties holding the wires and air line in place.
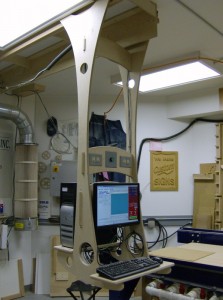
This rolling computer gantry keeps the electronics safe and handy.
Along the way I replaced the recycled tool cart that had been holding up the control computer with a custom-designed gantry which hangs from a ceiling-mounted track, allowing it to be moved out of the way or into working position quickly and easily while keeping wires up off the floor and out of harm’s way. Plus it looks cool and shows off what I can do to visitors and potential clients.
So is the machine “finished”? Not hardly. There are still several more upgrades on my list, some of which I plan to detail here in future columns. The first and biggest is to add a “Retro” PRS-style Z axis as my main Z axis, and replace the aging air drill with the original PRT Z axis, giving me a two-Z axis machine. This will allow more control over drilling depths and speeds, and the ability to use a router bit instead of just a drill bit on the 2nd Z axis will create a de-facto two-tool tool changer. I’m really looking forward to that. I also plan to enlarge the vacuum table slightly to better handle oversized melamine sheets, add pneumatic stops to speed up panel processing, and to replace the PVC plumbing with a plywood manifold and valves to accommodate more powerful vacuum motors. It seems like for every project that gets crossed off the list, one or two more get added (I have a lot of lists like that). So stay tuned…
Leave a Reply