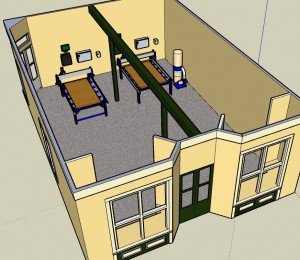
Sketchup model of Bill’s Exmore, VA shop.
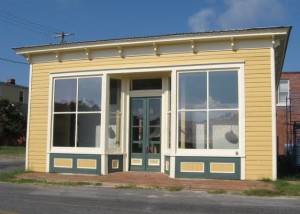
Here’s the street view.
Well, I’m only about a month late getting started on my MAKEcation! I’ve been bogged down by all those small projects at ShopBot that just seemed too important to leave unfinished. Bill Young and I also spent some time on developing resource and marketing plans 100kGarages.com — and I don’t know if that’s work or MAKEcation. It’s certainly fun and exciting to visit the shop in Exmore [View a recent “LinkerLog” cutting project in the shop; Or see MoMA project, below], see all the projects going on, and hear a lot of provocative new ideas (not to mention pumpkin cinnamon rolls at the Yellow Duck Cafe just around the corner). But my MAKEcation actually got underway last week.
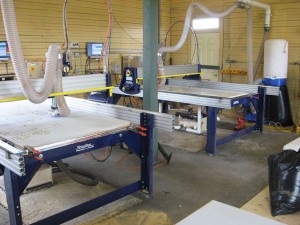
Two PRSalphas at work.
It was a pretty mundane start: Beginning with clearing away the debris from around the pram (the small, unfinished boat I will be working on) in my shed, shopping for epoxy (for both the seascape and boat projects), and shopping for a digitizing pad for doing computer drawing. I’ve mentioned that my wife and I share our shop and (old PRT) ShopBot. Our shop organizational standards are quite a bit different — so without putting it in a way that will get me in too much trouble — I’ve been re-organizing the shop a bit too. This includes putting a new work surface down on the ShopBot. As reported earlier, I’m also planning to do a bit of an update to the tool (just to feel good about it) and install a “Retro-Z” axis”. I’ll report on that shortly …
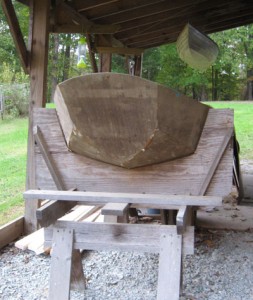
Pram ready for new work after 15 years …
By way of introduction to my boat project (I actually need to cover two concepts at the core of the project, this will be the first), I should say that basically it is a small plywood boat of the construction method known as “stitch-and-glue”. It’s a method that has been popular with amateur and a few professional boat builders. I became fascinated with the technique about 20 years ago because of a nifty feature. The plywood panels for a hull are pre-cut to shape, and as they are pulled together at the seams — actually “stitched” with copper wire or plastic wire-ties — they take on the shape of the boat. It is the geometry of the curved edges that when brought tight force the shape of the panels into its designed form. It’s almost like magic. Very few added framing structures are required, and they are added after the hull is formed — molds or building frames of the traditional sort are not needed (though usually there is a simple building jig to keep the hull in position for work, as in my picture here).
In fact, I got so fascinated by this whole approach to boat building that with a partner, Joe Dominic, I spent a couple of years developing a boat design program that would allow one to fully explore the kinds of shapes that can be developed for hulls using flexed or bent plywood and this amazing ability to form sturdy shapes by bringing curves together. I wrote a magazine article about the whole process that was published in Messing about in Boats in 1995. Here is a link to a copy of the article which does a better job of explaining the whole geometrical concept for those who are interested than I have done here [Designing Plywood Boats]. The article includes a small version of the outlines of the panels for the pram that I am actually making in the shed. You can cut the small panels out, carefully tape them together, and see exactly how she’ll look.
The article is a little dated and was created in reference to our shareware software program called “BTDZN”, short for “Boat Design” — it was the DOS era, and one needed short file names. The sort of design work that is described is known as “developable surfaces”. One reason I bring it up is that I believe that the method offers a potential for furniture making as well as boat building because it creates a way to work with interesting curved shapes that are also stiff and light. My understanding is that this type of developable surface design with sheet materials for stitch-and-glue can be done in current versions of Rhino, though I haven’t had a chance to actually try it out.
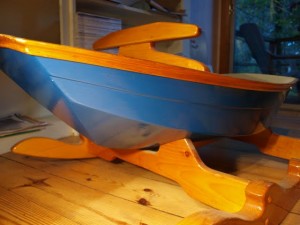
View of rocker-pram.
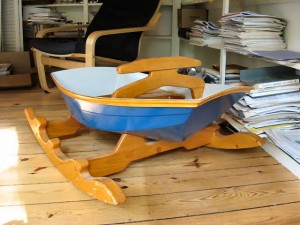
Kids rocker, built as pram.
To test out my early pram pattern, I scaled it to about 3/8ths and used the resulting hull for a rocker for my kids.
And speaking of kids and boats, many years ago Bill Young contributed to ShopBotters the Part Files for a small toy row boat, cut from 3mm door-skins plywood and assembled with the stitch and glue method [Toy Boat]. This is a mini version of a full size “Weekend Dinghy” designed by Karl Stambaugh and available in full size kit form from Seaside Small Craft.
Finally, you’ll notice we are experimenting here with a new format (of the blog type) for publishing ShopBot’s Web Columns. We’ve always thought that our web columns are more archival and educational than the typical blog and so have not called them blogs (I think we started before blogs was a word), but we are thinking this format will make it a bit easier for both readers and authors and also allow for a little interactive commentary. Your thoughts are appreciated.
Leave a Reply