ShopBot makes amazing tools, and while they aren’t really magic, they can seem that way. A ShopBot is a 10,000 trick pony and in this column we are going to explore techniques and patterns that can make your ShopBot experience more productive, more fun and maybe even magical.
A Design Pattern is a description of a solution to a particular problem. And a collection of design patterns is called a Pattern Language. This column is devoted to defining a ShopBot Pattern Language: a collection of useful design patterns which used together in a composition can help solve problems and reduce complexity in your digital fabrication projects.
While one pattern may stand alone, another may only make sense within the context of a composition of patterns. In either case each pattern defines a good solution to a particular type of problem. With each entry we will describe the problem, why the given design pattern is a good solution, and present a real world example of the pattern in use.
So let’s get started building out our vocabulary and seeing the components in use …
1. The Puzzle Joint
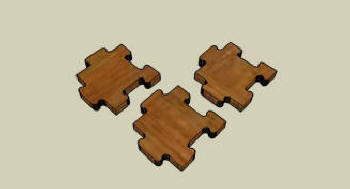
Sometimes a design presents itself in which flat parts cannot easily be cut as a single part. Either the part is too large to cut from the material available, exceeds your ShopBot capacity, or maybe would simply be too wasteful to cut as a single object. Puzzle joints provide a fast and easy way to accurately attach flat parts together to create larger parts.
Turning MDF back into Trees: A Puzzle Joint Example
I was presented with a design problem which involved producing over 52 linear feet of a 5 foot tall articulating and branching tree shapes for an indoor garden of a local restaurant.
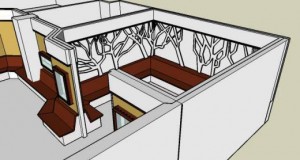
The design, provided by the architect, resembled an artistic, silhouette tree-scape. The contractor I was working with was conscientious about material waste and so I suggested that we break the trees into parts which could then be assembled onsite like a giant jigsaw puzzle. This would increase our yield from 30% to 80% – a significant improvement.
It took me just under three hours using Sketchup to break the design down into manageable parts and to align and scale the puzzle joint geometry to the parts. In the end there were 127 parts. Every part had a number and of course I provided the key for assembly. We joked with the contractor about just dropping off a giant pile of parts and letting him figure it out – somehow he didn’t see the humor.
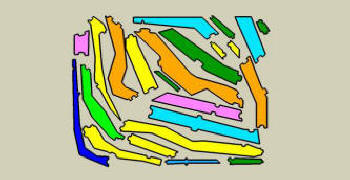
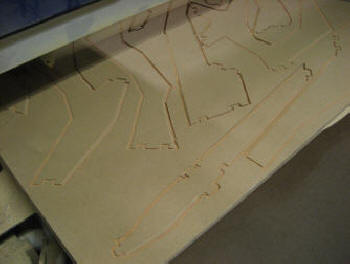
Unfortunately the special 1/2″ fire-proof MDF was only available in 4’x10′ sheets so I precut each into 4’x5′ sections for nesting. In the end only 3 sheets were required. Here’s an example of one of the nesting patterns. This was done by hand and while somewhat tedious it didn’t really take very long.

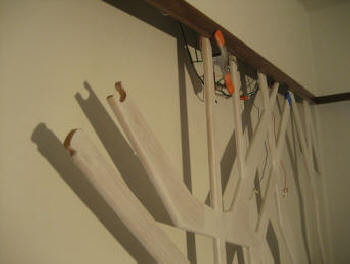
I stopped by the jobsite to take some pictures and make sure everything was coming together well. The contractor has been apprehensive that this approach would be difficult and time consuming for him. And while he probably wasn’t so happy about all the edge sanding the assembly portion of the job came together quickly and easily.
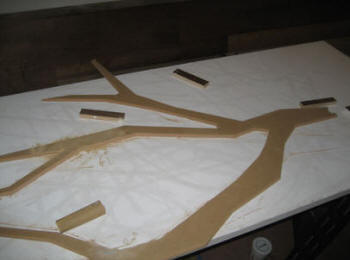

Here’s a picture of the first sub-assembly being test fit. One of the three puzzle keys has been taped to the wall for reference.
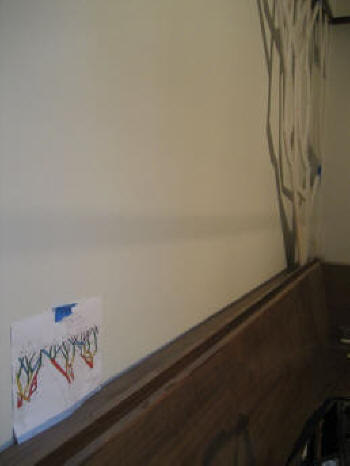
And at last the trees were done. These were taken minutes before the opening night party. They were a huge success!

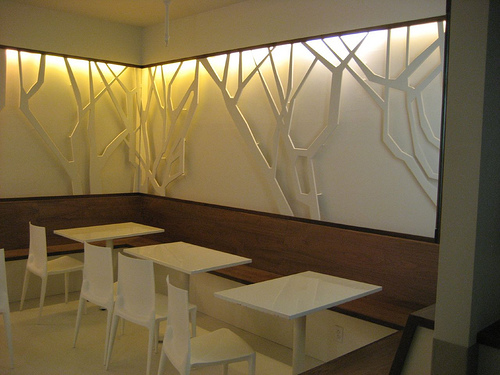
And there’s the magic – turning MDF back into Trees!
How to construct a Puzzle Joint
Breaking a part down into smaller parts which interlock via puzzle joints is fast and easy. Here’s how I use Google Sketchup (a free version can be downloaded from their website) to create a puzzle joint design. Any decent CAD software should be able to perform equivalent operations.
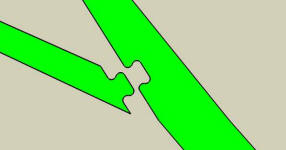
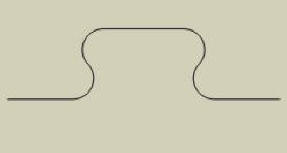
First I’ve designed and saved a model of a generic puzzle joint. There are many possible variations on this form. This just happens to be one I generally start with. You can download a zipped dxf file of this joint here.
Then, starting with the model I want to break up into smaller parts I import my puzzle joint geometry. In Sketchup, when one model is imported into another, the imported geometry is encapsulated into its own component. This is handy since for the moment we want to move, rotate and scale the puzzle joint without interfering with our base model geometry.
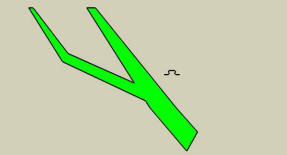
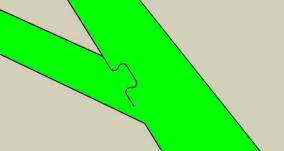
Move the puzzle joint so that one endpoint is coincident with a point on the model where you want the joint to begin.
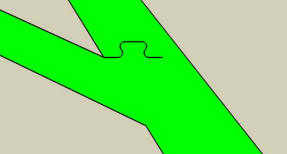
Rotate the puzzle joint about that first point such that the other end is in alignment with the opposite point you wish the joint to span.
Scale the joint along its axis to bridge the two points. When scaling always have care that the curves of the joint never become too small for your intended cutting tool to properly machine.
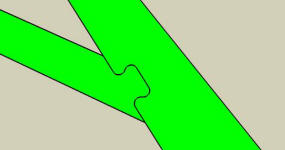
Explode the puzzle joint component thereby merging its geometry with the rest of the part. Separate the two parts from one another. These parts are now ready for nesting and toolpathing.