A plenum is little more than a few slots cut into a piece of material, but there are some options to consider when designing one for the first time. Start out your design with a size that is very close to your finish zone size so that any resizing is minimal before cutting. The general opinion is that round grooves flow better than square. I used 3/8” dia. slots cut 5/16” deep to allow the use of round gasket material for zone masking. This gasket has been seldom used and I would use a ½” groove if I were to do it again. The gasket would be more useful if I was using special purpose pallets for cutting small parts on a regular basis. If you use your machine in this manner, it is a very good option for you.
Try to get the squares between the grooves near 1 inch. This will give you a zone with no area more than ½” from vacuum flow. You may want to add angled grooves radiating outwards from your vacuum port out towards the corners for better flow.
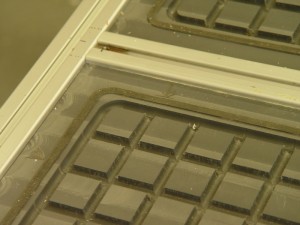
Corner Details
You may also want to make a couple passes at different depths to ease the transition into your vacuum port.
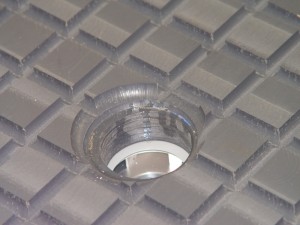
Vacuum Port
Try to keep the outer groove an inch or less from the edge of the material. If you are cutting a perimeter gasket groove, cut it between the outer groove and the edge of the zone. You may want to radius the corners of the outermost groove. Once you have the design correctly sized, use the block copy function to place one plenum section in each of your zones.

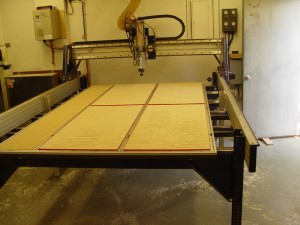
Completed Table
T-Track & Plenum Assembly…
I used 1 ½” wide t track so I cut a dozen blocks of plywood 1 3/8” wide for plenum assembly spacers. I used this width so that I could machine all the edges of the plenum zones true at the same time I cut in a shallow recess for the t track. The blank plenum sections are cut ¼” oversize in both directions from the zone design size. The 1/8” undersize spacers allow each section to overhang the track location by 1/8”.
* Sand sections and table thoroughly and glue to table using spacers
* Set a sheet of plywood over all 4 quadrants and add something for weight.
* When glue has cured, Install a surfacing bit and lightly surface the top of the plenum quadrants.
* I now used a cut file I created that matched the layout for the t track and machined it .060 deep into the table board. This levels the t track and cuts the edges of the plenum quadrants.
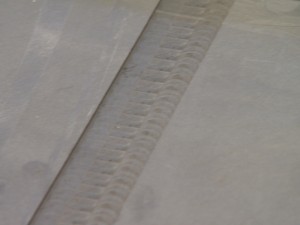
Track Milling
* If you want your t track flush with the top of the plenum, adjust cut depth accordingly.
* Check that the size of the quadrants matches your plenum design size, if not, adjust them at this time.
* Using your plenum file, cut the plenum and gasket grooves.
* Double check the locations of the vacuum entry holes and cut them. Make sure that no table cross supports will be hit.
* With all the machining done on the plenum, it is time to install the t track. I used stainless flat head bolts with locking nuts, 10-12” on center.
* Cut 4 spoil board pieces to fit in between the track and set is place.
* Hook up the vacuum and TRY IT OUT!
Spoilboards
More on Removable Bleeder Boards:
Using a loose fitting bleeder/spoil board has both advantages and disadvantages and is not going to be the best solution for all users. The biggest advantage is the ability to have replaceable Spoilboards in any zone. Along with the economics of partial sheet replacement, you also have the ability to install custom made fixtures to hold parts you may cut repetitively. These fixtures, or pallets, can be used to “drop” a load onto the machine for cutting, and when that cut is complete, “drop” another pallet full of parts on to repeat. These pallets are usually sealed and allow vacuum to pass only under the part, between gaskets that are inside the cutting area. We have found that is convenient to do most of our cutting in the home or 0,0 position. With the price of Trupan what it is, it is nice to be able to replace our most used area, ¼ sheet at a time.
The biggest downside of having loose fitting Spoilboards is the tendency of the material to curl up at the edges, especially as we surface them thinner. This seems to happen with changes in humidity. Our recent switch to ¾” from ½” has helped a lot. We also turn them upside down when not in use. We are going to test spot gluing them down with silicone in the near future. This curling is more of an inconvenience than a problem as we have not noted any variation when the vacuum is on. So far, we have found that for us, the benefits outweigh the disadvantages.
Hopefully, if you had questions about building a vacuum table, this article has given you some information that helped your decision making process. If you were thinking about changing or upgrading an existing table, it is my wish to have given you a few things to think about. The cost of the PVC sheet and heavy duty T Track may exceed the budget for some. However, it is a very stable platform that should give better long term performance than any of the wood based products more commonly used in table construction.
Next time: Adding vacuum replacement motors directly to the table.