We create all kinds of signs here at the Lincoln Sign Company, and with some of these signs, we actually don’t even need our ShopBot to do them! But here is the amazing thing, we still use it as a tool just like anything else in the shop, and the ShopBot seems to get used a little bit with everything we do, that’s how good it is. Even with a job that had nothing to do with carving, we still use our ShopBot. Amazing!
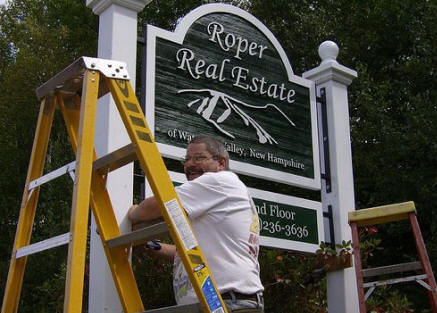
We were contacted by Chip Roper of Roper Real Estate of Waterville Valley, NH back in June about making a sign for his new location, and we installed that sign Thursday, August 24th, right on schedule.
The above picture shows the board that we are using for the project after it has been cut to size and it has been trimmed on the table saw. How does one make a sign blank? Glad you asked. Basically we take a number of boards, and glue them end-to-end to make a large piece of wood that will become our sign.
When we sandblast, our wood if choice is vertical-grain, Western Red Cedar. We actually have it shipped in from Washington State, as I have not been able to find any nice Western Red Cedar (that I have been happy with) at this end of the country. Why Western Red Cedar? Resistant to insects, rot, and repels water to some degree. It is also a very light wood (doesn’t weigh all that much) and it likes being carved (as opposed to oak, which does not!).
After the wood has been cut and trimmed, we use a tool call a “biscuit cutter” to cut slots in the boards. When we glue the boards together, we will stick a wooden wedge called a “biscuit” into the slot which will help us get the boards lined up properly.
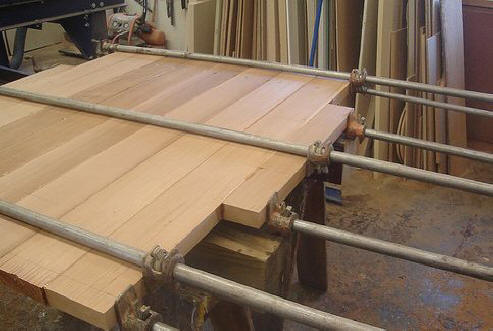
After spreading glue on the edges of the boards, we put the blank together and then pull it together using pipe-clamps. Here is Chip’s blank after all the clamps have been placed, and it will sit overnight and be ready to blast in the morning.
Now, here is where we used the ShopBot, and we used it for two things:
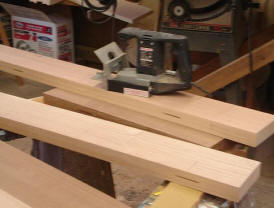
#1: We actually use our ShopBot as a vertical planer. After we take the clamps off a glue up, we lay it on the table, put a 0.5” bit into it, and then it pass over every square inch of the sign to plane off everything nice and flat. Then we flip it over and do it again! What we end up with is a picture perfect blank surface
#2: Naturally, we also use the ShopBot to cut out the shape of the sign-blank. It’s really a no-brainer to do that, and I can’t imagine picking up a jig-saw to do it.
As a matter of fact, I can’t tell you the last time we used the jig-saw in the shop.
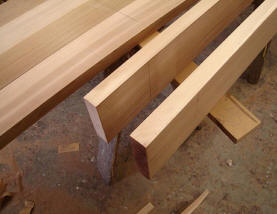
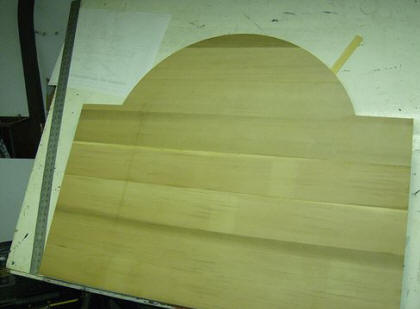
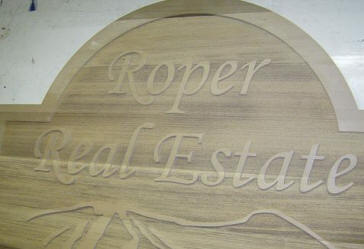
Here are the glued up boards, after they have been sanded, planed, and cut to size and shape.
Here is the sign after the “sandblast mask” has been applied.
What’s sandblast mask? Well, the way you make a sandblasted sign, is you take an air-compressor (a BIG one), hook it up to a special metal chamber called a “hopper” that is filled with a fine, abrasive material (we use coal-slag). The hopper fills with pressurized air, and then you open the other end which is connected to a hose and a ceramic nozzle (like a fire-hose, kinda)
That allows you to direct the coal-slag firing out the end of the hose. Now, when you shoot this at wood, it wears the wood away. The letters, border and mountain on this sign have been covered with sandblast stencil (which is made out of rubber). The rubber bounces the coal-slag away, preserving the wood underneath. That is how you get the “raised lettering look, of a sandblasted sign”.
Here is the sign in the sandblast shed ready for a good blastin’!
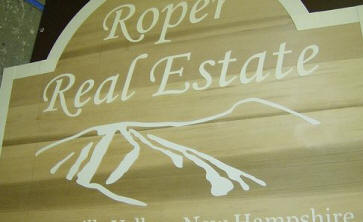
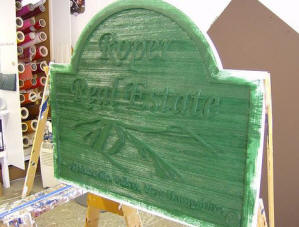
Here is the Roper sign after it has been sandblasted
When we pull the sandblast mask off, you can see that the letters and graphics have been untouched by the coal slag, and appear as if they have been “raised” above a rough-textured background.
Pretty slick…
Here is the sign as the background color is being painted. (Our most popular color – Crylite 2-Pumps Black – we all BLEED this color)
Here the border and the lettering been painted.
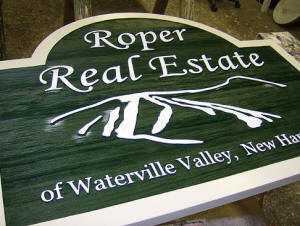
Here you can see what is so unique about a sandblasted sign. Sandblasted signs are very labor-intensive, but they are always worth the effort! They can take a very straight-forward, clean logo, help it gain prestige and attention.
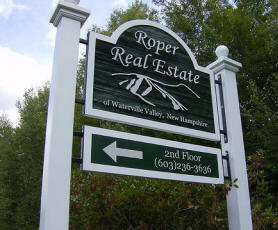
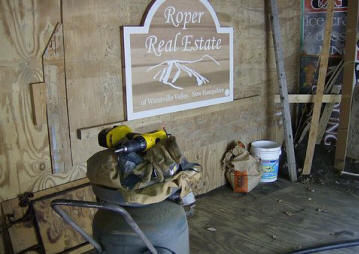
We really don’t consider our job done until a sign is properly installed, and in some cases the install can be the most difficult part of making a sign. Every installation has it own set of challenges, and this installation was more challenging than most.
Initially, when we went out to install this sign, we found that if we had not called Dig Safe (which is an organization that finds power, cable, and telephone lines in locations where you plan to dig – for free) I would be writing this “FROM BEYOND THE GRAVE.”
Yes, the original location would have been going through what was probably the electrical trunk line for all of Waterville Valley, and needless to say it would have stung…. a bit.
So, we needed to go back to the shop, fabricate some different posts, and move the install up the hill. When we were driving out to the location, I joked with Lee that we were digging in the middle of a huge rhododendron bush (which we were), and I could guarantee that we wouldn’t encounter any rocks, but we would find lots of roots. (When digging post holes, roots tend to be annoying but can be easily cut-away during the digging process, but rocks just plain slow you down and are very resistant to the whole “cutting” thing.)
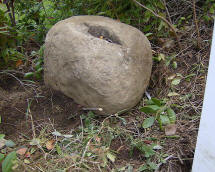
Well, when we actually got to the site, we didn’t find one root, but we found some really amazingly big, heavy, and annoyingly placed rocks. We did, however, eventually get them all out, and everyone was all smiles after that.